

Bottle gardening onions: Sounds a bit unconventional, right? But trust me, it’s a game-changer for anyone who loves fresh onions but doesn’t have a sprawling garden! For centuries, humans have cultivated onions, from the ancient Egyptians who revered them to the humble kitchen gardens of today. But what if I told you that you could grow your own delicious onions, even if you live in a tiny apartment or have limited outdoor space?
That’s where this DIY trick comes in! We’re diving into the world of upcycling and urban gardening to show you how to transform ordinary plastic bottles into mini onion farms. Why is this so important? Well, imagine having a constant supply of fresh scallions or green onions right at your fingertips. No more last-minute grocery store runs or wilted onions in the fridge! Plus, bottle gardening onions is an incredibly sustainable and budget-friendly way to enjoy homegrown produce.
This DIY project is perfect for beginners, experienced gardeners looking for a fun experiment, or anyone who wants to add a touch of green to their living space. So, grab your empty bottles, some soil, and let’s get started on this exciting journey of growing onions in bottles! I’m so excited to share this simple yet effective method with you, and I know you’ll love the results!

DIY Bottle Gardening: Growing Onions in Recycled Plastic
Hey there, fellow gardening enthusiasts! I’m super excited to share one of my favorite DIY projects with you: growing onions in recycled plastic bottles. It’s a fantastic way to reuse those bottles cluttering your recycling bin, save space, and enjoy fresh, homegrown onions right at your fingertips. Trust me, it’s easier than you think, and the satisfaction of harvesting your own onions is incredibly rewarding.
What You’ll Need
Before we dive in, let’s gather our supplies. This is a pretty low-cost project, which is always a win in my book!
* Plastic Bottles: You’ll need plastic bottles, preferably 2-liter soda bottles or similar sizes. The number of bottles depends on how many onions you want to grow. Make sure they’re clean and dry.
* Potting Soil: A good quality potting mix is essential for healthy onion growth. Avoid using garden soil directly, as it can be too dense and may contain pests or diseases.
* Onion Sets or Seedlings: You can use onion sets (small, immature onions) or onion seedlings. Sets are generally easier and faster to grow, but seedlings offer more variety. I usually go with sets for convenience.
* Scissors or Utility Knife: For cutting the plastic bottles. Be careful!
* Drill or Nail: To create drainage holes in the bottom of the bottles.
* Watering Can or Spray Bottle: For watering your onions.
* Gloves (Optional): To keep your hands clean.
* Measuring Cup: To measure the soil.
* Small Trowel or Spoon: To help with planting.
* Optional: Liquid fertilizer for feeding your onions.
Preparing the Bottles
This is where we transform those plastic bottles into mini-gardens.
1. Clean the Bottles: Start by thoroughly cleaning the plastic bottles with soap and water. Remove any labels and residue. Rinse them well and let them dry completely. This is crucial to prevent any mold or bacteria growth that could harm your onions.
2. Cut the Bottles: Now, carefully cut the bottles in half horizontally. You can use scissors or a utility knife. I prefer a utility knife for a cleaner cut, but always exercise caution. You’ll be using the bottom half of the bottle for planting. You can discard the top half or save it for another project, like a mini-greenhouse cover for seedlings.
3. Create Drainage Holes: Drainage is super important to prevent waterlogging and root rot. Use a drill or a nail to create several drainage holes in the bottom of each bottle. I usually make about 5-6 holes, evenly spaced. If you’re using a nail, heat it up slightly with a lighter or stove to make it easier to puncture the plastic. Again, be careful!
Planting the Onions
Now for the fun part – planting our onions!
1. Fill with Potting Soil: Fill each bottle half with potting soil, leaving about an inch of space at the top. Gently tap the bottle to settle the soil and remove any air pockets. Don’t pack the soil too tightly, as this can hinder root growth.
2. Plant the Onion Sets or Seedlings: If you’re using onion sets, make a small hole in the soil with your finger or a trowel. Plant the set with the root end facing down, burying it about an inch deep. If you’re using seedlings, gently separate them and plant them at the same depth they were growing in their original container. Space the onion sets or seedlings about 2-3 inches apart. You can plant several onions in each bottle, depending on the size of the bottle.
3. Water Thoroughly: After planting, water the onions thoroughly until the water drains out of the drainage holes. This helps to settle the soil around the roots and provides essential moisture.
Caring for Your Onions
Proper care is key to a successful onion harvest.
1. Sunlight: Onions need plenty of sunlight, so place your bottle gardens in a sunny location that receives at least 6-8 hours of direct sunlight per day. A south-facing window or a sunny balcony is ideal. If you don’t have enough natural sunlight, you can supplement with grow lights.
2. Watering: Water your onions regularly, keeping the soil consistently moist but not waterlogged. Check the soil moisture by sticking your finger into the soil. If the top inch feels dry, it’s time to water. Avoid overwatering, as this can lead to root rot.
3. Fertilizing (Optional): Onions are heavy feeders, so fertilizing them regularly can boost their growth. You can use a liquid fertilizer diluted to half strength. Apply the fertilizer every 2-3 weeks, following the instructions on the fertilizer label. I like to use a balanced fertilizer with equal amounts of nitrogen, phosphorus, and potassium.
4. Weeding: Keep your bottle gardens free of weeds. Weeds compete with your onions for nutrients and water. Gently remove any weeds that appear, being careful not to disturb the onion roots.
5. Pest Control: Keep an eye out for pests, such as aphids or onion maggots. If you notice any pests, you can try spraying your onions with insecticidal soap or neem oil. You can also handpick the pests off the plants.
Harvesting Your Onions
The moment we’ve all been waiting for!
1. When to Harvest: Onions are typically ready to harvest when the tops start to turn yellow and fall over. This usually takes about 3-4 months from planting.
2. How to Harvest: Gently pull the onions out of the soil. If the soil is dry, you may need to loosen it with a trowel first.
3. Curing the Onions: After harvesting, cure the onions by laying them out in a dry, well-ventilated place for about 1-2 weeks. This allows the outer layers to dry and helps to prevent rot. You can cure them on a screen or a wire rack.
4. Storing the Onions: Once the onions are cured, you can store them in a cool, dry, and dark place. A mesh bag or a well-ventilated container is ideal. Properly cured and stored onions can last for several months.
Troubleshooting
Even with the best care, you might encounter some challenges. Here are a few common issues and how to address them:
* Yellowing Leaves: This could be a sign of overwatering, underwatering, nutrient deficiency, or pest infestation. Check the soil moisture, fertilize if necessary, and inspect for pests.
* Slow Growth: This could be due to insufficient sunlight, poor soil, or lack of nutrients. Make sure your onions are getting enough sunlight, use a good quality potting mix, and fertilize regularly.
* Root Rot: This is caused by overwatering and poor drainage. Make sure your bottles have adequate drainage holes and avoid overwatering. If you suspect root rot, you can try transplanting the onions into fresh soil.
* Pest Infestation: Inspect your onions regularly for pests and take action promptly. Insecticidal soap, neem oil, or handpicking can be effective.
Extra Tips and Tricks
* Succession Planting: Plant new onion sets or seedlings every few weeks to ensure a continuous harvest throughout the growing season.
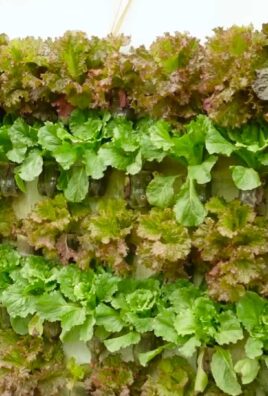
* Companion Planting: Plant onions near other vegetables that benefit from their presence, such as carrots, tomatoes, and lettuce. Onions can help to deter pests that attack these plants.
* Label Your Bottles: Use a permanent marker to label each bottle with the type of onion you’re growing and the date you planted it. This will help you keep track of your progress.
* Get Creative with Decoration: Decorate your bottle gardens with paint, stickers, or other embellishments to add a personal touch. This is a great way to get kids involved in the project.
* Use Different Bottle Sizes: Experiment with different bottle sizes to see which ones work best for you. Smaller bottles are great for growing green onions, while larger bottles are better for bulb onions.
I hope you found this guide helpful! Growing onions in recycled plastic bottles is a fun, rewarding, and sustainable way to enjoy fresh, homegrown produce. So, gather your supplies, get your hands dirty, and start growing your own onions today! Happy gardening!

Conclusion
So, there you have it! Transforming a simple plastic bottle into a thriving onion garden is not just a fun project; it’s a sustainable, space-saving, and incredibly rewarding way to grow your own food. We’ve walked you through the steps, highlighting the ease and accessibility of this DIY trick. But why is this method a must-try?
Firstly, it’s about resourcefulness. In a world increasingly conscious of waste, repurposing plastic bottles into something productive is a small but significant step towards a more sustainable lifestyle. You’re not just throwing away a bottle; you’re giving it a new life, a new purpose, and contributing to a greener planet.
Secondly, it’s about accessibility. Whether you live in a sprawling suburban home or a tiny city apartment, space is often a constraint. Bottle gardening onions eliminates this barrier. You can hang them on a balcony, place them on a windowsill, or even create a vertical garden on a small patio. The possibilities are endless!
Thirdly, it’s about the sheer joy of growing your own food. There’s something incredibly satisfying about nurturing a plant from a small seedling to a mature vegetable. The taste of a freshly grown onion, snipped straight from your bottle garden, is simply unmatched. It’s fresher, more flavorful, and you know exactly where it came from.
But the beauty of this DIY project lies in its adaptability. Feel free to experiment with different types of onions. Shallots, scallions, or even garlic can thrive in a bottle garden. You can also try adding companion plants like herbs (thyme or oregano) to deter pests and enhance the flavor of your onions. Consider using different types of soil mixes to see what works best for your local climate and onion variety. You could even get creative with the bottles themselves – paint them, decorate them, or create a visually stunning vertical garden display.
This isn’t just about growing onions; it’s about fostering a connection with nature, learning new skills, and embracing a more sustainable way of living. It’s about proving that you don’t need acres of land to grow your own food. All you need is a little creativity, a few recycled bottles, and a desire to nurture something beautiful.
We wholeheartedly encourage you to try this DIY trick. It’s easy, affordable, and incredibly rewarding. And most importantly, we want to hear about your experience! Share your photos, your tips, and your stories with us. Let us know what worked for you, what challenges you faced, and what delicious dishes you created with your homegrown onions. Together, we can inspire others to embrace the joy of bottle gardening and create a more sustainable future, one onion at a time. So, grab those bottles, get your hands dirty, and start growing! You’ll be amazed at what you can achieve.
Frequently Asked Questions (FAQ)
What kind of plastic bottles are best for bottle gardening onions?
The ideal plastic bottles are those that are sturdy and can hold a good amount of soil. Two-liter soda bottles or larger water bottles work well. Make sure to thoroughly clean the bottles with soap and water before using them to remove any residue that could harm your plants. Avoid using bottles that have contained harsh chemicals. Clear or translucent bottles are preferable as they allow you to monitor the soil moisture levels.
How often should I water my bottle garden onions?
Watering frequency depends on several factors, including the climate, the type of soil you’re using, and the size of the bottle. Generally, you should water your onions when the top inch of soil feels dry to the touch. Overwatering can lead to root rot, so it’s crucial to ensure proper drainage. Check the drainage holes at the bottom of the bottle to make sure they are not clogged. In hotter climates, you may need to water more frequently, perhaps every day or every other day. In cooler climates, you may only need to water once or twice a week.
What type of soil is best for growing onions in bottles?
A well-draining potting mix is essential for successful onion growth in bottles. Avoid using garden soil, as it can be too heavy and compact, hindering root development. A good mix consists of equal parts potting soil, compost, and perlite or vermiculite. Compost provides essential nutrients, while perlite or vermiculite improves drainage and aeration. You can also add a slow-release fertilizer to the soil mix to provide a steady supply of nutrients to your onions.
How much sunlight do bottle garden onions need?
Onions require at least 6-8 hours of direct sunlight per day to thrive. Place your bottle garden in a sunny location, such as a south-facing window or a balcony that receives ample sunlight. If you don’t have access to enough natural light, you can supplement with grow lights. Rotate the bottles regularly to ensure that all sides of the plants receive equal exposure to sunlight.
How do I prevent pests and diseases in my bottle garden onions?
Prevention is key when it comes to pests and diseases. Start with healthy seedlings or sets and use a clean potting mix. Regularly inspect your plants for signs of pests, such as aphids, spider mites, or onion maggots. If you spot any pests, you can try spraying them with insecticidal soap or neem oil. Ensure good air circulation around the plants to prevent fungal diseases. Avoid overwatering, as this can create a favorable environment for fungal growth. You can also add companion plants like marigolds or basil to deter pests.
Can I grow onions from seed in a bottle garden?
Yes, you can grow onions from seed in a bottle garden, but it requires more patience and time compared to using sets (small, immature onion bulbs). Start the seeds indoors in a seed-starting tray or small pots about 8-10 weeks before the last expected frost. Once the seedlings are large enough to handle, transplant them into your bottle garden. Make sure to thin the seedlings to allow adequate space for each plant to grow.
How do I harvest my bottle garden onions?
You can harvest your onions when the tops start to turn yellow and fall over. This indicates that the bulbs are mature. Gently pull the onions from the soil, being careful not to damage the roots. Allow the onions to dry in a well-ventilated area for a few days before storing them. You can also harvest the green onion tops (scallions) at any time for fresh use. Simply snip off the green tops as needed, leaving the bulb in the soil to continue growing.
What are some variations I can try with bottle gardening onions?
There are many creative variations you can try with bottle gardening onions. You can create a vertical garden by hanging multiple bottles from a wall or fence. You can also paint or decorate the bottles to add a personal touch to your garden. Try growing different varieties of onions, such as red onions, white onions, or shallots. You can also experiment with different soil mixes and fertilizers to see what works best for your growing conditions. Consider adding companion plants like herbs or flowers to your bottle garden to attract pollinators and deter pests.
How do I store my harvested onions?
Proper storage is essential to extend the shelf life of your harvested onions. After drying the onions for a few days, trim the roots and the tops, leaving about an inch of the stem. Store the onions in a cool, dry, and well-ventilated place, such as a pantry or a basement. You can store them in mesh bags or loosely woven baskets. Avoid storing onions in plastic bags, as this can trap moisture and lead to spoilage. Check the onions regularly for any signs of rot or sprouting and remove any damaged onions to prevent them from affecting the others. Properly stored onions can last for several months.

Leave a Comment