

Baking Soda Teeth Whitening DIY: Ready to unlock a brighter, more confident smile without breaking the bank? I’m so excited to share some amazing tips and tricks with you! For centuries, people have sought ways to enhance their pearly whites, and while modern dentistry offers fantastic solutions, sometimes we need a little boost from the comfort of our own homes.
Did you know that baking soda has been used as a cleaning agent for ages? Its mild abrasive properties make it a surprisingly effective, and affordable, way to gently polish away surface stains. But before you rush to the bathroom, it’s crucial to understand the right way to use baking soda teeth whitening DIY methods to avoid any potential harm to your enamel.
In this article, I’ll guide you through safe and effective DIY baking soda teeth whitening techniques. We’ll explore different methods, discuss the pros and cons, and address common concerns. Because let’s face it, who doesn’t want a dazzling smile? Whether you’re prepping for a special occasion or simply want to boost your everyday confidence, these simple hacks can make a noticeable difference. So, let’s dive in and discover the secrets to a brighter, whiter smile using the power of baking soda!
DIY Baking Soda Teeth Whitening: A Brighter Smile on a Budget
Hey there! Are you looking for a way to brighten your smile without breaking the bank? I’ve got just the thing for you: a DIY teeth whitening method using baking soda! It’s a simple, affordable, and surprisingly effective way to remove surface stains and get a noticeably brighter smile. I’ve been using this method on and off for years, and I’m excited to share my tips and tricks with you.
What You’ll Need
Before we dive in, let’s gather our supplies. This is a super simple list, which is one of the things I love about this method!
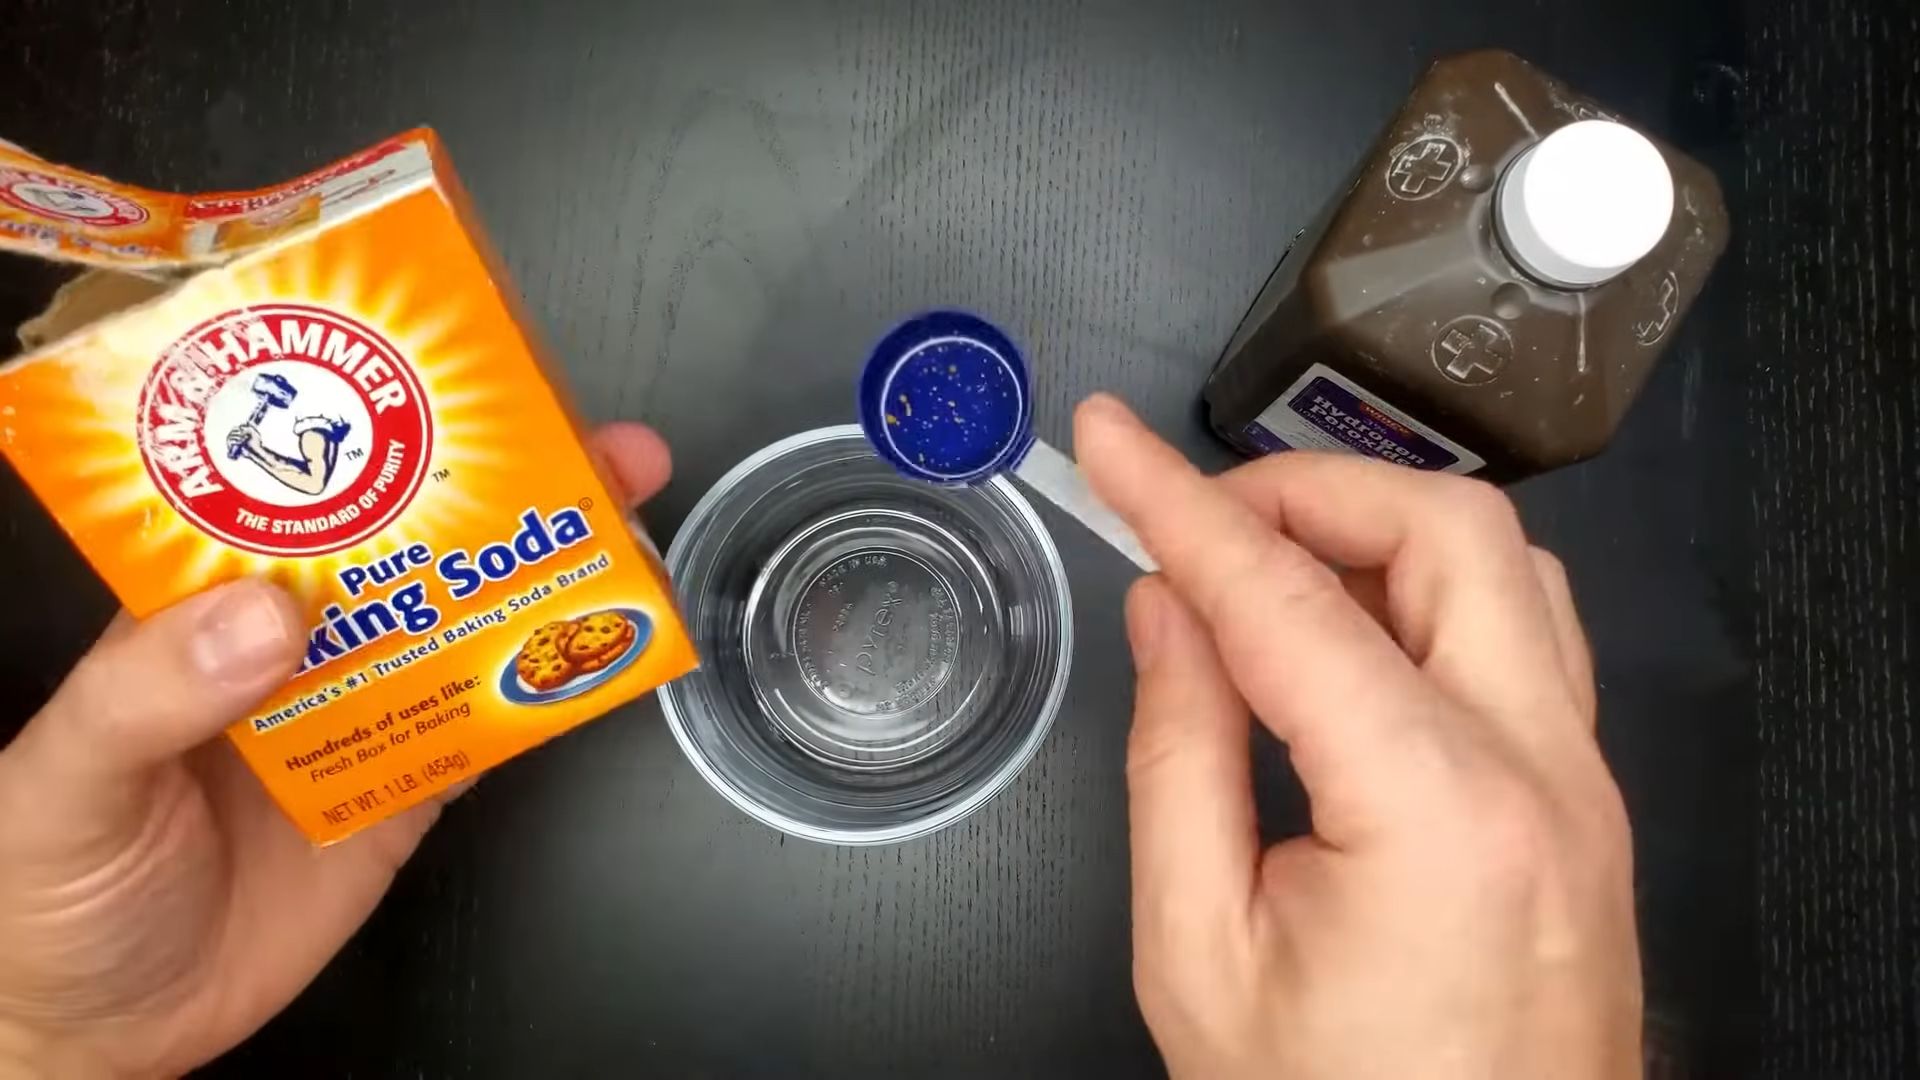
* Baking Soda: The star of the show! Plain old baking soda, readily available at any grocery store.
* Water: Tap water is perfectly fine.
* Toothbrush: Use a soft-bristled toothbrush. You might even want to dedicate one specifically for this purpose.
* Small Bowl or Dish: To mix the baking soda and water.
* Mirror: For obvious reasons! You’ll want to see what you’re doing.
* Optional:
* Hydrogen Peroxide: For an extra boost (use with caution!).
* Essential Oil (Peppermint or Spearmint): To improve the taste (optional, and only a drop or two!).
* Toothpaste: For brushing after the baking soda treatment.
Understanding the Science (A Little Bit!)
Baking soda, also known as sodium bicarbonate, is a mild abrasive. This means it gently scrubs away surface stains from your teeth, like those caused by coffee, tea, red wine, and smoking. It also helps neutralize acids in your mouth, which can contribute to tooth decay. While it’s effective for surface stains, it won’t change the actual color of your teeth like professional whitening treatments. Think of it as a really good scrub, not a bleach.
Important Considerations Before You Start
* Enamel Sensitivity: If you have sensitive teeth, proceed with caution! Baking soda can be abrasive, and overuse can potentially wear down enamel. Start with less frequent applications and monitor how your teeth feel.
* Gum Health: If you have gum disease or any open sores in your mouth, it’s best to consult with your dentist before trying this method.
* Fillings and Dental Work: Baking soda is generally safe for fillings and other dental work, but if you’re concerned, check with your dentist.
* Frequency: Don’t overdo it! I recommend using this method no more than once or twice a week. Overuse can damage your enamel.
* Listen to Your Body (or Your Teeth!): If you experience any pain or sensitivity, stop immediately.
Step-by-Step Instructions: The Baking Soda Paste Method
This is the most common and straightforward way to use baking soda for teeth whitening.
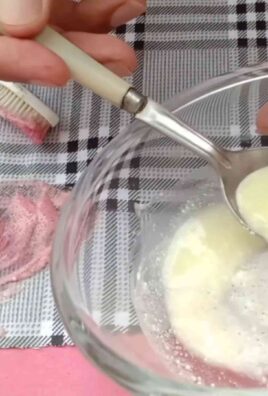
1. Prepare Your Paste: In your small bowl or dish, mix about 1 teaspoon of baking soda with just enough water to form a paste. You want it to be thick enough to stick to your toothbrush but not too runny. I usually start with a few drops of water and add more gradually until I get the right consistency.
2. Apply the Paste: Dip your toothbrush into the baking soda paste, making sure to coat the bristles evenly.
3. Brush Gently: Brush your teeth gently with the baking soda paste for about 2 minutes. Focus on areas with the most staining. Remember, gentle is key! You don’t want to scrub too hard and damage your enamel. Use small, circular motions.
4. Rinse Thoroughly: Rinse your mouth thoroughly with water to remove all traces of baking soda. Make sure you get all the nooks and crannies!
5. Brush with Regular Toothpaste (Optional): After rinsing, you can brush your teeth with your regular toothpaste to remove any remaining baking soda taste and freshen your breath. This is totally optional, but I usually do it.
6. Admire Your Smile! Take a look in the mirror and admire your slightly brighter smile! Remember, results are gradual, so don’t expect a dramatic transformation after just one use.
Alternative Methods: Mixing it Up!
While the paste method is the most common, here are a couple of variations you can try:
Baking Soda and Hydrogen Peroxide
Hydrogen peroxide is another whitening agent, so combining it with baking soda can give you an extra boost. However, it’s important to use this method with caution, as hydrogen peroxide can be irritating to your gums.
1. Prepare the Mixture: Mix 1 teaspoon of baking soda with just enough 3% hydrogen peroxide to form a paste. Use the same consistency as the water and baking soda paste.
2. Apply and Brush: Follow steps 2-6 from the baking soda paste method above.
3. Important Note: Do not swallow the hydrogen peroxide mixture. Rinse thoroughly. Use this method sparingly, no more than once a week.
Baking Soda as a Toothpaste Booster
This is a gentler way to incorporate baking soda into your routine.
1. Apply Toothpaste: Put your regular toothpaste on your toothbrush.
2. Dip in Baking Soda: Dip your toothpaste-covered toothbrush into a small amount of baking soda.
3. Brush: Brush your teeth as usual.
4. Rinse: Rinse your mouth thoroughly.
Tips and Tricks for Best Results
* Be Consistent: For best results, use this method regularly (but not too often!). I find that using it once or twice a week helps maintain a brighter smile.
* Avoid Swallowing: Baking soda isn’t harmful if swallowed in small amounts, but it’s best to avoid it.
* Store Baking Soda Properly: Keep your baking soda in an airtight container to prevent it from absorbing moisture and odors.
* Don’t Expect Miracles: Baking soda whitening is effective for removing surface stains, but it won’t dramatically change the color of your teeth. If you’re looking for a more significant whitening effect, you might want to consider professional whitening treatments.
* Listen to Your Dentist: Always follow your dentist’s recommendations for oral hygiene. This DIY method is a supplement to, not a replacement for, regular brushing, flossing, and dental checkups.
* Add a Drop of Essential Oil (Optional): If you find the taste of baking soda unpleasant, you can add a drop or two of peppermint or spearmint essential oil to the paste. Make sure the essential oil is food-grade and safe for oral use.
* Make a Bigger Batch (If You Want): If you plan on using this method regularly, you can make a larger batch of the baking soda paste and store it in an airtight container. Just make sure to use it within a few days.
* Take Pictures: Before and after pictures can be a great way to track your progress and see how well the baking soda whitening is working for you.
Troubleshooting and Common Questions
* “My teeth feel sensitive after using baking soda.” Reduce the frequency of use or stop altogether. You might also want to try using a toothpaste specifically designed for sensitive teeth.
* “I don’t see any results.” Be patient! It can take several weeks of regular use to see noticeable results. Also, make sure you’re using the method correctly and brushing gently but thoroughly.
* “The baking soda paste tastes awful!” Try adding a drop of essential oil to improve the taste. You can also brush with your regular toothpaste afterward to remove any remaining baking soda taste.
* “Can I use baking soda every day?” No, I don’t recommend using baking soda every day. Overuse can damage your enamel. Stick to once or twice a week.
* “Is baking soda safe for my fillings?” Baking soda is generally safe for fillings, but if you’re concerned, check with your dentist.
Final Thoughts
I hope this guide has been helpful! Remember, DIY teeth whitening with baking soda is a simple and affordable way to brighten your smile, but it’s important to use it safely and responsibly. Listen to your teeth, don’t overdo it, and always consult with your dentist if you have any concerns. Happy whitening!
Conclusion
So, there you have it! This simple, yet effective, baking soda teeth whitening DIY trick is a game-changer for anyone seeking a brighter smile without breaking the bank or resorting to harsh chemicals. We’ve explored the science behind why it works, the safe and effective method for application, and addressed common concerns to ensure you feel confident and informed.
Why is this a must-try? Because it’s accessible, affordable, and offers noticeable results with consistent, careful use. Think about it: you likely already have baking soda in your pantry. No need for expensive whitening strips or professional treatments right away. This DIY method allows you to take control of your teeth whitening journey from the comfort of your own home.
But remember, consistency and moderation are key. Overdoing it can lead to enamel erosion, so stick to the recommended frequency and always listen to your body. If you experience any sensitivity, reduce the frequency or discontinue use altogether.
Looking for variations? Consider adding a drop of peppermint essential oil to your baking soda paste for a refreshing flavor and breath-freshening boost. You could also experiment with mixing the baking soda with a small amount of hydrogen peroxide (3% solution) for an extra whitening kick, but use this variation sparingly and with extreme caution, as hydrogen peroxide can irritate gums if used improperly. Another option is to combine baking soda with mashed strawberries. Strawberries contain malic acid, which can help to naturally remove surface stains. However, be sure to rinse thoroughly after using strawberries, as their natural sugars can contribute to tooth decay if left on the teeth.
Ultimately, the best way to determine if this baking soda teeth whitening DIY method is right for you is to try it yourself. Start slowly, observe your teeth and gums carefully, and adjust your approach as needed.
We are incredibly excited for you to embark on this journey to a brighter, more confident smile. Don’t be shy! We encourage you to try this simple DIY trick and share your experience with us in the comments below. Let us know what works best for you, any variations you’ve tried, and the results you’ve achieved. Your feedback will not only help us improve this guide but also inspire others to discover the power of natural teeth whitening. Share your before-and-after photos, your tips and tricks, and any questions you still have. We’re here to support you every step of the way. Let’s unlock brighter smiles together!
Frequently Asked Questions (FAQ)
Is baking soda really safe for my teeth?
Yes, when used correctly and in moderation, baking soda is generally considered safe for teeth whitening. Baking soda is a mild abrasive, which means it can gently scrub away surface stains and debris from your teeth. However, it’s crucial to avoid overusing it, as excessive abrasion can potentially erode tooth enamel over time. Enamel is the protective outer layer of your teeth, and once it’s gone, it’s gone for good. Therefore, stick to the recommended frequency of use (no more than a few times per week) and use a soft-bristled toothbrush to minimize abrasion. If you have sensitive teeth or gums, consult with your dentist before using baking soda for teeth whitening. They can assess your oral health and provide personalized recommendations.
How often should I use baking soda to whiten my teeth?
The recommended frequency for using baking soda to whiten your teeth is no more than two to three times per week. Using it more often than that can increase the risk of enamel erosion and tooth sensitivity. Remember, consistency is key, but moderation is essential. It’s better to whiten gradually and safely than to aggressively whiten and damage your teeth in the process. Pay attention to how your teeth and gums feel after each use. If you experience any sensitivity, reduce the frequency or discontinue use altogether.
Can I use baking soda if I have sensitive teeth?
If you have sensitive teeth, you should exercise caution when using baking soda for teeth whitening. Baking soda’s abrasive nature can potentially exacerbate sensitivity. However, that doesn’t necessarily mean you can’t use it at all. You can try using a smaller amount of baking soda, mixing it with more water to create a less abrasive paste, and using a very soft-bristled toothbrush. You can also try using baking soda less frequently, perhaps only once a week. If you experience any increased sensitivity, discontinue use immediately and consult with your dentist. They may recommend alternative whitening methods that are gentler on sensitive teeth.
Will baking soda whiten my teeth as effectively as professional whitening treatments?
While baking soda can effectively remove surface stains and brighten your teeth, it’s unlikely to achieve the same dramatic results as professional whitening treatments. Professional treatments often use stronger bleaching agents that can penetrate deeper into the tooth enamel to remove intrinsic stains. Baking soda primarily works on surface stains. However, for those seeking a natural, affordable, and gentle whitening option, baking soda can be a great choice. It can help to maintain a brighter smile between professional treatments or as a standalone whitening method for those with mild staining.
Can I mix baking soda with lemon juice for teeth whitening?
While some people advocate for mixing baking soda with lemon juice for teeth whitening, it’s generally not recommended. Lemon juice is highly acidic, and the combination of acidity and abrasion can significantly increase the risk of enamel erosion. Enamel erosion can lead to tooth sensitivity, cavities, and other dental problems. It’s best to avoid using acidic substances like lemon juice in combination with baking soda for teeth whitening. Stick to safer alternatives like water or a small amount of hydrogen peroxide (used with extreme caution and sparingly).
Is it okay to swallow baking soda while brushing my teeth?
You should avoid swallowing baking soda while brushing your teeth. While a small amount of baking soda is unlikely to cause serious harm, ingesting larger quantities can lead to digestive upset, such as nausea, vomiting, and diarrhea. Baking soda can also interfere with the absorption of certain medications. If you accidentally swallow a significant amount of baking soda, contact your doctor or poison control center.
Can I use baking soda if I have braces or other dental appliances?
If you have braces or other dental appliances, you should consult with your orthodontist or dentist before using baking soda for teeth whitening. Baking soda’s abrasive nature could potentially damage certain dental materials or interfere with the bonding of brackets. Your orthodontist or dentist can advise you on the safest and most effective whitening methods for your specific situation. They may recommend alternative whitening products or techniques that are compatible with your dental appliances.
How long will it take to see results from using baking soda for teeth whitening?
The time it takes to see results from using baking soda for teeth whitening can vary depending on the severity of your staining, your oral hygiene habits, and the frequency of use. Some people may notice a difference after just a few uses, while others may need to use it for several weeks to see noticeable results. Consistency is key. Be patient and persistent with your efforts, and you’re likely to see some improvement in the brightness of your smile over time. Remember to take before-and-after photos to track your progress.


Leave a Comment