

Easy Carpet Stain Removal – sounds like a dream, right? I know I’ve certainly wished for a magic wand to banish those pesky spills and splatters from my carpets more times than I can count! Let’s face it, accidents happen. Whether it’s a rogue coffee cup, a muddy paw print, or a child’s artistic expression gone awry, carpet stains are an inevitable part of life.
But before you resign yourself to living with unsightly blemishes or shelling out a fortune for professional cleaning, I’m here to tell you that you can tackle those stains yourself with some simple, effective DIY tricks. Carpet cleaning has been a concern for centuries, evolving from rudimentary methods using natural elements like sunshine and vinegar to the sophisticated cleaning solutions we have today. But sometimes, the old ways are the best ways!
This article is your ultimate guide to easy carpet stain removal using readily available household items. I’ll share my favorite hacks and techniques that will save you time, money, and a whole lot of frustration. Because honestly, who wants to spend their precious weekend scrubbing away at a stubborn stain when you could be relaxing and enjoying your clean, fresh-looking home? Let’s dive in and discover the secrets to a stain-free carpet!
DIY Carpet Stain Removal: My Foolproof Guide
Hey everyone! I’ve battled my fair share of carpet stains over the years, thanks to kids, pets, and the occasional clumsy moment (okay, maybe more than occasional!). I’ve tried countless store-bought cleaners, some with limited success and others that just left a sticky residue. So, I decided to dive into the world of DIY carpet stain removal, and I’m excited to share my go-to method that works wonders on most common stains. This isn’t just a quick fix; it’s a deep clean that leaves your carpet looking fresh and revitalized.
Understanding the Enemy: Identifying Your Stain
Before we jump into the cleaning process, it’s crucial to identify what kind of stain you’re dealing with. Different stains require different approaches. Here’s a quick rundown:
* **Water-based stains:** These include things like juice, soda, mud, and most food spills. They’re generally easier to remove than oil-based stains.
* **Oil-based stains:** Think grease, oil, butter, and makeup. These require a solvent to break down the oily residue.
* **Protein-based stains:** These are things like blood, milk, and vomit. They need to be treated carefully to avoid setting the stain.
* **Tannin-based stains:** Coffee, tea, and wine fall into this category. They can be tricky to remove, especially if they’ve been left to sit for a while.
Knowing what you’re up against will help you choose the right cleaning solution and technique.
Gathering Your Arsenal: Supplies You’ll Need
Okay, let’s get our supplies together. Here’s what you’ll need for this DIY carpet stain removal method:
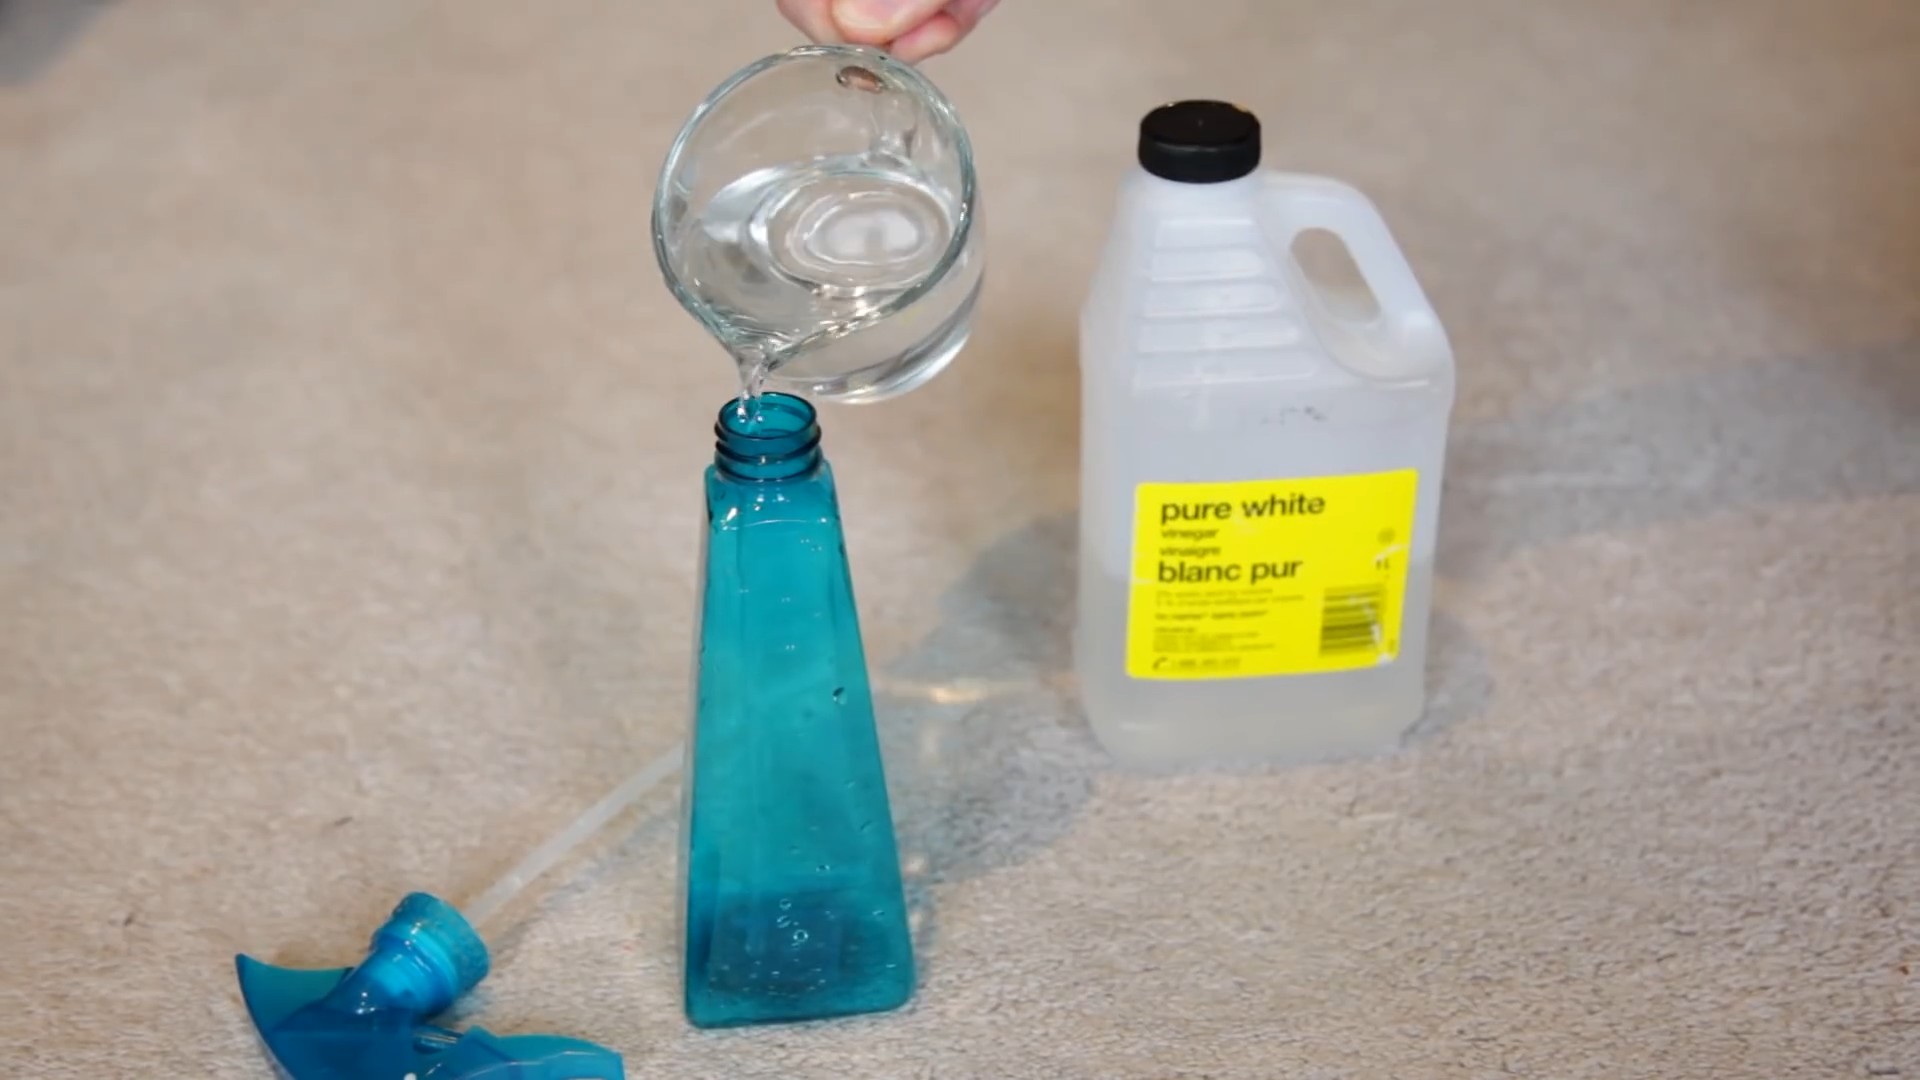
* **White vinegar:** This is my secret weapon! It’s a natural cleaner, deodorizer, and stain remover.
* **Baking soda:** Another powerhouse! It absorbs odors and helps lift stains.
* **Dish soap (clear, non-bleach):** A gentle degreaser that’s safe for most carpets.
* **Hydrogen peroxide (3%):** This is optional, but it’s great for lightening stubborn stains, especially on light-colored carpets. *Always test in an inconspicuous area first!*
* **Clean, white cloths or paper towels:** Avoid using colored cloths, as the dye could transfer to your carpet.
* **Spray bottle:** For applying the cleaning solution.
* **Vacuum cleaner:** To remove loose debris and dry the carpet.
* **Spoon or dull knife:** For gently scraping up any solid residue.
* **Warm water:** For rinsing and diluting the cleaning solution.
* **Optional: Old toothbrush:** For scrubbing stubborn stains.
* **Optional: Fan:** To speed up the drying process.
The Stain Removal Process: Step-by-Step Instructions
Alright, let’s get down to business! Follow these steps carefully for the best results:
1. **Act Fast! (The Golden Rule):** The sooner you tackle a stain, the easier it will be to remove. Don’t let it sit and set!
2. **Blot, Don’t Rub:** Use a clean, white cloth or paper towel to blot up as much of the stain as possible. Rubbing will only spread the stain and grind it deeper into the carpet fibers. Work from the outside of the stain inward to prevent it from spreading.
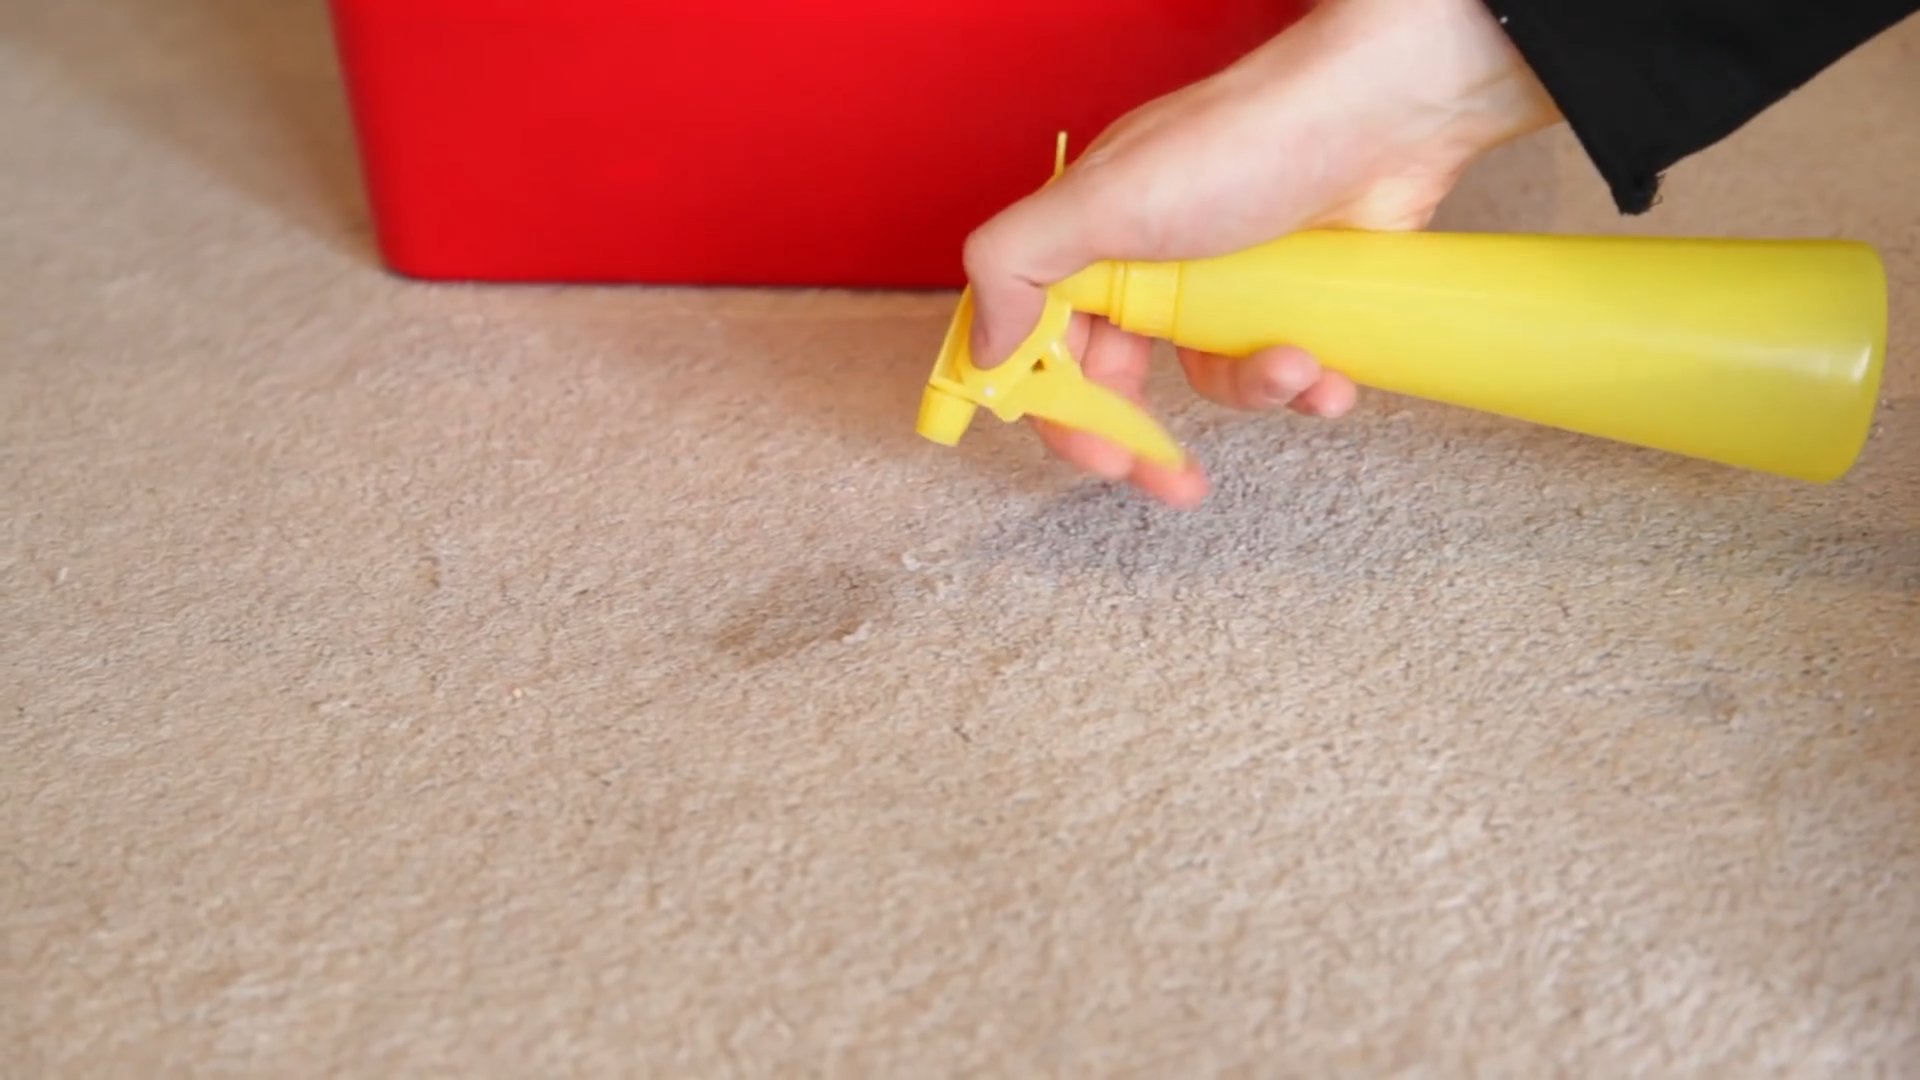
3. **Remove Solids:** If there are any solid pieces of the stain (like food or mud), gently scrape them up with a spoon or dull knife. Be careful not to damage the carpet fibers.
4. **Prepare Your Cleaning Solution:** In a spray bottle, mix together:
* 1/2 cup white vinegar
* 1/4 cup warm water
* 1 tablespoon clear dish soap
Gently swirl the mixture to combine. Avoid shaking vigorously, as this will create too many bubbles.
5. **Test in an Inconspicuous Area:** Before applying the cleaning solution to the stain, test it in a hidden area of your carpet (like under a piece of furniture or in a closet) to make sure it doesn’t cause any discoloration or damage. Wait for the area to dry completely before proceeding.
6. **Apply the Cleaning Solution:** Spray the cleaning solution liberally onto the stain, making sure to saturate the affected area. Don’t over-saturate the carpet, as this can lead to mold growth.
7. **Blot Again:** Use a clean, white cloth or paper towel to blot up the cleaning solution and the stain. Again, work from the outside of the stain inward.
8. **Repeat as Needed:** Repeat steps 6 and 7 until the stain is no longer visible on the cloth or paper towel.
9. **Rinse with Warm Water:** Once you’ve removed the stain, rinse the area with warm water to remove any remaining cleaning solution. You can do this by spraying the area with warm water and then blotting it up with a clean, dry cloth.
10. **Blot Dry:** Use a clean, dry cloth or paper towel to blot up as much of the water as possible.
11. **Apply Baking Soda (Optional):** Sprinkle a generous amount of baking soda over the damp area. This will help absorb any remaining moisture and odors.
12. **Let it Dry:** Allow the area to dry completely. This may take several hours or even overnight. You can speed up the drying process by using a fan.
13. **Vacuum Thoroughly:** Once the area is completely dry, vacuum it thoroughly to remove the baking soda and fluff up the carpet fibers.
Tackling Tough Stains: Advanced Techniques
Sometimes, a stain is particularly stubborn and requires a little extra effort. Here are a few advanced techniques I’ve found helpful:
Hydrogen Peroxide for Lightening Stains
For light-colored carpets, hydrogen peroxide (3%) can be used to lighten stubborn stains like coffee or wine. *However, it’s crucial to test it in an inconspicuous area first, as it can bleach darker carpets.*
1. **Test:** Apply a small amount of hydrogen peroxide to a hidden area of your carpet and wait for it to dry completely. Check for any discoloration or damage.
2. **Apply:** If the test is successful, spray a small amount of hydrogen peroxide onto the stain.
3. **Blot:** Blot the area with a clean, white cloth.
4. **Repeat:** Repeat steps 2 and 3 until the stain is lightened.
5. **Rinse and Dry:** Rinse the area with warm water and blot it dry as described above.
The Baking Soda Paste Method
For dried or ground-in stains, a baking soda paste can be very effective.
1. **Make a Paste:** Mix baking soda with a small amount of water to create a thick paste.
2. **Apply:** Apply the paste to the stain and let it sit for several hours or even overnight.
3. **Vacuum:** Vacuum up the dried paste thoroughly.
4. **Rinse and Dry:** Rinse the area with warm water and blot it dry as described above.
Using an Iron for Wax Stains
This method works wonders for removing wax from carpets.
1. **Cover with Cloth:** Place a clean, white cloth or paper towel over the wax stain.
2. **Iron:** Set your iron to a low setting (no steam) and gently iron over the cloth. The heat will melt the wax and transfer it to the cloth.
3. **Replace Cloth:** Replace the cloth as it becomes saturated with wax.
4. **Repeat:** Repeat steps 2 and 3 until all the wax is removed.
5. **Clean:** Clean the area with a mild detergent solution to remove any remaining residue.
Preventing Future Stains: Proactive Measures
Prevention is always better than cure! Here are a few tips to help prevent future carpet stains:
* **Act Fast:** As I mentioned before, the sooner you tackle a spill, the easier it will be to remove.
* **Use Rugs and Mats:** Place rugs and mats in high-traffic areas to protect your carpet from dirt and spills.
* **Regular Vacuuming:** Vacuum your carpets regularly to remove loose dirt and debris that can contribute to staining.
* **Professional Cleaning:** Consider having your carpets professionally cleaned once or twice a year to remove deep-seated dirt and stains.
* **No Shoes Policy:** Implement a “no shoes” policy in your home to reduce the amount of dirt and grime tracked onto your carpets.
* **Carpet Protector:** Apply a carpet protector spray to help repel stains and make your carpets easier to clean.
Final Thoughts
I hope this guide has been helpful! Remember, patience and persistence are key when it comes to carpet stain removal. Don’t be afraid to experiment with different techniques until you find what works best for your carpet and the type of stain you’re dealing with. And always, always test in an inconspicuous area first! Good luck, and happy cleaning!
Conclusion
So, there you have it! This simple, yet incredibly effective DIY carpet stain removal trick is a game-changer for anyone who’s ever despaired over a stubborn stain. Forget expensive, chemical-laden cleaners that promise the world but often fall short. This method utilizes ingredients you likely already have in your pantry, making it not only budget-friendly but also a safer, more natural alternative for your home and family.
Why is this a must-try? Because it works! We’ve seen it tackle everything from coffee spills and muddy footprints to pet accidents and even some surprisingly resilient food stains. The combination of readily available ingredients creates a powerful cleaning action that lifts stains without damaging your carpet fibers. Plus, the satisfaction of removing a seemingly permanent stain with your own two hands is truly rewarding.
But don’t just take our word for it. We encourage you to experiment and adapt this method to your specific needs. For instance, for particularly stubborn grease stains, try adding a few drops of dish soap to the solution. If you’re dealing with a colored stain like red wine or juice, a touch of hydrogen peroxide (always test in an inconspicuous area first!) can work wonders. And for older, set-in stains, you might need to repeat the process a few times, allowing the solution to sit for a longer period before blotting.
Remember, the key to successful carpet stain removal is to act quickly. The sooner you address the stain, the easier it will be to remove. Keep this DIY trick in your back pocket, and you’ll be prepared for any unexpected spills or accidents that come your way.
We’re confident that this DIY carpet stain removal method will become your go-to solution for keeping your carpets looking fresh and clean. Now, it’s your turn! Give it a try and let us know how it works for you. Share your before-and-after photos and any variations you’ve discovered in the comments below. We can’t wait to hear about your success stories and learn from your experiences. Together, we can conquer even the most challenging carpet stains and keep our homes looking their best!
Frequently Asked Questions (FAQs)
1. What types of stains does this DIY carpet stain removal method work best on?
This method is effective on a wide range of common household stains, including:
* Coffee and tea spills
* Mud and dirt
* Pet accidents (urine, vomit, feces)
* Food stains (sauce, juice, chocolate)
* Wine (red and white)
* Ink (depending on the type)
However, the effectiveness can vary depending on the age and severity of the stain, as well as the type of carpet fiber. For very old or heavily ingrained stains, professional cleaning may be required.
2. What ingredients do I need for this DIY carpet stain removal solution?
The basic recipe typically involves:
* White vinegar: Acts as a natural cleaning agent and deodorizer.
* Baking soda: Helps to lift stains and absorb odors.
* Water: Dilutes the solution and aids in the cleaning process.
* Optional: Dish soap (for grease stains), hydrogen peroxide (for colored stains – use with caution and test first).
The exact proportions may vary depending on the specific recipe you’re following.
3. Is this DIY carpet stain removal method safe for all types of carpets?
While generally safe, it’s always recommended to test the solution in an inconspicuous area of your carpet before applying it to the entire stain. This is especially important for delicate or natural fibers like wool or silk. Look for any discoloration, fading, or damage to the fibers. If you notice any adverse effects, discontinue use immediately.
4. How do I test the solution in an inconspicuous area?
Choose a hidden spot, such as inside a closet, under a piece of furniture, or along the edge of the carpet where it meets the wall. Apply a small amount of the solution to the area, let it sit for a few minutes, and then blot it with a clean cloth. Observe the area for any changes in color or texture.
5. How long should I let the solution sit on the stain?
The amount of time you let the solution sit on the stain will depend on the severity of the stain. For fresh stains, a few minutes may be sufficient. For older or more stubborn stains, you may need to let it sit for 15-30 minutes, or even longer. Keep an eye on the area and blot it periodically to check for progress.
6. How do I blot the stain properly?
Blotting is crucial for effectively removing the stain without spreading it or damaging the carpet fibers. Use a clean, white cloth or paper towel and gently press down on the stain to absorb the liquid. Avoid rubbing or scrubbing, as this can push the stain deeper into the carpet and damage the fibers. Work from the outside of the stain towards the center to prevent it from spreading.
7. What if the stain doesn’t come out completely after the first attempt?
Don’t give up! For stubborn stains, you may need to repeat the process several times. Allow the carpet to dry completely between applications. You can also try adjusting the proportions of the ingredients or adding a small amount of dish soap or hydrogen peroxide (with caution).
8. How do I dry the carpet after cleaning?
After blotting the stain, you can help the carpet dry faster by placing a clean, dry towel over the area and pressing down firmly. You can also use a fan or a hairdryer (on a low setting) to circulate air and speed up the drying process. Avoid walking on the wet carpet until it is completely dry.
9. Will this DIY method remove odors as well as stains?
Yes, baking soda is a natural deodorizer and can help to absorb odors associated with stains, such as pet urine or food spills. Vinegar also helps to neutralize odors.
10. Can I use this method on upholstery as well?
This method can be used on some types of upholstery, but it’s essential to test it in an inconspicuous area first, just as you would with carpet. Be especially cautious with delicate fabrics like silk or velvet. If you’re unsure, it’s best to consult a professional upholstery cleaner.
11. What if I don’t have white vinegar? Can I use another type of vinegar?
White vinegar is preferred because it’s clear and less likely to stain the carpet. Other types of vinegar, such as apple cider vinegar or balsamic vinegar, may contain pigments that could potentially discolor the carpet. If you must use another type of vinegar, dilute it significantly and test it in an inconspicuous area first.
12. Is it safe to use hydrogen peroxide on my carpet?
Hydrogen peroxide can be effective for removing colored stains, but it can also bleach or lighten the carpet fibers. Always test it in an inconspicuous area first and use it sparingly. Avoid using it on dark-colored carpets.
13. How often should I clean my carpets to prevent stains from setting in?
Regular vacuuming is essential for preventing dirt and debris from accumulating in your carpets and causing stains. It’s also a good idea to spot-clean any spills or accidents as soon as they occur. Professional carpet cleaning is recommended every 12-18 months to remove deep-seated dirt and stains.
14. Where can I find more information about carpet care and stain removal?
There are many resources available online and in libraries that provide information about carpet care and stain removal. You can also consult with a professional carpet cleaner for advice and recommendations.


Leave a Comment