

Easy cleaning shortcuts – who doesn’t want them? Let’s be honest, cleaning isn’t usually anyone’s favorite pastime. We all dream of sparkling homes without spending hours scrubbing and sweating. But what if I told you that achieving a clean and tidy space could be easier and faster than you ever imagined?
For centuries, people have sought ways to streamline household chores. From ancient Roman bathhouses meticulously maintained by slaves to the Victorian era’s emphasis on domestic order, the desire for cleanliness has been a constant. While our methods have evolved, the underlying goal remains the same: to create a healthy and comfortable living environment.
In today’s fast-paced world, time is a precious commodity. Juggling work, family, and social commitments often leaves little room for extensive cleaning routines. That’s where these easy cleaning shortcuts come in! I’m going to share some clever DIY tricks and hacks that will revolutionize your cleaning routine. These aren’t just about saving time; they’re about reclaiming your weekends and enjoying a cleaner, healthier home with minimal effort. Get ready to ditch the drudgery and embrace a smarter, more efficient way to clean!

DIY Cleaning Shortcuts: Making Life Easier, One Hack at a Time!
Okay, let’s be honest, cleaning isn’t exactly anyone’s favorite pastime. But a clean home is a happy home, right? So, I’ve compiled some of my absolute favorite DIY cleaning shortcuts that will save you time, money, and a whole lot of elbow grease. Get ready to transform your cleaning routine!
Cleaning Your Microwave Like a Pro (Without Scrubbing!)
This is a game-changer. I used to dread cleaning the microwave, but not anymore! This method uses the power of steam to loosen all that stuck-on food.
What you’ll need:
* 1 cup of water
* 1/4 cup of white vinegar (or lemon juice)
* Microwave-safe bowl
* Sponge or cloth
Step-by-step instructions:
1. Mix the solution: In your microwave-safe bowl, combine the water and vinegar (or lemon juice). The vinegar helps to loosen grease and grime, while the lemon juice adds a fresh scent.
2. Microwave it: Place the bowl in the microwave and heat on high for 5-10 minutes. You want the solution to boil and create steam. The steam is what does the magic!
3. Let it sit: Once the timer goes off, don’t open the microwave immediately! Let it sit for another 5 minutes. This allows the steam to continue working its magic.
4. Wipe it down: Carefully remove the bowl (it will be hot!). Use a sponge or cloth to wipe down the inside of the microwave. You’ll be amazed at how easily the grime comes off!
5. Clean the turntable: Don’t forget to remove the turntable and wash it separately with soap and water.
Cleaning Your Shower Head for Better Water Pressure
Hard water deposits can really clog up your shower head, reducing water pressure and making your shower less enjoyable. This simple trick will have your shower head working like new in no time.
What you’ll need:
* White vinegar
* Plastic bag (a sandwich bag works well)
* Rubber band or twist tie
* Old toothbrush (optional)
Step-by-step instructions:
1. Fill the bag with vinegar: Pour enough white vinegar into the plastic bag to completely submerge the shower head.
2. Attach the bag: Carefully position the bag over the shower head, making sure the shower head is fully immersed in the vinegar. Secure the bag with a rubber band or twist tie.
3. Soak overnight: Let the shower head soak in the vinegar overnight (or for at least a few hours). This allows the vinegar to dissolve the mineral deposits.
4. Remove and rinse: Remove the bag and discard the vinegar. Turn on the shower and let the water run for a few minutes to flush out any remaining vinegar and loosened debris.
5. Scrub if needed: If there are still some stubborn deposits, use an old toothbrush to gently scrub them away.
Cleaning Your Blender Quickly and Easily
Cleaning a blender can be a pain, especially if you’ve just made a smoothie with sticky ingredients. This method is so easy, you’ll wonder why you haven’t been doing it all along.
What you’ll need:
* Water
* Dish soap
Step-by-step instructions:
1. Fill with water: Fill the blender about halfway with warm water.
2. Add soap: Add a squirt of dish soap.
3. Blend: Secure the lid and blend on high speed for about 30-60 seconds.
4. Rinse: Pour out the soapy water and rinse the blender thoroughly with clean water.
5. Dry: Let the blender air dry or dry it with a clean towel.
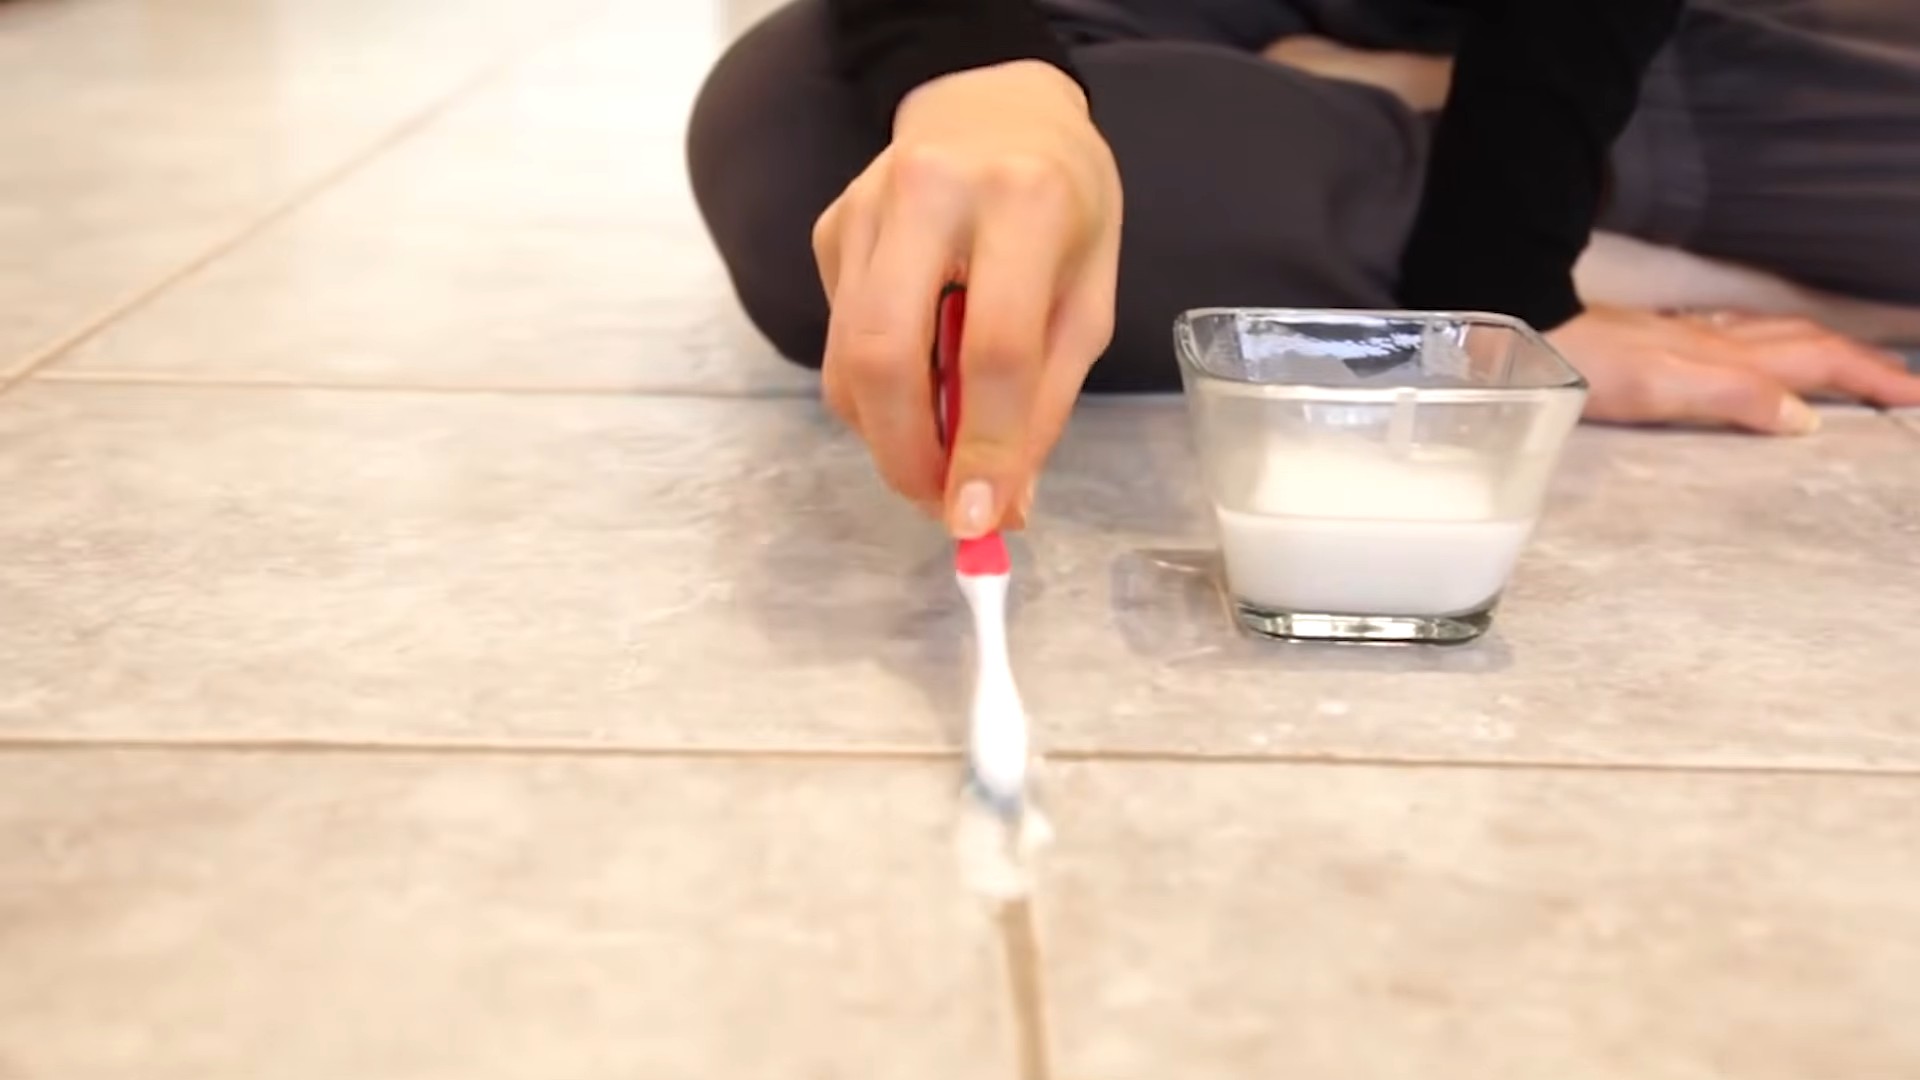
Cleaning Your Grout Without Harsh Chemicals
Grimey grout can make your whole bathroom look dirty. This natural cleaning solution is effective and safe for your family and pets.
What you’ll need:
* Baking soda
* White vinegar
* Old toothbrush or grout brush
* Spray bottle (optional)
Step-by-step instructions:
1. Make a paste (Option 1): Mix baking soda and water to form a thick paste. Apply the paste to the grout lines.
2. Spray with vinegar (Option 1): Spray the baking soda paste with white vinegar. The mixture will fizz.
3. Make a spray (Option 2): Mix equal parts of baking soda and water in a spray bottle. Spray the grout lines.
4. Let it sit: Let the mixture sit for 5-10 minutes.
5. Scrub: Use an old toothbrush or grout brush to scrub the grout lines.
6. Rinse: Rinse the area with clean water.
Cleaning Your Mattress for a Fresher Sleep
We spend a lot of time on our mattresses, so it’s important to keep them clean. This simple method will help remove dust mites, odors, and stains.
What you’ll need:
* Baking soda
* Vacuum cleaner with upholstery attachment
* Essential oil (optional, for scent)
* Spray bottle (optional)
Step-by-step instructions:
1. Strip the bed: Remove all bedding from the mattress.
2. Sprinkle with baking soda: Generously sprinkle baking soda over the entire surface of the mattress. If you want to add a fresh scent, mix a few drops of your favorite essential oil with the baking soda before sprinkling. Lavender and eucalyptus are great choices for promoting relaxation.
3. Let it sit: Let the baking soda sit on the mattress for at least 30 minutes, or even better, for a few hours. This allows the baking soda to absorb odors and moisture.
4. Vacuum: Use the upholstery attachment on your vacuum cleaner to thoroughly vacuum the entire surface of the mattress, removing all the baking soda.
5. Flip and repeat: Flip the mattress and repeat steps 2-4 on the other side.
Cleaning Burnt Food from Pots and Pans
Ugh, burnt food! It happens to the best of us. Don’t throw away that pot or pan just yet! This trick can save the day.
What you’ll need:
* Water
* Baking soda
* Dish soap
* Scrubbing sponge or pad
Step-by-step instructions:
1. Fill with water: Fill the pot or pan with enough water to cover the burnt food.
2. Add baking soda: Add 1-2 tablespoons of baking soda to the water.
3. Boil: Bring the water to a boil and let it simmer for 10-15 minutes.
4. Let it cool: Remove the pot or pan from the heat and let it cool slightly.
5. Scrub: Use a scrubbing sponge or pad to scrub away the burnt food. The baking soda should have loosened it, making it easier to remove.
6. Wash as usual: Wash the pot or pan with dish soap and water as usual.
Cleaning Your Dishwasher for Sparkling Dishes
A clean dishwasher means cleaner dishes! This simple cleaning routine will keep your dishwasher running smoothly and your dishes sparkling.
What you’ll need:
* White vinegar
* Baking soda
Step-by-step instructions:
1. Remove debris: Remove any food particles or debris from the bottom of the dishwasher.
2. Vinegar rinse: Place a dishwasher-safe cup filled with white vinegar on the top rack of the dishwasher.
3. Run a cycle: Run the dishwasher on a hot cycle. The vinegar will help to dissolve grease and grime.
4. Baking soda boost: After the cycle is complete, sprinkle a cup of baking soda on the bottom of the dishwasher.
5. Run a short cycle: Run a short, hot cycle. The baking soda will help to freshen the dishwasher and remove any lingering odors.
6. Clean the door and seals: Wipe down the door and seals of the dishwasher with a damp cloth.
Cleaning Your Coffee Maker for Better Tasting Coffee
A clean coffee maker is essential for brewing delicious coffee. Mineral deposits can build up over time, affecting the taste of your coffee.
What you’ll need:
* White vinegar
* Water
Step-by-step instructions:
1. Fill with vinegar and water: Fill the water reservoir of your coffee maker with equal parts white vinegar and water.
2. Brew: Run the coffee maker through a full brewing cycle.
3. Rinse: Run the coffee maker through two or three more brewing cycles with just water to rinse out any remaining vinegar.
4.
Conclusion
So there you have it! This simple DIY cleaning trick is more than just a shortcut; it’s a game-changer for anyone looking to reclaim their time and maintain a sparkling clean home without breaking the bank or relying on harsh chemicals. We’ve shown you how to create an effective, eco-friendly cleaning solution using ingredients you likely already have in your pantry. The beauty of this method lies not only in its simplicity but also in its versatility.
Think about it: no more lugging around multiple cleaning bottles for different surfaces. This all-purpose cleaner can tackle everything from kitchen countertops and bathroom tiles to dusty furniture and grimy windows. It’s a one-stop solution that simplifies your cleaning routine and frees up valuable storage space.
But the benefits extend beyond convenience. By making your own cleaner, you’re actively reducing your environmental impact. You’re minimizing plastic waste from disposable bottles and avoiding the potentially harmful chemicals found in many commercial cleaning products. You’re creating a healthier environment for yourself, your family, and the planet.
Why is this DIY cleaning trick a must-try? Because it’s effective, affordable, eco-friendly, and incredibly easy to make. It’s a win-win situation for everyone involved.
Now, let’s talk about variations. Feel free to experiment with different essential oils to customize the scent of your cleaner. Lavender, lemon, tea tree, and eucalyptus are all excellent choices, each offering its own unique aroma and potential antibacterial properties. For tougher cleaning jobs, consider adding a tablespoon of borax to the mixture for extra cleaning power. Just be sure to wear gloves when handling borax and avoid using it on delicate surfaces.
Another variation involves infusing vinegar with citrus peels. Simply place orange, lemon, or grapefruit peels in a jar of vinegar and let it sit for a few weeks. The citrus oils will infuse into the vinegar, creating a more pleasant-smelling and even more effective cleaner. Strain the vinegar before using it in your DIY cleaning solution.
We understand that trying something new can sometimes feel daunting, but we promise this DIY cleaning trick is worth the effort. It’s a small change that can make a big difference in your cleaning routine and your overall well-being.
So, what are you waiting for? Gather your ingredients, mix up a batch of this amazing cleaner, and experience the difference for yourself. We’re confident that you’ll be amazed by the results.
And most importantly, we want to hear about your experience! Share your tips, variations, and before-and-after photos on social media using #DIYCleaningMagic. Let’s create a community of clean-living enthusiasts who are passionate about simplifying their lives and protecting the environment. Your feedback will not only inspire others to try this DIY cleaning trick but also help us refine and improve the recipe for future generations. We can’t wait to see what you create!
Frequently Asked Questions (FAQ)
What exactly is this “DIY cleaning trick” you keep mentioning?
The DIY cleaning trick we’re referring to is a method of creating your own all-purpose cleaner using simple, readily available ingredients like vinegar, baking soda, water, and essential oils. It’s a cost-effective and eco-friendly alternative to commercial cleaning products. The exact recipe can vary, but the core principle remains the same: using natural ingredients to achieve a clean and fresh home.
Is vinegar really safe to use on all surfaces?
While vinegar is a fantastic cleaning agent, it’s not suitable for all surfaces. Avoid using vinegar on marble, granite, or other natural stone countertops, as the acidity can etch and damage the surface. It’s also best to avoid using vinegar on waxed wood furniture, as it can strip the wax finish. Always test the cleaner on an inconspicuous area first to ensure it doesn’t cause any damage. For delicate surfaces, consider diluting the vinegar with more water or using a different cleaning solution altogether.
Can I use any type of vinegar for this DIY cleaner?
White distilled vinegar is generally recommended for cleaning purposes due to its high acidity and lack of color, which minimizes the risk of staining. However, you can also use apple cider vinegar, although it may have a slightly stronger odor and could potentially leave a slight residue on some surfaces. Avoid using balsamic vinegar or other flavored vinegars, as they can stain surfaces and attract insects.
What essential oils are best for cleaning, and how much should I use?
Several essential oils possess antibacterial, antiviral, and antifungal properties, making them excellent additions to your DIY cleaner. Some popular choices include:
* **Lemon:** Known for its degreasing and disinfecting properties.
* **Tea Tree:** A powerful antiseptic and antifungal agent.
* **Lavender:** Offers a calming scent and has antibacterial properties.
* **Eucalyptus:** Effective against germs and provides a refreshing aroma.
* **Peppermint:** A natural insect repellent and has a refreshing scent.
As for the amount, start with 10-20 drops of essential oil per cup of cleaning solution. You can adjust the amount to your preference, but be mindful that some essential oils can be irritating to the skin or respiratory system in high concentrations. Always use essential oils in a well-ventilated area.
How long will this DIY cleaner last?
The shelf life of your DIY cleaner depends on the ingredients you use. A simple mixture of vinegar and water can last indefinitely. However, if you add essential oils or other ingredients, the cleaner may degrade over time. It’s best to store your cleaner in a cool, dark place and use it within a few months for optimal effectiveness. If you notice any changes in color, odor, or consistency, discard the cleaner and make a fresh batch.
Can I use this DIY cleaner on my floors?
Yes, you can use this DIY cleaner on most types of floors, but it’s essential to consider the material of your flooring. For hardwood floors, use a diluted solution of vinegar and water to avoid damaging the finish. Avoid using vinegar on waxed wood floors altogether. For tile and laminate floors, you can use a stronger concentration of vinegar. Always test the cleaner on an inconspicuous area first to ensure it doesn’t cause any discoloration or damage.
Is baking soda really necessary for this cleaner? What does it do?
Baking soda is a mild abrasive and deodorizer that can help remove stubborn stains and odors. It’s particularly effective for cleaning sinks, bathtubs, and other surfaces that tend to accumulate grime. While baking soda is not strictly necessary for all cleaning tasks, it can significantly enhance the cleaning power of your DIY solution.
I’m allergic to vinegar. Is there an alternative I can use?
If you’re allergic to vinegar, you can try using lemon juice as a substitute. Lemon juice has similar acidic properties to vinegar and can be just as effective for cleaning. You can also use a solution of baking soda and water for general cleaning. For disinfecting purposes, consider using hydrogen peroxide, but be sure to test it on an inconspicuous area first, as it can bleach some surfaces.
My DIY cleaner smells too strongly of vinegar. How can I fix this?
The strong smell of vinegar is a common concern when making DIY cleaners. To minimize the odor, you can try the following:
* Infuse the vinegar with citrus peels for a more pleasant scent.
* Add more essential oils to mask the vinegar smell.
* Use a higher concentration of water to dilute the vinegar.
* Open windows and ventilate the area while cleaning.
* The vinegar smell will dissipate quickly after the surface dries.
Can I use this DIY cleaner to clean my oven?
Yes, you can use a paste of baking soda and water to clean your oven. Apply the paste to the interior of the oven, let it sit overnight, and then scrub it clean with a damp cloth. For stubborn stains, you can add a small amount of vinegar to the baking soda paste. Avoid using vinegar on the heating elements or electrical components of the oven.
Leave a Comment