

House cleaning hacks – who doesn’t need them? Let’s be honest, keeping a house sparkling clean can feel like a never-ending battle. You conquer one room, and another mess magically appears! But what if I told you there are simple, clever tricks that can cut your cleaning time in half and leave your home looking its best?
For centuries, people have been devising ingenious ways to maintain their homes. From ancient civilizations using natural remedies to clean and disinfect, to the Victorian era’s obsession with spotless parlors, the desire for a clean and organized living space is deeply ingrained in our history. But in today’s fast-paced world, who has time for elaborate cleaning rituals?
That’s where these DIY house cleaning hacks come in! I’m going to share some of my favorite, tried-and-true methods for tackling common household messes with minimal effort and maximum impact. Whether you’re battling stubborn stains, struggling to keep your bathroom sparkling, or just looking for ways to streamline your cleaning routine, these tips will transform the way you approach housework. Get ready to say goodbye to endless scrubbing and hello to a cleaner, happier home!
DIY House Cleaning Hacks: Sparkling Clean on a Budget!
Hey there, fellow cleaning enthusiasts! Let’s face it, nobody *loves* cleaning, but a clean house is a happy house, right? I’m here to share some of my favorite DIY house cleaning hacks that will save you money and maybe even make the process a little less dreadful. Get ready to ditch those expensive store-bought cleaners and embrace the power of everyday household items!
Hack 1: Sparkling Clean Microwave with Lemon Power
That microwave… it’s a magnet for splatters and grime, isn’t it? Forget scrubbing for hours. This lemon trick is a game-changer.
What you’ll need:
* 1 lemon
* 1 cup of water
* Microwave-safe bowl
* Clean cloth or sponge
Step-by-step instructions:
1. Prepare the lemon solution: Cut the lemon in half. Squeeze the juice from both halves into the microwave-safe bowl. Then, drop the lemon halves into the bowl as well.
2. Add water: Pour one cup of water into the bowl with the lemon juice and lemon halves.
3. Microwave magic: Place the bowl in the microwave and heat on high for 3-5 minutes. You want the water to boil and create steam.
4. Let it steam: Once the timer goes off, don’t open the microwave immediately! Let the steam work its magic for another 5-10 minutes. This will loosen all the grime and splatters.
5. Wipe it clean: Carefully remove the bowl (it will be hot!). Use a clean cloth or sponge to easily wipe away all the loosened food particles. You’ll be amazed at how easily everything comes off!
6. Final touch: For any stubborn spots, you can use the lemon halves to scrub gently. The lemon’s acidity will help break down the grime.
Hack 2: De-Gunk Your Showerhead with Vinegar
Hard water got your showerhead looking sad and spraying unevenly? Vinegar to the rescue! This is one of my go-to hacks for a revitalizing shower experience.
What you’ll need:
* White vinegar
* Plastic bag (sandwich bag or larger, depending on your showerhead size)
* Rubber band or twist tie
* Old toothbrush (optional)
Step-by-step instructions:
1. Fill the bag with vinegar: Pour enough white vinegar into the plastic bag to completely submerge the showerhead.
2. Secure the bag: Carefully position the bag over the showerhead, ensuring the showerhead is fully immersed in the vinegar. Use a rubber band or twist tie to secure the bag tightly around the showerhead neck.
3. Soak overnight: Let the showerhead soak in the vinegar overnight (or for at least a few hours). This allows the vinegar to dissolve the mineral deposits.
4. Remove and rinse: Remove the bag and discard the vinegar. Turn on the shower and let the water run for a few minutes to flush out any remaining vinegar and loosened debris.
5. Scrub if needed: If you still see some stubborn mineral deposits, use an old toothbrush to gently scrub them away.
6. Enjoy your revitalized shower: Your showerhead should now be spraying evenly and powerfully!
Hack 3: Unclog Drains with Baking Soda and Vinegar (The Natural Plumber!)
Clogged drains are a common household headache. Before you reach for harsh chemical drain cleaners, try this natural and effective solution.
What you’ll need:
* 1 cup baking soda
* 2 cups white vinegar
* Hot water
Step-by-step instructions:
1. Pour in the baking soda: Pour one cup of baking soda down the clogged drain. Try to get as much of it down the drain as possible.
2. Follow with vinegar: Immediately pour two cups of white vinegar down the drain after the baking soda.
3. Let it fizz: You’ll hear a fizzing sound – that’s the chemical reaction between the baking soda and vinegar, which helps to break down the clog. Let the mixture sit for at least 30 minutes, or even better, overnight.
4. Flush with hot water: After the waiting period, flush the drain with a generous amount of hot water. Let the hot water run for several minutes to completely clear the drain.
5. Repeat if necessary: If the drain is still clogged, repeat the process. For particularly stubborn clogs, you might need to repeat it a few times.
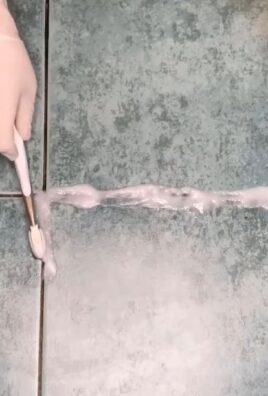
Hack 4: Clean Your Grout with Baking Soda Paste
Dirty grout can make even the cleanest tiles look dingy. This baking soda paste is a simple and effective way to brighten up your grout lines.
What you’ll need:
* Baking soda
* Water
* Old toothbrush or grout brush
* Spray bottle (optional)
Step-by-step instructions:
1. Make the baking soda paste: In a small bowl, mix baking soda with enough water to form a thick paste. The consistency should be similar to toothpaste.
2. Apply the paste: Apply the baking soda paste to the grout lines. You can use your fingers, a spoon, or an old toothbrush to apply it. Make sure to cover all the grout lines thoroughly.
3. Let it sit: Allow the paste to sit on the grout lines for at least 15-20 minutes. For heavily soiled grout, you can let it sit for up to an hour.
4. Scrub the grout: Use an old toothbrush or a grout brush to scrub the grout lines. Apply firm pressure and scrub in a back-and-forth motion. You’ll see the dirt and grime start to lift.
5. Rinse thoroughly: Rinse the grout lines with clean water. You can use a spray bottle or a damp sponge to remove the baking soda residue.
6. Dry the area: Dry the area with a clean towel. Your grout lines should now be noticeably brighter!
Hack 5: Freshen Your Mattress with Baking Soda
Mattresses can harbor dust mites, odors, and moisture. This baking soda trick will help freshen and deodorize your mattress.
What you’ll need:
* Baking soda
* Vacuum cleaner with upholstery attachment
* Essential oil (optional)
* Sifter or strainer (optional)
Step-by-step instructions:
1. Prepare the mattress: Remove all bedding from the mattress.
2. Sprinkle baking soda: Generously sprinkle baking soda over the entire surface of the mattress. If you want to add a pleasant scent, you can mix a few drops of your favorite essential oil (like lavender or eucalyptus) with the baking soda before sprinkling. A sifter or strainer can help distribute the baking soda evenly.
3. Let it sit: Allow the baking soda to sit on the mattress for at least 30 minutes, or even better, for several hours. The longer it sits, the more effectively it will absorb odors and moisture.
4. Vacuum thoroughly: Use the upholstery attachment of your vacuum cleaner to thoroughly vacuum the entire surface of the mattress. Make sure to get into all the crevices and seams.
5. Flip and repeat: Flip the mattress over and repeat the process on the other side.
6. Enjoy a fresh mattress: Your mattress should now be fresher, cleaner, and free of odors!
Hack 6: Clean Your Blender with Soap and Water (Seriously!)
Cleaning a blender can be a pain, especially after making smoothies or sauces. But this simple trick makes it a breeze.
What you’ll need:
* Dish soap
* Water
Step-by-step instructions:
1. Fill with water: Fill the blender jar about halfway with warm water.
2. Add dish soap: Add a squirt or two of dish soap to the water.
3. Blend: Secure the lid and blend on high speed for about 30-60 seconds.
4. Rinse: Pour out the soapy water and rinse the blender jar thoroughly with clean water.
5. Dry: Let the blender jar air dry or dry it with a clean towel.
Hack 7: Remove Water Stains from Wood Furniture with a Hair Dryer
Ugh, those dreaded water rings on your beautiful wood furniture! Don’t panic. A hair dryer can often do the trick.
What you’ll need:
* Hair dryer
* Soft cloth
Step-by-step instructions:
1. Position the hair dryer: Set your hair dryer to a low or medium heat setting.
2. Apply heat: Hold the hair dryer a few inches away from the water stain and move it back and forth over the stain.
3. Watch the stain disappear: As
Conclusion
So, there you have it! These simple yet incredibly effective house cleaning hacks are more than just time-savers; they’re game-changers for maintaining a sparkling and healthy home. We’ve explored how to tackle common cleaning challenges with readily available household items, transforming mundane chores into manageable tasks. From banishing stubborn stains to revitalizing tired surfaces, these DIY solutions offer a cost-effective and eco-friendly alternative to harsh chemical cleaners.
Why is this a must-try? Because it empowers you to take control of your cleaning routine, using ingredients you likely already have in your pantry. Imagine the satisfaction of knowing you’re creating a cleaner, healthier environment for yourself and your family, all while saving money and reducing your environmental impact. These hacks are about more than just cleaning; they’re about simplifying your life and making your home a more enjoyable space to be in.
But don’t stop there! Feel free to experiment and adapt these techniques to suit your specific needs and preferences. For instance, if you’re dealing with particularly stubborn grime, try adding a bit of baking soda to your vinegar solution for extra scrubbing power. Or, if you prefer a more fragrant cleaning experience, infuse your homemade cleaning solutions with essential oils like lemon, lavender, or tea tree. The possibilities are endless!
Consider these variations:
* **Lemon Power:** Add lemon juice to your cleaning solutions for its natural disinfecting and deodorizing properties. It’s especially effective for cleaning cutting boards and removing hard water stains.
* **Essential Oil Infusion:** Incorporate a few drops of your favorite essential oils into your cleaning sprays for a pleasant aroma and added antibacterial benefits.
* **Baking Soda Boost:** For tough stains and grime, create a paste of baking soda and water and apply it to the affected area. Let it sit for a few minutes before scrubbing.
* **Vinegar Versatility:** Experiment with different dilutions of vinegar and water to find the perfect balance for your cleaning needs. Remember that vinegar is acidic and may not be suitable for all surfaces.
We’re confident that these house cleaning hacks will revolutionize your cleaning routine. They’re easy, effective, and environmentally friendly. But the real magic happens when you put them into practice. So, go ahead, give them a try! We encourage you to embrace these DIY solutions and discover the joy of a cleaner, healthier home.
And most importantly, we want to hear about your experiences! Share your successes, your challenges, and any variations you’ve discovered in the comments below. Let’s create a community of cleaning enthusiasts who are passionate about making their homes shine. Your insights could help others discover new and innovative ways to tackle their cleaning challenges. Together, we can transform the way we clean and create a more sustainable and enjoyable living environment. So, what are you waiting for? Get cleaning and share your story!
FAQ
What are the benefits of using DIY house cleaning hacks compared to commercial cleaners?
DIY house cleaning hacks offer a multitude of benefits. Firstly, they are often significantly cheaper than commercial cleaners. You’re using ingredients you likely already have in your pantry, such as vinegar, baking soda, and lemon juice. Secondly, they are generally safer for your health and the environment. Commercial cleaners often contain harsh chemicals that can be harmful to your respiratory system, skin, and the planet. DIY solutions are typically made with natural, biodegradable ingredients. Thirdly, you have complete control over what goes into your cleaning products, allowing you to avoid allergens and irritants. Finally, DIY cleaning can be a fun and rewarding experience, empowering you to take control of your home environment.
Are DIY cleaning solutions as effective as commercial cleaners?
In many cases, yes! While some heavy-duty cleaning tasks might require specialized commercial products, DIY solutions are surprisingly effective for everyday cleaning. Vinegar, for example, is a powerful disinfectant and degreaser. Baking soda is a gentle abrasive that can remove stains and odors. Lemon juice is a natural brightener and deodorizer. The key is to use the right ingredients for the right task and to allow sufficient contact time for the solutions to work their magic. For instance, letting a vinegar solution sit on a hard water stain for a few minutes before scrubbing will significantly improve its effectiveness.
What surfaces should I avoid cleaning with vinegar?
While vinegar is a versatile cleaner, it’s important to be aware of surfaces it can damage. Avoid using vinegar on natural stone surfaces like marble, granite, and limestone, as its acidity can etch and dull the finish. It’s also best to avoid using vinegar on waxed wood floors, as it can strip the wax. Additionally, vinegar can damage rubber seals in appliances like dishwashers and washing machines. Always test a small, inconspicuous area before applying vinegar to a new surface.
How can I make my DIY cleaning solutions smell better?
One of the common concerns about DIY cleaning solutions is their scent, particularly the strong smell of vinegar. Fortunately, there are several ways to enhance the aroma of your homemade cleaners. The easiest way is to add a few drops of your favorite essential oils. Lemon, lavender, tea tree, and eucalyptus are popular choices for their pleasant scents and added antibacterial properties. You can also infuse your vinegar with citrus peels or herbs for a more subtle fragrance. Simply place the peels or herbs in a jar of vinegar and let it steep for a few weeks before straining and using the infused vinegar in your cleaning solutions.
How long can I store DIY cleaning solutions?
The shelf life of DIY cleaning solutions depends on the ingredients used. Solutions containing water should be used within a few weeks to prevent bacterial growth. Solutions made with vinegar or alcohol have a longer shelf life due to their antimicrobial properties. Store your DIY cleaning solutions in airtight containers in a cool, dark place. Label each container clearly with the ingredients and date of preparation. If you notice any changes in color, odor, or consistency, discard the solution.
Can I use these house cleaning hacks if I have allergies or sensitivities?
If you have allergies or sensitivities, it’s crucial to be cautious when using any cleaning product, whether commercial or DIY. Always read the ingredient list carefully and avoid using ingredients that you know you are allergic to. When trying a new DIY cleaning solution, test it on a small, inconspicuous area first to check for any adverse reactions. Wear gloves and a mask to protect your skin and respiratory system. If you experience any irritation or discomfort, discontinue use immediately. Consider consulting with an allergist or dermatologist to determine which cleaning ingredients are safe for you.
What are some other effective DIY house cleaning hacks?
Beyond the basics of vinegar, baking soda, and lemon juice, there are many other effective DIY house cleaning hacks to explore. For example, you can use olive oil to polish wood furniture, coffee grounds to deodorize your refrigerator, and dryer sheets to remove static cling from clothes. A paste of cream of tartar and water can remove stubborn stains from porcelain sinks and tubs. Club soda is excellent for removing wine stains from carpets and upholstery. The possibilities are endless! The key is to be creative and resourceful, experimenting with different ingredients and techniques to find what works best for you.


Leave a Comment