

Living Room Deep Cleaning Guide: Transform your space from chaotic to cozy with these simple DIY tricks! Let’s face it, our living rooms are the heart of our homes. They’re where we unwind after a long day, entertain guests, and create lasting memories. But all that living can leave our beloved spaces looking a little… well, lived-in. Dust bunnies multiplying under the sofa? Fingerprints smudging the TV screen? Don’t despair! I’m here to share my ultimate living room deep cleaning guide, packed with easy-to-follow steps and clever hacks to restore your living room to its former glory.
The concept of spring cleaning, a tradition deeply rooted in many cultures, highlights the importance of refreshing our living spaces. Historically, it was a practical necessity to remove accumulated grime from winter heating. Today, while we may not be battling soot, the need for a thorough clean remains. A clean living room isn’t just about aesthetics; it’s about creating a healthier and more inviting environment for ourselves and our loved ones.
This Living Room Deep Cleaning Guide will empower you to tackle even the most daunting cleaning tasks with confidence. I’ll walk you through everything from decluttering and dusting to polishing furniture and revitalizing carpets. You’ll learn how to banish allergens, eliminate odors, and create a space that truly reflects your personal style. So, grab your cleaning supplies, put on some music, and let’s get started! You’ll be amazed at the difference a little elbow grease and these simple DIY tricks can make.

Living Room Deep Cleaning: My Ultimate DIY Guide!
Okay, friends, let’s face it: our living rooms often bear the brunt of daily life. From movie nights with spilled popcorn to kids building epic forts, it’s a space that sees a lot of action. That’s why a deep clean is essential every now and then to refresh and revitalize this central hub. I’m going to walk you through my tried-and-true method for a sparkling clean living room, step-by-step. Get ready to roll up your sleeves – it’s time to get cleaning!
Gathering Your Supplies
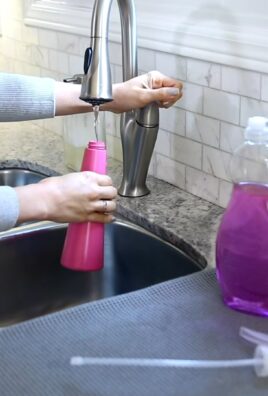
Before we dive in, let’s make sure we have everything we need. Trust me, having all your supplies ready will save you tons of time and frustration. Here’s my go-to list:
* Microfiber cloths: These are my absolute favorites for dusting and wiping surfaces. Stock up!
* All-purpose cleaner: Choose your favorite – I personally love a lemon-scented one for that fresh, clean smell.
* Wood cleaner (if applicable): If you have wood furniture, a dedicated wood cleaner is a must.
* Upholstery cleaner: For sofas, chairs, and other upholstered items. Make sure it’s suitable for your fabric type!
* Carpet cleaner or vacuum with upholstery attachment: Depending on your carpet and upholstery, you might need a dedicated cleaner or just a good vacuum.
* Glass cleaner: For windows, mirrors, and glass tabletops.
* Dusting brush or duster: For reaching high places and delicate items.
* Vacuum cleaner: A powerful vacuum is essential for carpets, rugs, and floors.
* Bucket: For mixing cleaning solutions.
* Rubber gloves: To protect your hands.
* Old toothbrush: Perfect for scrubbing grout and tight spaces.
* Screwdriver (optional): For removing vent covers for cleaning.
* Trash bags: For collecting clutter and discarded items.
* Lint roller: For quick fabric touch-ups.
* Magic Eraser: For stubborn marks and scuffs.
Decluttering: The First Step to Cleanliness
Before we even think about cleaning, we need to declutter. A clean space starts with a clutter-free space!
1. Grab a trash bag and a box: The trash bag is for actual garbage, and the box is for items that belong in other rooms.
2. Go through everything: Start with surfaces like coffee tables, shelves, and side tables. Toss any trash, and place items that belong elsewhere in the box.
3. Check drawers and cabinets: Empty them out and sort through the contents. Get rid of anything you don’t need or use.
4. Don’t forget the floor: Pick up any toys, books, or other items scattered on the floor.
5. Remove decorative items: Take down picture frames, vases, and other decorative items so you can dust them properly. Place them aside carefully.
Dusting: From Top to Bottom
Now that we’ve decluttered, it’s time to tackle the dust. Remember to work from top to bottom so you don’t have to re-clean areas you’ve already dusted.
1. Ceiling fans and light fixtures: Use a dusting brush or duster to remove dust from ceiling fans and light fixtures. Be careful when working at heights! I like to use a step stool for this.
2. Walls and baseboards: Dust the walls with a microfiber cloth or a vacuum cleaner with a brush attachment. Pay special attention to baseboards, as they tend to accumulate dust and dirt.
3. Shelves and furniture: Dust all shelves, tables, and other furniture surfaces with a microfiber cloth. Don’t forget to dust the undersides of shelves and tables!
4. Electronics: Use a dry microfiber cloth to dust your TV screen, speakers, and other electronic devices. Avoid using liquid cleaners on screens.
5. Window treatments: Dust blinds or vacuum curtains to remove dust and allergens. You can also wash curtains according to the care instructions.
6. Decorative items: Dust picture frames, vases, and other decorative items before placing them back on shelves and tables.
Cleaning Surfaces: Making Everything Shine
With the dusting done, it’s time to clean all the surfaces in your living room.
1. Coffee table and side tables: Wipe down the coffee table and side tables with an all-purpose cleaner or wood cleaner, depending on the material.
2. Shelves and cabinets: Clean the shelves and cabinets with an all-purpose cleaner. Pay attention to any spills or stains.
3. Windows and mirrors: Spray windows and mirrors with glass cleaner and wipe them clean with a microfiber cloth.
4. Glass tabletops: Clean glass tabletops with glass cleaner and a microfiber cloth.
5. Light switches and door handles: Wipe down light switches and door handles with an all-purpose cleaner to remove germs and fingerprints.
6. Fireplace (if applicable): Clean the fireplace according to the manufacturer’s instructions. Remove ashes and soot.
Upholstery Cleaning: Reviving Your Furniture
Our sofas and chairs often need a little extra love. Here’s how I tackle upholstery cleaning:
1. Vacuum: Start by vacuuming your sofa and chairs thoroughly to remove loose dirt and debris. Use the upholstery attachment to get into crevices and seams.
2. Spot clean: Treat any stains with an upholstery cleaner. Always test the cleaner on an inconspicuous area first to make sure it doesn’t damage the fabric. Follow the manufacturer’s instructions for application and removal.
3. Deep clean (optional): If your upholstery is heavily soiled, you may want to consider deep cleaning it with an upholstery cleaner or renting a carpet cleaner with an upholstery attachment. Again, always test the cleaner on an inconspicuous area first.
4. Deodorize: Sprinkle baking soda on your upholstery and let it sit for 30 minutes to absorb odors. Then, vacuum it up.
5. Leather furniture: If you have leather furniture, use a leather cleaner and conditioner to clean and protect the leather.
Carpet and Rug Cleaning: Freshening Up Your Floors
A clean carpet or rug can make a huge difference in the overall look and feel of your living room.
1. Vacuum: Vacuum your carpet or rug thoroughly to remove loose dirt and debris.
2. Spot clean: Treat any stains with a carpet cleaner. Always test the cleaner on an inconspicuous area first.
3. Deep clean (optional): If your carpet or rug is heavily soiled, you may want to consider deep cleaning it with a carpet cleaner. You can rent a carpet cleaner from most hardware stores or hire a professional carpet cleaning service.
4. Deodorize: Sprinkle baking soda on your carpet or rug and let it sit for 30 minutes to absorb odors. Then, vacuum it up.
5. Hardwood floors: If you have hardwood floors, sweep or vacuum them to remove loose dirt and debris. Then, mop them with a wood floor cleaner.
Finishing Touches: The Details That Matter
It’s the little things that really make a difference!
1. Arrange furniture: Put your furniture back in its place and arrange it in a way that is both functional and aesthetically pleasing.
2. Replace decorative items: Put your picture frames, vases, and other decorative items back on shelves and tables.
3. Fluff pillows and throws: Fluff your pillows and throws to make your living room feel cozy and inviting.
4. Open windows: Open the windows to air out the room and let in fresh air.
5. Light a candle or use an air freshener: Light a candle or use an air freshener to create a pleasant aroma.
6. Clean the vents: Remove the vent covers and vacuum them to remove dust. This will improve air quality. I use a screwdriver to remove them carefully.
7. Organize media: Neatly organize DVDs, Blu-rays, and video games. Consider using storage containers or shelves.
8. Tidy cables: Use cable ties or organizers to manage and hide unsightly cables behind electronics.
9. Empty trash cans: Ensure all trash cans are emptied and lined with fresh bags.
10. Final walkthrough: Do a final walkthrough to ensure everything is in its place and sparkling clean.
Maintaining Your Clean Living Room
Now that you’ve put in all this effort, you’ll want to keep your living room clean! Here are a few tips:
* Vacuum regularly: Vacuum your carpets and rugs at least once a week to prevent dirt and dust from building up.
* Dust frequently: Dust your furniture and surfaces at least once a week to keep them looking their best.
* Spot clean spills immediately: Clean up

Conclusion
So, there you have it! Transforming your living room from a cluttered chaos to a sparkling sanctuary is entirely within your reach, and this deep cleaning guide provides the roadmap. We’ve covered everything from decluttering strategies to tackling those often-overlooked grime hotspots. But why is this DIY deep clean a must-try? Because it’s more than just aesthetics; it’s about creating a healthier, more relaxing, and ultimately more enjoyable living space. A clean living room contributes to a clearer mind and a more peaceful home environment.
Think about it: less dust means fewer allergens circulating, leading to improved air quality and potentially fewer allergy flare-ups. A well-organized space reduces stress and promotes a sense of calm. And let’s be honest, who doesn’t feel a surge of satisfaction after conquering a cleaning challenge? This guide empowers you to take control of your living space and reap the rewards of a truly clean and organized home.
But don’t stop there! Feel free to adapt this guide to suit your specific needs and preferences. For example, if you’re particularly sensitive to certain cleaning products, consider using natural alternatives like vinegar, baking soda, and lemon juice. These ingredients are not only effective but also environmentally friendly and safe for your family and pets. You can also tailor the cleaning schedule to fit your lifestyle. Perhaps you prefer to tackle one task per day over the course of a week, or maybe you’re a weekend warrior who likes to dedicate a few hours to deep cleaning. The key is to find a system that works for you and stick with it.
Consider adding a touch of personalization to your cleaning routine. Infuse your cleaning solutions with essential oils like lavender or eucalyptus for a refreshing and aromatherapy-infused experience. Play your favorite music while you clean to make the process more enjoyable. And don’t forget to reward yourself after completing each task! A small treat or a relaxing activity can help you stay motivated and make deep cleaning feel less like a chore.
Another variation to consider is focusing on specific areas of your living room that require extra attention. If you have pets, you might want to invest in a pet hair remover tool and focus on cleaning upholstery and carpets. If you have young children, you might want to prioritize disinfecting surfaces and toys. And if you have a fireplace, you’ll definitely want to dedicate some time to cleaning the hearth and chimney.
Ultimately, the goal of this guide is to provide you with the tools and knowledge you need to create a living room that you love. So, roll up your sleeves, gather your supplies, and get ready to transform your space. We encourage you to try this **living room deep cleaning** guide and share your experiences with us. Let us know what worked well for you, what challenges you encountered, and any tips or tricks you discovered along the way. Your feedback will help us improve this guide and make it even more helpful for others. Share your before-and-after photos on social media using #LivingRoomDeepClean and inspire others to create their own sparkling sanctuaries. We can’t wait to see your amazing transformations!
Frequently Asked Questions (FAQ)
What’s the best way to start a living room deep clean?
The most effective way to start is by decluttering. Remove anything that doesn’t belong in the living room, such as toys, books, or clothing. This will give you a clear space to work with and make the cleaning process much easier. Next, gather all your cleaning supplies and tools in one place so you don’t have to waste time searching for them later. Finally, create a plan of attack. Decide which tasks you’ll tackle first and how you’ll approach each one. This will help you stay organized and focused throughout the cleaning process.
How often should I deep clean my living room?
Ideally, you should aim to deep clean your living room at least twice a year, typically in the spring and fall. However, the frequency may vary depending on your lifestyle and the amount of traffic your living room receives. If you have pets or young children, you may need to deep clean more often. Regular maintenance cleaning, such as vacuuming, dusting, and wiping down surfaces, should be done weekly to prevent dirt and grime from building up.
What are some essential cleaning supplies for a living room deep clean?
Here’s a list of essential cleaning supplies:
* All-purpose cleaner
* Glass cleaner
* Upholstery cleaner
* Carpet cleaner
* Dusting cloths (microfiber is best)
* Vacuum cleaner with attachments
* Mop and bucket
* Sponges
* Scrub brush
* Rubber gloves
* Trash bags
* Baking soda
* Vinegar
* Lemon juice
How do I clean upholstery effectively?
Before cleaning your upholstery, always check the manufacturer’s instructions for specific cleaning recommendations. Generally, you can start by vacuuming the upholstery to remove loose dirt and debris. Then, test the upholstery cleaner on a small, inconspicuous area to ensure it doesn’t damage the fabric. Apply the cleaner according to the instructions and gently scrub the upholstery with a soft brush or cloth. Blot the area with a clean, dry cloth to remove excess moisture. Allow the upholstery to air dry completely before using it. For stubborn stains, you may need to repeat the process or consult a professional upholstery cleaner.
What’s the best way to remove pet hair from furniture and carpets?
Pet hair can be a challenge to remove, but there are several effective methods. A vacuum cleaner with a pet hair attachment is a must-have. Use the attachment to vacuum upholstery, carpets, and rugs thoroughly. You can also use a lint roller or a rubber glove to pick up loose pet hair. For carpets, consider using a carpet rake to loosen embedded hair before vacuuming. Another trick is to dampen a sponge or cloth and wipe it across the surface to collect pet hair.
How can I get rid of lingering odors in my living room?
Lingering odors can be caused by various factors, such as pets, cooking, or mold. To eliminate odors, start by identifying the source. Clean any spills or messes immediately. Open windows and doors to ventilate the room. Place bowls of baking soda around the living room to absorb odors. You can also use an air purifier to filter out airborne particles and odors. For stubborn odors, consider using a fabric refresher spray or steam cleaning your carpets and upholstery.
How do I clean my windows and mirrors without streaks?
To achieve streak-free windows and mirrors, use a glass cleaner and a microfiber cloth. Spray the cleaner onto the surface and wipe it down with the cloth using a circular motion. Then, use a clean, dry microfiber cloth to buff the surface until it’s clear and streak-free. Avoid using paper towels, as they can leave lint behind. You can also use a homemade glass cleaner made from equal parts water and vinegar.
What are some natural cleaning alternatives I can use in my living room?
Natural cleaning alternatives are a great way to clean your living room without harsh chemicals. Vinegar is an excellent all-purpose cleaner and disinfectant. Baking soda is a natural deodorizer and abrasive cleaner. Lemon juice can be used to clean glass and remove stains. Essential oils can be added to cleaning solutions for a pleasant scent and added cleaning power. For example, you can mix vinegar and water in a spray bottle for an all-purpose cleaner, or use baking soda to scrub sinks and bathtubs.
How can I maintain a clean living room after deep cleaning?
Maintaining a clean living room after deep cleaning requires regular maintenance and a few simple habits. Make it a habit to vacuum or sweep the floors at least once a week. Dust surfaces regularly to prevent dust buildup. Wipe down spills and messes immediately. Declutter regularly to prevent clutter from accumulating. Encourage family members to put things away after using them. By following these simple tips, you can keep your living room clean and organized for longer.
What if I encounter mold during my deep clean?
If you discover mold during your deep clean, it’s important to address it promptly and safely. Small areas of mold can often be cleaned with a solution of bleach and water (always wear gloves and eye protection). However, for larger infestations, it’s best to consult a professional mold remediation service. Mold can pose health risks, so it’s crucial to handle it with care and ensure it’s completely removed.


Leave a Comment