

Growing cabbage without a garden? Absolutely! Forget the sprawling backyard – I’m here to tell you that fresh, crisp cabbage is within reach, even if your “garden” is a sunny windowsill or a cozy balcony. For centuries, cabbage has been a staple in diets around the world, from sauerkraut in Germany to kimchi in Korea, showcasing its versatility and nutritional power. But what if you’re short on space? That’s where this DIY guide comes in!
Let’s face it, not everyone has the luxury of a traditional garden. Apartment living, busy schedules, or simply a lack of green space can make the dream of homegrown vegetables seem impossible. But I’m here to show you it’s not! This article is packed with clever tricks and hacks to help you successfully growing cabbage without a garden. Imagine the satisfaction of harvesting your own cabbage, knowing exactly where it came from and how it was grown.
We’ll explore container gardening techniques, soil selection, sunlight requirements, and even pest control strategies tailored for small spaces. So, ditch the store-bought cabbage and get ready to embark on a rewarding journey of urban gardening. Let’s transform your limited space into a thriving cabbage patch!
Growing Cabbage Without a Garden: A Balcony Gardener’s Guide
Hey there, fellow plant enthusiasts! Dreaming of fresh, homegrown cabbage but lacking a sprawling garden? Don’t fret! You absolutely *can* cultivate these leafy greens even if your outdoor space is limited to a balcony, patio, or even a sunny windowsill. I’m going to walk you through everything you need to know to successfully grow cabbage in containers. Get ready for some delicious, homegrown coleslaw!
Choosing the Right Cabbage Variety
Not all cabbage varieties are created equal, especially when it comes to container gardening. You’ll want to opt for smaller, more compact varieties that won’t outgrow their pots. Here are a few of my favorites:
* ‘Dwarf Morden’: As the name suggests, this is a compact variety perfect for containers. It matures quickly and produces small, dense heads.
* ‘Golden Acre’: Another early-maturing variety that stays relatively small. It’s known for its sweet flavor.
* ‘Red Express’: If you’re looking for a pop of color, ‘Red Express’ is a great choice. It’s a smaller red cabbage variety that’s both beautiful and delicious.
* ‘Savoy Cabbage’: While some savoy varieties can get quite large, there are smaller cultivars available. Look for ones specifically bred for container gardening.
Gathering Your Supplies
Before we dive into the planting process, let’s make sure you have everything you need. Here’s a checklist:
* Cabbage Seeds or Seedlings: You can start from seed or purchase seedlings from your local nursery. Starting from seed gives you more control over the variety, but seedlings will give you a head start.
* Large Containers: Cabbage needs room to grow, so choose containers that are at least 12 inches in diameter and 12 inches deep. Larger is always better! Make sure your containers have drainage holes.
* High-Quality Potting Mix: Don’t use garden soil! It’s too heavy and doesn’t drain well in containers. Opt for a lightweight, well-draining potting mix.
* Slow-Release Fertilizer: Cabbage are heavy feeders, so a slow-release fertilizer will provide them with the nutrients they need throughout the growing season.
* Watering Can or Hose: You’ll need a way to water your cabbage regularly.
* Optional:
* Seed Starting Tray and Dome: If you’re starting from seed.
* Grow Lights: If you don’t have a sunny location.
* Organic Pest Control: Such as insecticidal soap or neem oil.
Starting from Seed vs. Seedlings
Deciding whether to start your cabbage from seed or purchase seedlings is a matter of personal preference and timing.
* Starting from Seed: This allows you to choose from a wider variety of cabbage types and is generally more economical. However, it requires more time and effort. You’ll need to start your seeds indoors 6-8 weeks before the last expected frost.
* Purchasing Seedlings: This is a quicker and easier option, especially if you’re short on time or space. Just make sure to choose healthy-looking seedlings with no signs of pests or diseases.
Planting Your Cabbage
Now for the fun part! Let’s get those cabbage plants in the ground (or, rather, in the container).
Starting from Seed (Indoor Sowing)
1. Prepare Your Seed Starting Tray: Fill your seed starting tray with a seed starting mix. Moisten the mix thoroughly.
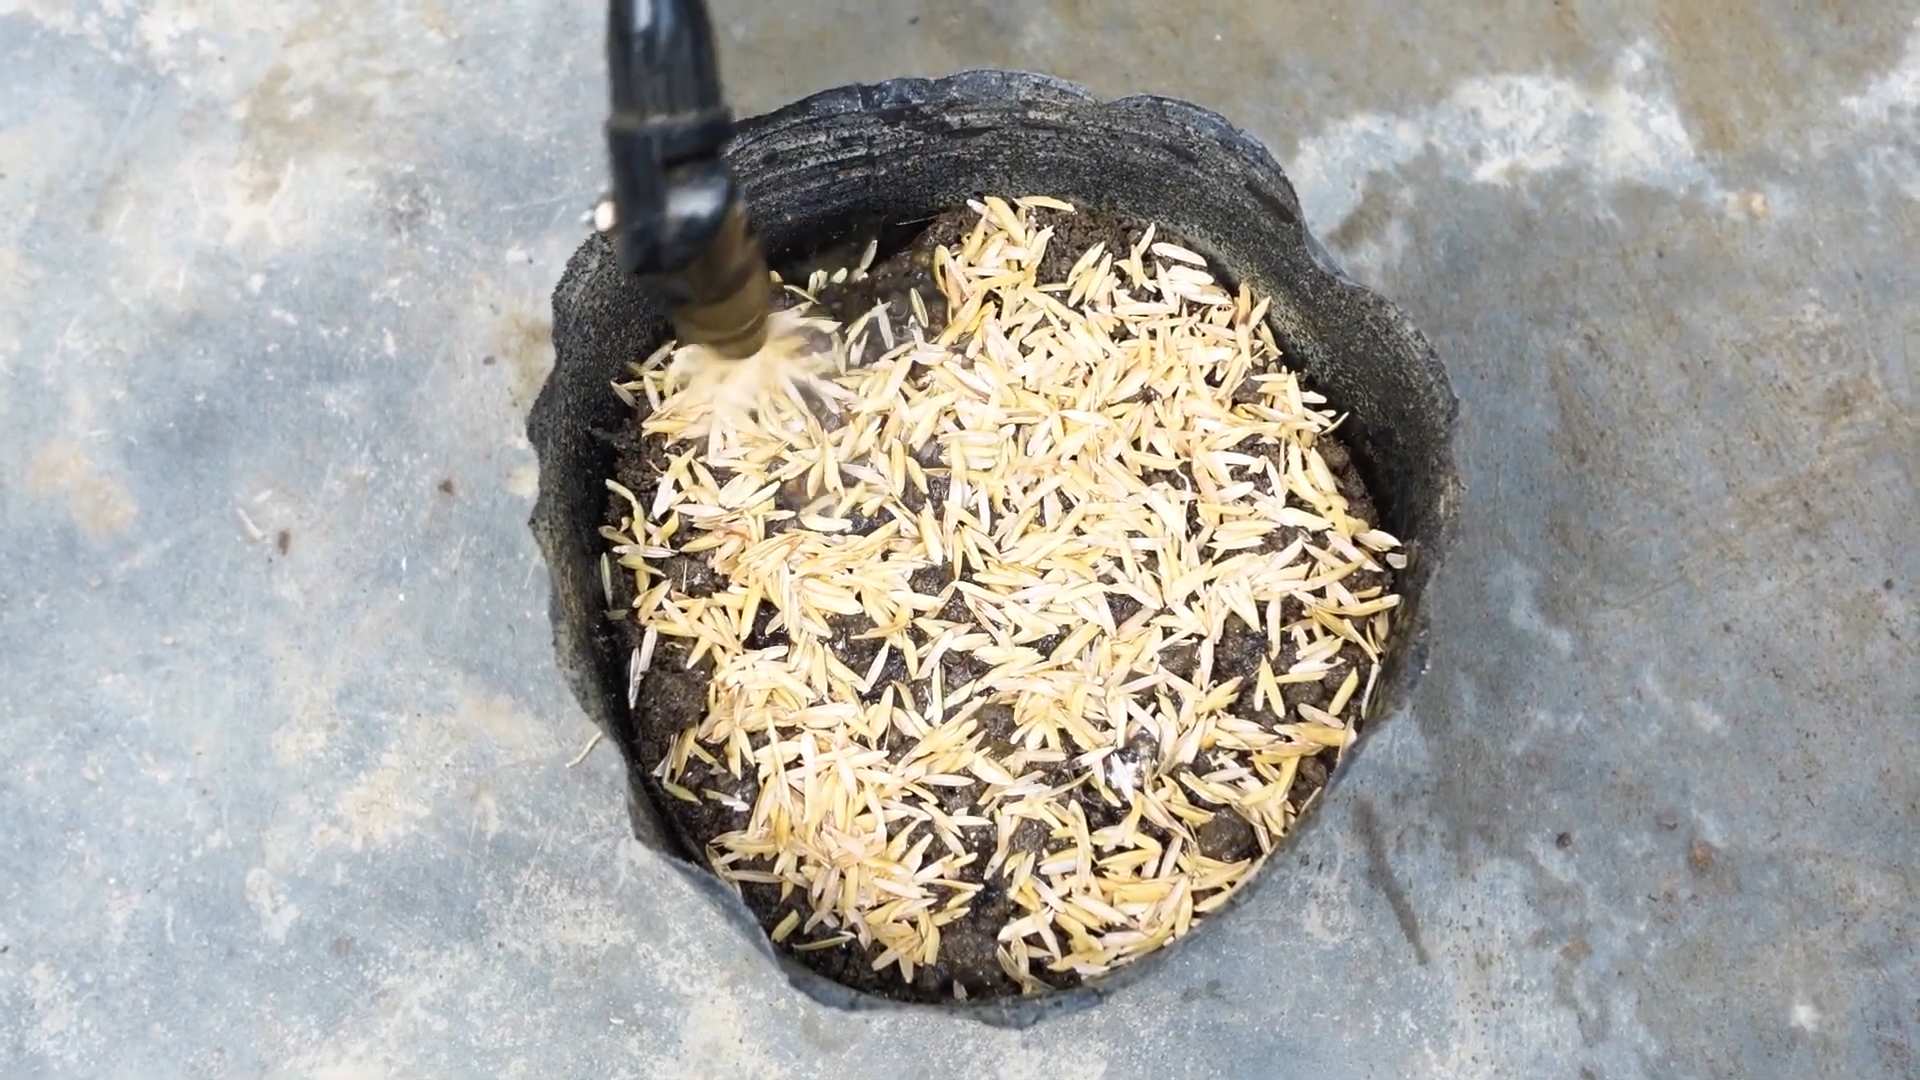
2. Sow the Seeds: Sow the cabbage seeds about 1/4 inch deep in the seed starting mix. Place 2-3 seeds per cell.
3. Cover and Water: Gently cover the seeds with more seed starting mix and water lightly.
4. Provide Warmth and Light: Place the seed starting tray in a warm location (around 70-75°F) and under grow lights or in a sunny window.
5. Keep the Soil Moist: Keep the seed starting mix consistently moist, but not soggy.
6. Thin Seedlings: Once the seedlings emerge and have their first true leaves (the second set of leaves), thin them to one seedling per cell. Choose the strongest, healthiest-looking seedling.
7. Harden Off Seedlings: Before transplanting your seedlings outdoors, you’ll need to “harden them off.” This process gradually acclimates them to outdoor conditions. Start by placing the seedlings outdoors in a sheltered location for a few hours each day, gradually increasing the amount of time they spend outdoors over the course of a week.
8. Transplant Seedlings: Once the seedlings are hardened off, they’re ready to be transplanted into their containers.
Planting Seedlings (Direct Planting)
1. Prepare Your Container: Fill your container with high-quality potting mix, leaving about an inch or two of space at the top.
2. Dig a Hole: Dig a hole in the center of the container that’s large enough to accommodate the seedling’s root ball.
3. Gently Remove the Seedling: Gently remove the seedling from its nursery pot, being careful not to damage the roots. If the roots are pot-bound (tightly circling the pot), gently loosen them before planting.
4. Place the Seedling in the Hole: Place the seedling in the hole, making sure that the top of the root ball is level with the surrounding soil.
5. Fill in the Hole: Fill in the hole with potting mix, gently firming the soil around the seedling.
6. Water Thoroughly: Water the seedling thoroughly after planting.
Caring for Your Container Cabbage
Now that your cabbage is planted, it’s time to provide it with the care it needs to thrive.
* Sunlight: Cabbage needs at least 6 hours of sunlight per day. If you don’t have a sunny location, you may need to supplement with grow lights.
* Watering: Water your cabbage regularly, especially during hot, dry weather. The soil should be consistently moist, but not soggy. Check the soil moisture by sticking your finger into the soil. If the top inch feels dry, it’s time to water.
* Fertilizing: Cabbage are heavy feeders and need regular fertilization. Apply a slow-release fertilizer at planting time and then supplement with a liquid fertilizer every 2-3 weeks. Follow the instructions on the fertilizer label.
* Pest Control: Cabbage are susceptible to a variety of pests, including cabbage worms, aphids, and flea beetles. Inspect your plants regularly for signs of pests and take action promptly. You can use organic pest control methods, such as insecticidal soap or neem oil, to control pests. You can also handpick cabbage worms off the plants.
* Weed Control: Keep your containers free of weeds, which can compete with your cabbage for nutrients and water.
* Crop Rotation: If you’re growing cabbage in the same containers year after year, it’s important to practice crop rotation. This means planting different types of vegetables in the containers each year to prevent the buildup of soilborne diseases.
Harvesting Your Cabbage
The moment you’ve been waiting for! Harvesting your homegrown cabbage.
* Timing: Cabbage is typically ready to harvest 60-100 days after planting, depending on the variety. The head should be firm and dense.
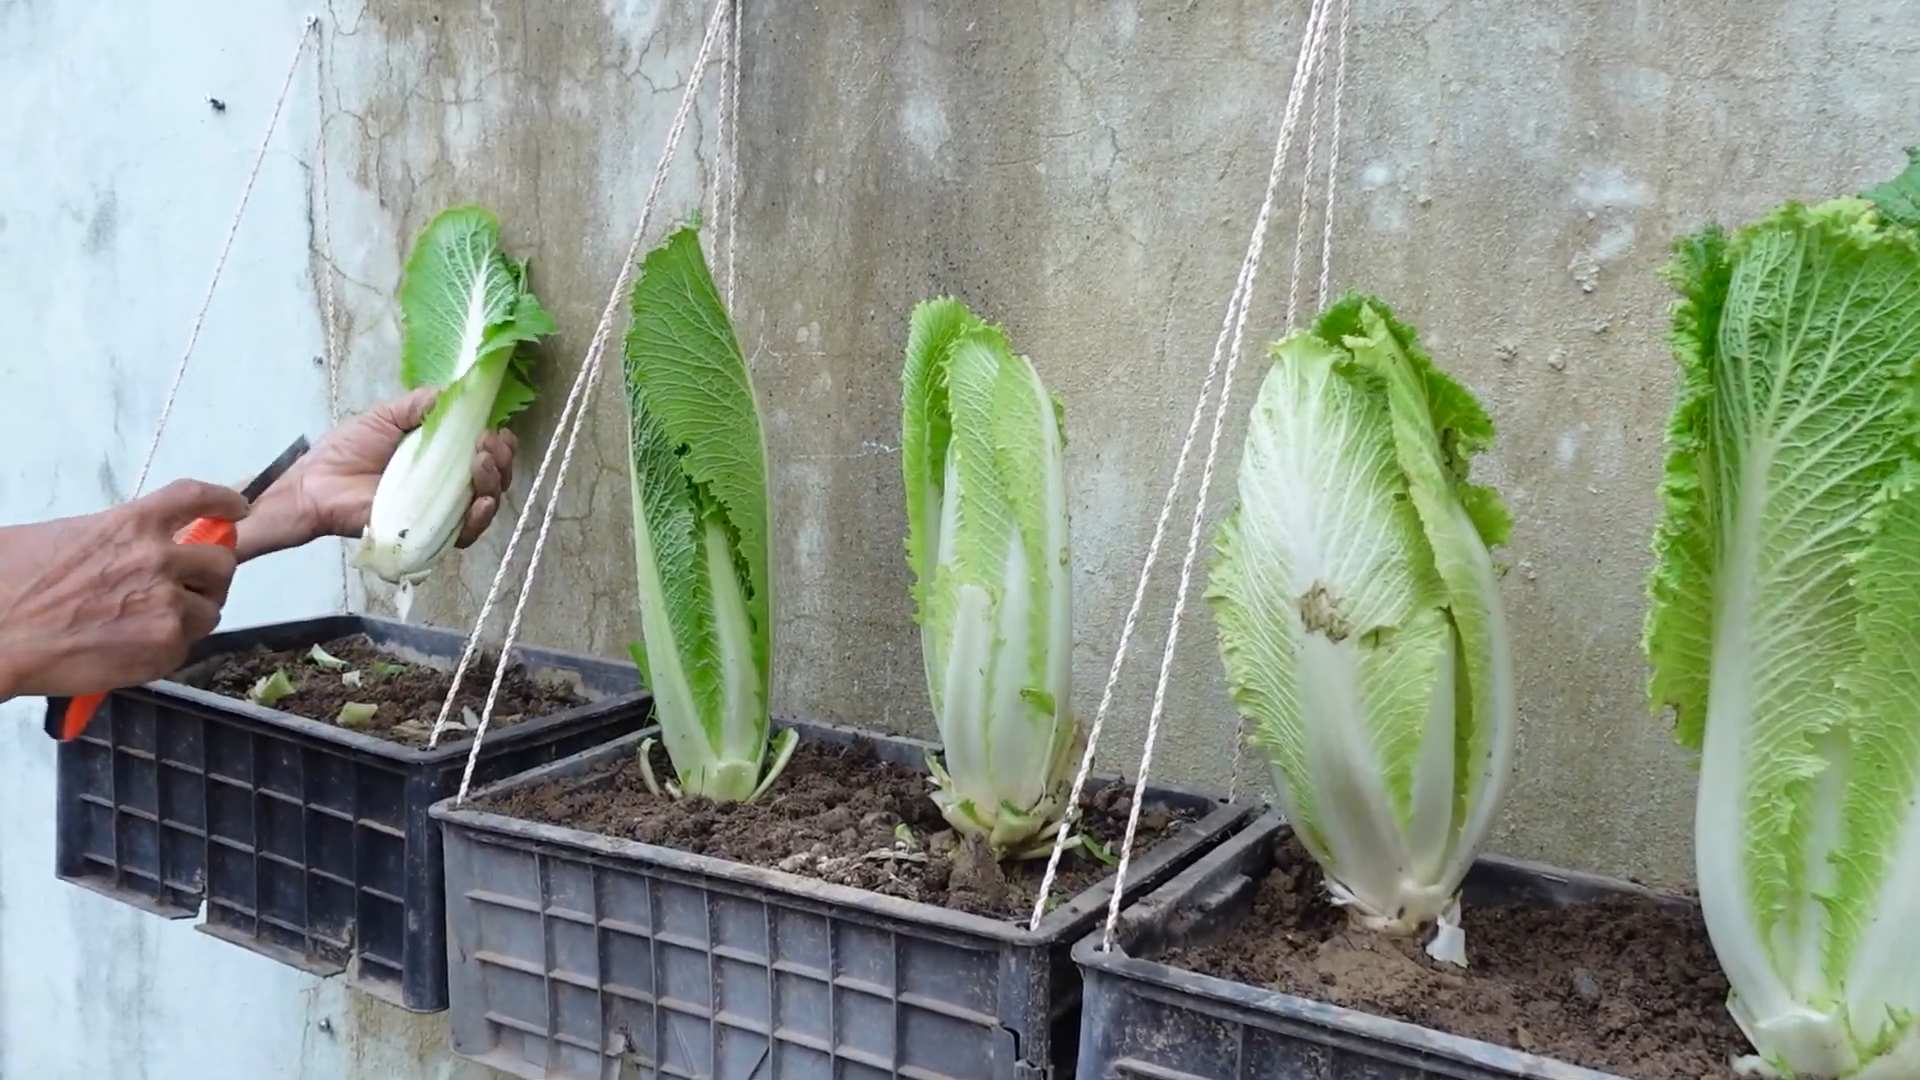
* Harvesting: To harvest your cabbage, use a sharp knife to cut the head from the stem, leaving a few outer leaves intact.
* Storage: Freshly harvested cabbage can be stored in the refrigerator for several weeks.
Troubleshooting Common Problems
Even with the best care, you may encounter some problems while growing cabbage in containers. Here are a few common issues and how to address them:
* Yellowing Leaves: This can be caused by a variety of factors, including nutrient deficiencies, overwatering, or underwatering. Check the soil moisture and fertilize your plants if necessary.
* Stunted Growth: This can be caused by a lack of sunlight, poor soil, or pests. Make sure your plants are getting enough sunlight and fertilize them regularly. Check for pests and take action if necessary.
* Cabbage Worms: These green caterpillars can quickly devour your cabbage plants. Handpick them off the plants or use insecticidal soap or Bt (Bacillus thuringiensis) to control them.
* Aphids: These small, sap-sucking insects can weaken your plants. Spray them with insecticidal soap or neem oil.
* Bolting: This occurs when the cabbage plant prematurely produces a flower stalk. It’s usually caused by stress, such as hot weather or inconsistent watering. To prevent bolting, provide your plants with consistent moisture and shade during hot weather.
Tips for Success
Here are a few extra tips to help you succeed with container
Conclusion
So, there you have it! Growing cabbage without a garden isn’t just a whimsical idea; it’s a genuinely achievable feat that opens up a world of fresh, homegrown goodness, even if you’re limited to a balcony, patio, or even a sunny windowsill. We’ve walked you through the process, from selecting the right container and soil to nurturing your cabbage plants to maturity. This method of container gardening allows you to bypass the limitations of traditional gardening, such as poor soil quality or lack of space.
Why is this DIY trick a must-try? Because it empowers you to take control of your food source, enjoy the satisfaction of nurturing a plant from seedling to harvest, and savor the unparalleled flavor of freshly grown cabbage. Imagine the crisp, sweet taste of your own homegrown cabbage in your favorite coleslaw, stir-fry, or stuffed cabbage rolls. It’s a taste that store-bought cabbage simply can’t replicate.
But the benefits extend beyond just taste. Growing your own cabbage is a sustainable practice that reduces your carbon footprint and minimizes your reliance on commercially grown produce. You’ll also know exactly what goes into your food, avoiding potentially harmful pesticides and herbicides. Plus, it’s a fantastic way to connect with nature, even in the heart of the city.
Looking for variations? Absolutely! Experiment with different varieties of cabbage to find your favorites. Red cabbage adds a vibrant splash of color to your dishes, while savoy cabbage offers a more delicate flavor and texture. You can also try companion planting in your containers. Marigolds, for example, can help deter pests, while dill can attract beneficial insects. Consider adding a layer of mulch to help retain moisture and suppress weeds.
Don’t be afraid to get creative with your container choices, too. While we’ve recommended specific sizes, you can repurpose old buckets, tubs, or even grow bags. Just make sure your chosen container has adequate drainage.
We wholeheartedly encourage you to give this DIY trick a try. It’s a rewarding experience that will bring fresh, delicious cabbage to your table, regardless of your gardening space. And most importantly, we want to hear about your experiences! Share your photos, tips, and challenges in the comments below. Let’s build a community of container cabbage growers and inspire others to embrace the joy of homegrown food. Let us know what kind of fertilizer you used, what kind of soil worked best, and any pest control methods you found effective. Your insights could be invaluable to other aspiring cabbage gardeners.
So, grab your seeds, soil, and containers, and embark on your cabbage-growing adventure today! You’ll be amazed at what you can achieve, even without a traditional garden. Remember, growing cabbage without a garden is not just possible; it’s a delicious and rewarding experience waiting to be discovered.
Frequently Asked Questions (FAQ)
What is the best variety of cabbage to grow in a container?
The best cabbage varieties for container gardening are generally smaller, more compact types. Some excellent choices include:
* **Dwarf varieties:** Look for varieties specifically labeled as “dwarf” or “miniature.” These are bred to stay small and are well-suited for containers.
* **Early varieties:** Early-maturing varieties, such as ‘Golden Acre’ or ‘Early Jersey Wakefield,’ are a good choice because they have a shorter growing season, which is beneficial in containers.
* **Red cabbage:** Red cabbage varieties tend to be smaller than green cabbage and can add visual appeal to your container garden.
* **Savoy cabbage:** Savoy cabbage has a milder flavor and a more delicate texture, and some varieties are well-suited for containers.
Consider your local climate and growing conditions when selecting a variety. Check the seed packet or plant label for information on size, maturity time, and disease resistance.
How often should I water my container cabbage plants?
Watering frequency depends on several factors, including the size of your container, the type of soil, the weather, and the stage of growth of your cabbage plants. As a general rule, water deeply whenever the top inch of soil feels dry to the touch.
During hot, dry weather, you may need to water daily or even twice a day. In cooler, wetter weather, you may only need to water every few days. Check the soil moisture regularly and adjust your watering schedule accordingly.
Avoid overwatering, as this can lead to root rot. Make sure your container has adequate drainage to prevent water from pooling at the bottom.
What kind of fertilizer should I use for container cabbage?
Cabbage plants are heavy feeders and require regular fertilization to thrive. Use a balanced fertilizer with an NPK ratio (nitrogen, phosphorus, potassium) of around 10-10-10 or 14-14-14.
You can use either a slow-release granular fertilizer or a liquid fertilizer. Slow-release fertilizers provide a steady supply of nutrients over a longer period, while liquid fertilizers need to be applied more frequently.
If using a slow-release fertilizer, incorporate it into the soil at planting time. If using a liquid fertilizer, apply it every 2-3 weeks, following the instructions on the product label.
Organic options include compost tea, fish emulsion, and seaweed extract. These provide essential nutrients and also improve soil health.
How do I protect my container cabbage plants from pests?
Cabbage plants are susceptible to several pests, including cabbage worms, aphids, and flea beetles. Here are some tips for protecting your plants:
* **Inspect your plants regularly:** Check for signs of pests, such as holes in the leaves, sticky residue, or visible insects.
* **Handpick pests:** If you find any pests, remove them by hand and dispose of them.
* **Use insecticidal soap:** Insecticidal soap is an effective and relatively safe way to control aphids and other soft-bodied insects.
* **Apply Bacillus thuringiensis (Bt):** Bt is a natural bacterium that is toxic to cabbage worms. Apply it to the leaves of your plants according to the product label.
* **Cover your plants with row covers:** Row covers are lightweight fabric covers that can protect your plants from pests.
* **Companion planting:** Plant marigolds or other pest-repelling plants near your cabbage to deter pests.
How much sunlight do container cabbage plants need?
Cabbage plants need at least 6 hours of direct sunlight per day to thrive. Choose a sunny location for your container garden. If you don’t have a spot that gets full sun, try to provide at least 4-5 hours of direct sunlight and supplement with artificial light if necessary.
How do I know when my cabbage is ready to harvest?
Cabbage is ready to harvest when the head is firm and feels solid when squeezed. The size of the head will vary depending on the variety. Check the seed packet or plant label for information on the expected size of your cabbage.
To harvest, use a sharp knife to cut the head from the stem, leaving a few outer leaves intact.
Can I grow cabbage in the same container year after year?
It’s generally not recommended to grow cabbage in the same container year after year, as this can deplete the soil of nutrients and increase the risk of disease. It’s best to replace the soil in your container each year or rotate your crops. If you choose to reuse the soil, amend it with compost and fertilizer to replenish nutrients.
What do I do if my cabbage head splits?
Cabbage heads can sometimes split if they receive too much water after a period of drought. To prevent splitting, water your plants consistently and avoid letting the soil dry out completely. If your cabbage head does split, harvest it immediately to prevent it from rotting. You can still eat the cabbage, but it may not store as well.


Leave a Comment