

Growing corn in sacks might sound unconventional, but trust me, it’s a game-changer for any home gardener, especially if you’re short on space! Imagine harvesting plump, juicy corn right from your balcony or patio – that’s the magic we’re unlocking today. For centuries, corn has been a staple crop, deeply woven into the cultures of the Americas, providing sustenance and playing a vital role in traditions. Now, we’re taking this ancient grain and adapting its cultivation to modern, urban living.
Why should you try this DIY trick? Well, traditional cornfields require a lot of land, something most of us simply don’t have. Growing corn in sacks offers a compact, efficient solution, allowing you to enjoy fresh, homegrown corn even in the smallest of spaces. Plus, it’s a fantastic way to control soil conditions, prevent weeds, and even move your corn plants to chase the sun! I’m excited to share my favorite tips and tricks for successful sack corn cultivation, so let’s dive in and get our hands dirty!
Growing Corn in Sacks: A DIY Guide to Bountiful Harvests in Small Spaces
Hey there, fellow gardening enthusiasts! Ever dreamt of sinking your teeth into sweet, juicy corn fresh from your own garden, but thought you didn’t have the space? Well, I’m here to tell you that you absolutely can! Growing corn in sacks is a fantastic way to enjoy homegrown goodness, even if you only have a balcony, patio, or small yard. It’s a surprisingly simple and rewarding project, and I’m excited to walk you through it.
What You’ll Need
Before we dive in, let’s gather our supplies. Here’s a comprehensive list of everything you’ll need to successfully grow corn in sacks:
* Large, sturdy sacks: Think burlap sacks, heavy-duty plastic grow bags (at least 20 gallons), or even repurposed feed sacks. The bigger, the better, as corn roots need room to spread.
* High-quality potting mix: Don’t skimp on this! A well-draining, nutrient-rich potting mix is crucial for healthy corn growth. Avoid using garden soil directly, as it can compact and hinder drainage.
* Corn seeds: Choose a variety that’s well-suited to your climate and growing season. Sweet corn is a popular choice, but you can also experiment with other varieties like popcorn or ornamental corn.
* Slow-release fertilizer: Corn is a heavy feeder, so a slow-release fertilizer will provide a steady supply of nutrients throughout the growing season. Look for a balanced formula (e.g., 10-10-10) or one specifically designed for vegetables.
* Water-soluble fertilizer: This will be used for supplemental feeding during the growing season.
* Watering can or hose: Essential for keeping your corn plants hydrated.
* Trowel or shovel: For filling the sacks with potting mix and planting the seeds.
* Stakes or bamboo poles (optional): To provide support for the corn stalks, especially in windy areas.
* Twine or plant ties (optional): To secure the stalks to the stakes.
* Pest control (optional): Depending on your area, you may need to protect your corn from pests like corn earworms or aphids. Organic options like neem oil or insecticidal soap are good choices.
* Gloves: To protect your hands.
Preparing the Sacks
This is a crucial step to ensure proper drainage and stability for your corn plants.
1. Choose your location: Corn needs at least 6-8 hours of direct sunlight per day, so select a sunny spot for your sacks. Make sure the location is also sheltered from strong winds, if possible.
2. Prepare the sacks: If you’re using burlap sacks, you may want to line them with a plastic bag (with drainage holes) to prevent the potting mix from drying out too quickly. For plastic grow bags, ensure they have adequate drainage holes at the bottom. If not, create some yourself.
3. Add drainage material: Place a layer of gravel or small rocks at the bottom of each sack to improve drainage. This will prevent the roots from sitting in water, which can lead to root rot. A layer of about 2-3 inches should be sufficient.
4. Fill the sacks with potting mix: Gradually fill the sacks with the high-quality potting mix, leaving about 4-6 inches of space at the top. As you fill, gently compact the soil to remove any air pockets.
5. Incorporate slow-release fertilizer: Mix the slow-release fertilizer into the top few inches of the potting mix, following the instructions on the fertilizer package. This will provide a steady supply of nutrients to your corn plants as they grow.
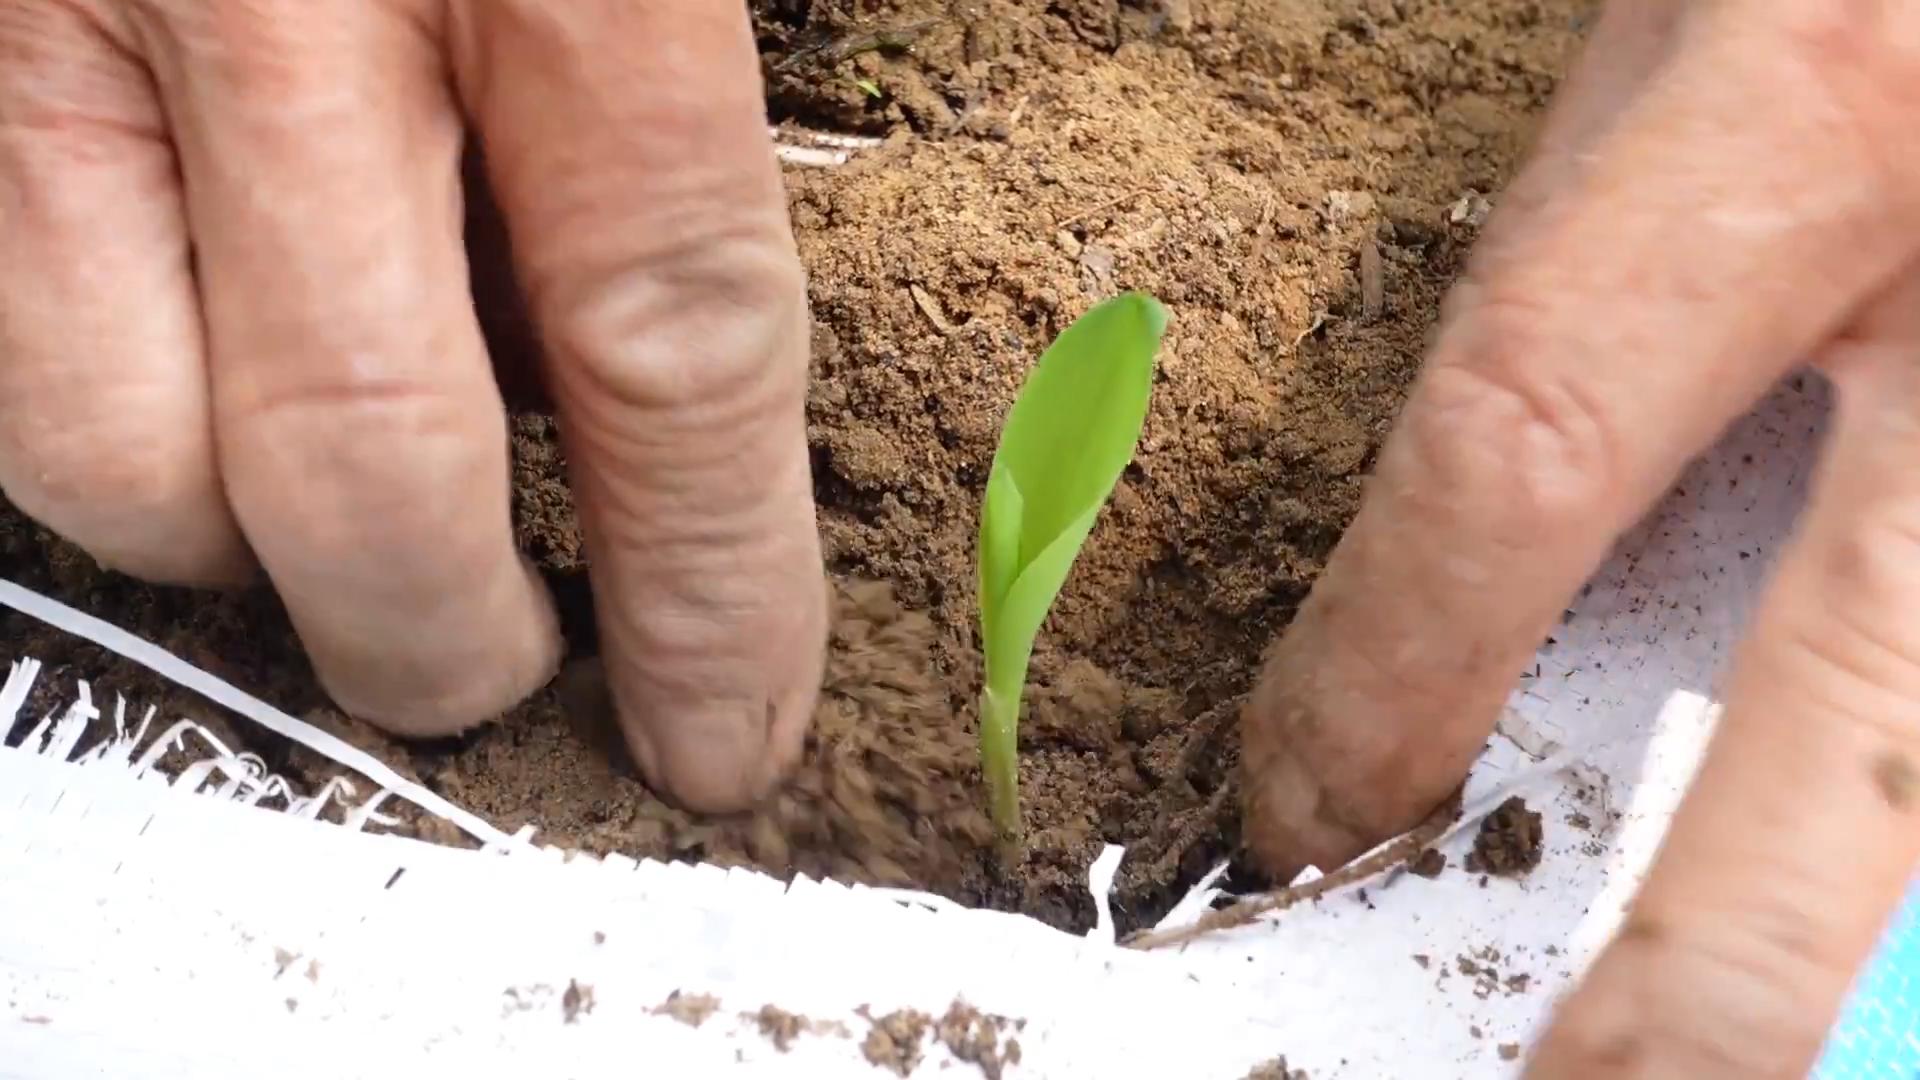
Planting the Corn Seeds
Now comes the fun part – planting the seeds!
1. Determine planting density: A good rule of thumb is to plant 4-6 corn plants per sack, depending on the size of the sack and the variety of corn you’re growing. Overcrowding can lead to smaller ears of corn.
2. Sow the seeds: Make small holes in the potting mix, about 1-2 inches deep, spacing them evenly around the sack. Place 2-3 seeds in each hole to increase the chances of germination.
3. Cover the seeds: Gently cover the seeds with potting mix and lightly water the soil.
4. Label the sacks: Use a permanent marker to label each sack with the variety of corn you’re growing and the date of planting. This will help you keep track of your progress.
Caring for Your Corn Plants
Consistent care is essential for healthy corn growth and a bountiful harvest.
1. Watering: Corn needs consistent moisture, especially during hot weather. Water deeply whenever the top inch of soil feels dry to the touch. Avoid overwatering, as this can lead to root rot. Aim to water in the morning so the foliage has time to dry before nightfall, reducing the risk of fungal diseases.
2. Fertilizing: In addition to the slow-release fertilizer, supplement your corn plants with a water-soluble fertilizer every 2-3 weeks. Follow the instructions on the fertilizer package. A fertilizer higher in nitrogen early in the season will promote leafy growth, while a fertilizer higher in phosphorus and potassium later in the season will encourage ear development.
3. Weeding: Keep the sacks free of weeds, as they can compete with the corn plants for nutrients and water. Hand-pull any weeds that appear.
4. Pollination: Corn is wind-pollinated, so it’s important to ensure good air circulation around your plants. If you’re growing corn in a sheltered location, you may need to hand-pollinate the plants. To do this, gently shake the tassels (the male flowers at the top of the plant) to release pollen, and then brush the pollen onto the silks (the female flowers that emerge from the developing ears of corn). Repeat this process for several days to ensure adequate pollination.
5. Pest and disease control: Monitor your corn plants regularly for signs of pests or diseases. If you notice any problems, take action promptly. Organic options like neem oil or insecticidal soap can be effective for controlling many common pests. For fungal diseases, ensure good air circulation and avoid overwatering.
6. Support: As the corn stalks grow taller, they may become susceptible to wind damage. Provide support by staking the plants with bamboo poles or other sturdy stakes. Use twine or plant ties to secure the stalks to the stakes.
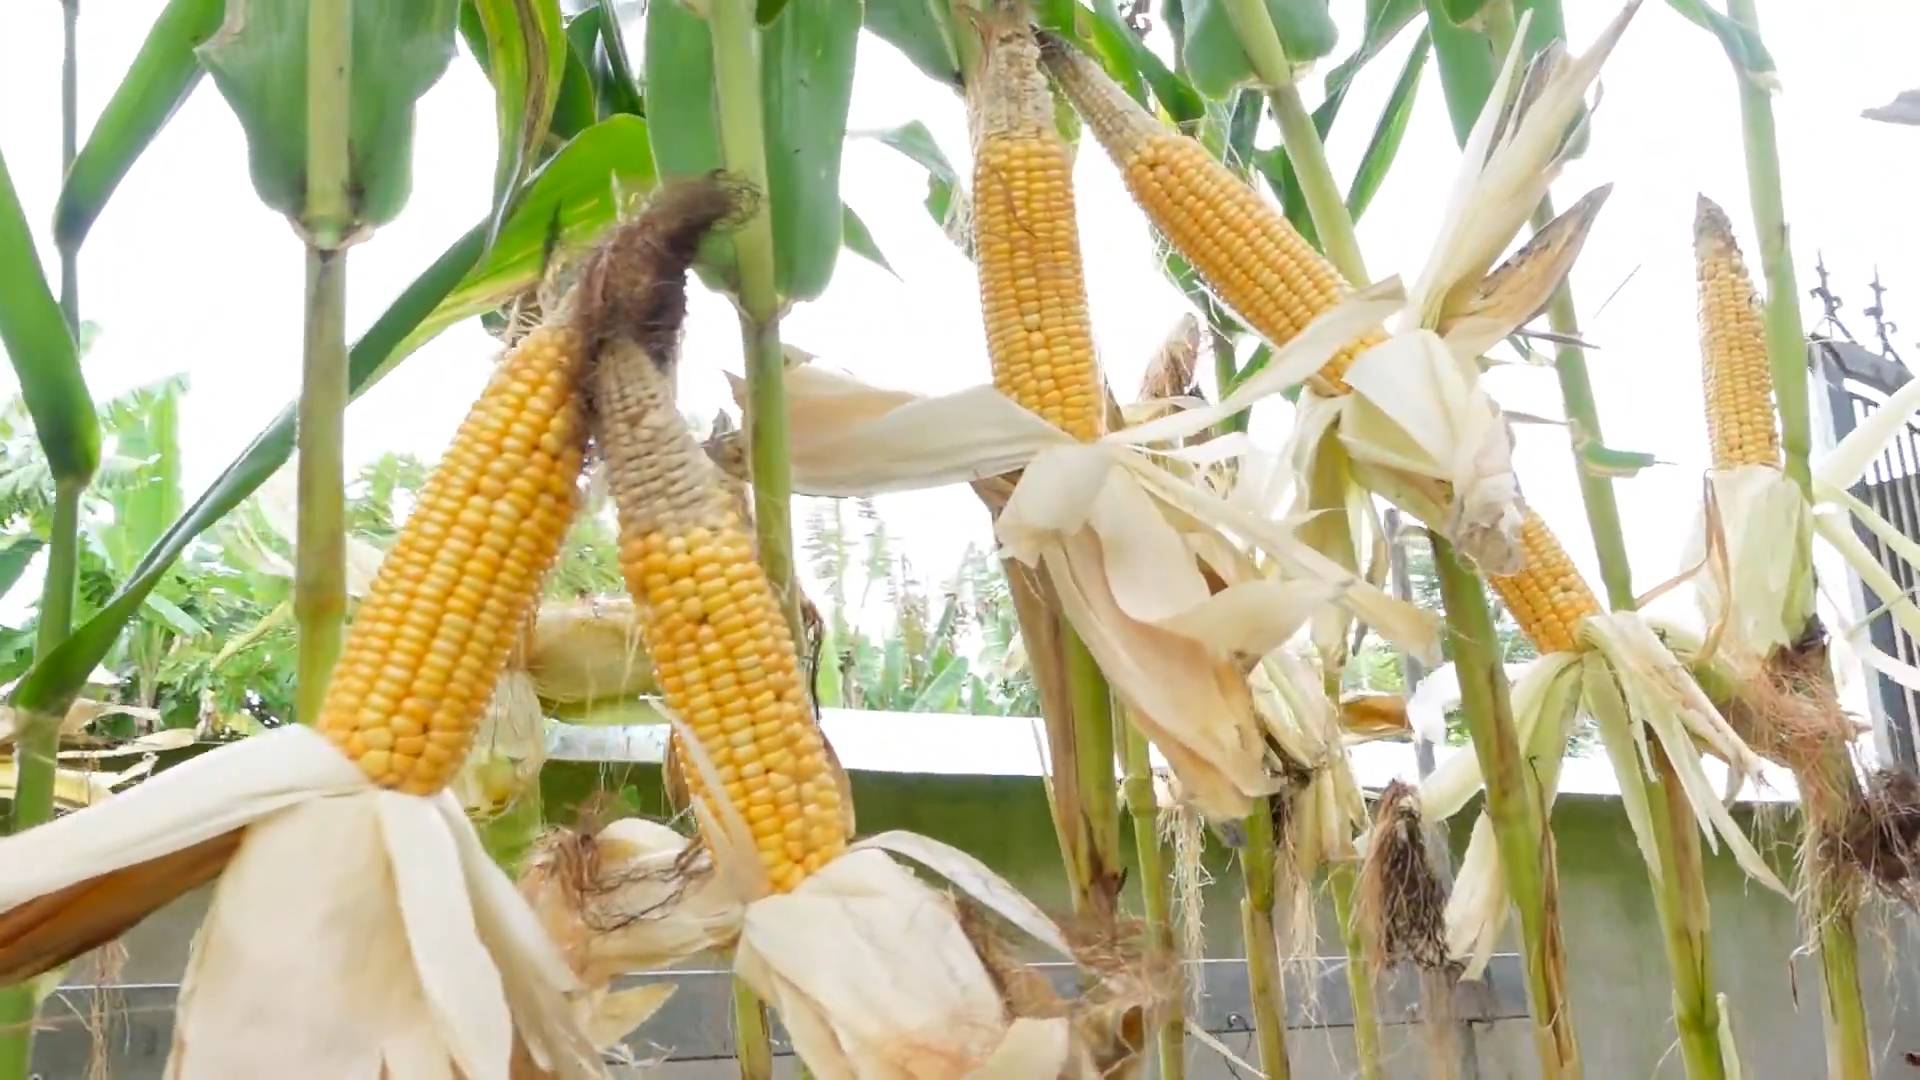
Harvesting Your Corn
The moment you’ve been waiting for! Knowing when to harvest corn is key to enjoying its sweet, juicy flavor.
1. Check the silks: The silks should turn brown and dry. This is a good indication that the ears of corn are nearing maturity.
2. Feel the ears: Gently squeeze the ears of corn. They should feel plump and full.
3. Peel back the husk: Carefully peel back a small portion of the husk to expose the kernels. The kernels should be plump and milky. If they are watery, the corn is not yet ripe. If they are hard and doughy, the corn is overripe.
4. Harvest the ears: Once the corn is ripe, grasp the ear firmly and twist it downward to snap it off the stalk.
5. Enjoy your harvest: Eat your freshly harvested corn as soon as possible for the best flavor. You can grill it, boil it, roast it, or use it in your favorite recipes.
Troubleshooting
Even with the best planning, you might encounter a few challenges along the way. Here are some common problems and how to address them:
* Poor germination: If your corn seeds don’t germinate, it could be due to several factors, such as old seeds, cold soil temperatures, or overwatering. Try planting fresh seeds in warmer soil and avoid overwatering.
* Yellowing leaves: Yellowing leaves can indicate a nutrient deficiency, especially nitrogen. Fertilize your corn plants with a balanced fertilizer or one specifically designed for vegetables.
* Stunted growth: Stunted growth can be caused by a variety of factors, such as poor soil, lack of sunlight, or pest infestations. Ensure your corn plants have access to high-quality potting mix, adequate sunlight, and are protected from pests.
* Corn earworms: Corn earworms are common pests that can damage the ears of corn. Handpick the worms from the ears or use an organic insecticide like Bacillus thuringiensis (Bt).
* Poor pollination: If you’re not getting good ear development, it could be due to poor pollination. Hand-pollinate the plants as described above.
Tips for Success
Here are a few extra tips to help you succeed in growing corn in sacks:
* Choose the right variety: Select a corn variety that’s well-suited to your climate and growing season.
* Start with good soil: Use a high-quality potting mix that’s well-draining and nutrient
Conclusion
So, there you have it! Growing corn in sacks isn’t just a quirky gardening experiment; it’s a game-changer for anyone with limited space, challenging soil, or a desire for a more controlled growing environment. We’ve walked you through the process, highlighting the benefits and providing practical tips to ensure your success. But why is this DIY trick a must-try?
Firstly, the space-saving aspect is undeniable. Imagine enjoying fresh, homegrown corn even if you only have a balcony, patio, or small yard. Traditional cornfields require significant acreage, but sack gardening allows you to cultivate a surprisingly bountiful harvest in a fraction of the space. This makes it ideal for urban gardeners, apartment dwellers, and anyone looking to maximize their yield without expanding their garden footprint.
Secondly, the control you gain over the growing environment is invaluable. By using high-quality potting mix in your sacks, you bypass the limitations of poor or contaminated soil. You can tailor the soil composition to perfectly suit the needs of your corn plants, ensuring optimal nutrient availability and drainage. This leads to healthier, more vigorous plants and ultimately, a more abundant harvest.
Thirdly, sack gardening offers a level of portability that traditional gardening simply can’t match. Need to move your corn plants to a sunnier spot? No problem! Simply relocate the sacks. Facing an unexpected frost? Easily move your plants indoors or to a sheltered location. This flexibility allows you to protect your precious corn crop from the elements and extend your growing season.
But the benefits don’t stop there. Sack gardening can also help to reduce weed pressure, minimize soil erosion, and even deter certain pests. The elevated growing environment makes it more difficult for weeds to take root, and the enclosed nature of the sacks helps to prevent soil runoff.
Now, let’s talk about variations. While we’ve focused on the standard sack gardening method, there are plenty of ways to customize the process to suit your specific needs and preferences. For example, you could experiment with different types of sacks, such as burlap sacks, grow bags, or even repurposed feed sacks. You could also try adding different amendments to your potting mix, such as compost, worm castings, or bone meal, to further enhance the nutrient content.
Another interesting variation is to incorporate companion planting into your sack garden. Consider planting herbs like basil or marigolds alongside your corn to deter pests and attract beneficial insects. You could also try intercropping with legumes like beans or peas to fix nitrogen in the soil and improve overall soil health.
Don’t be afraid to experiment and find what works best for you. Gardening is a journey of discovery, and there’s always something new to learn.
We wholeheartedly encourage you to give this DIY trick a try. Growing corn in sacks is a rewarding and surprisingly simple way to enjoy fresh, homegrown corn, regardless of your space limitations or gardening experience. It’s a fantastic project for families, a great way to get kids involved in gardening, and a satisfying way to connect with nature.
Once you’ve tried it, we’d love to hear about your experience! Share your photos, tips, and stories in the comments section below. Let’s build a community of sack gardeners and learn from each other’s successes and challenges. Together, we can unlock the full potential of this innovative gardening technique and enjoy the delicious rewards of our labor. So, grab some sacks, some potting mix, and some corn seeds, and get ready to embark on a gardening adventure! Happy growing!
Frequently Asked Questions (FAQ)
What kind of sacks are best for growing corn?
The best sacks for growing corn are those that are durable, breathable, and large enough to accommodate the root system of mature corn plants. Burlap sacks are a popular choice because they are biodegradable and allow for good air circulation. Grow bags, made from fabric, are another excellent option as they provide even better drainage and aeration. Avoid using plastic sacks, as they can trap moisture and lead to root rot. The size of the sack should be at least 15-20 gallons to provide enough space for the corn roots to develop properly. Consider the weight of the sack when filled with soil, and choose a material that can withstand the weight without tearing.
How much sunlight does corn grown in sacks need?
Corn requires at least 6-8 hours of direct sunlight per day to thrive. When growing corn in sacks, ensure that you place the sacks in a location that receives ample sunlight throughout the day. If you live in an area with limited sunlight, you may need to supplement with grow lights. Monitor your plants closely and adjust their position as needed to ensure they are getting enough light. Rotate the sacks periodically to ensure that all sides of the plants receive equal exposure to sunlight.
What type of soil is best for growing corn in sacks?
The best type of soil for growing corn in sacks is a well-draining, nutrient-rich potting mix. Avoid using garden soil, as it can be too heavy and compact, hindering root growth. A good potting mix should contain a blend of peat moss, perlite, and vermiculite to provide adequate drainage and aeration. You can also amend the potting mix with compost, worm castings, or other organic matter to boost its nutrient content. Corn is a heavy feeder, so it’s important to provide it with a soil that is rich in nitrogen, phosphorus, and potassium. Consider adding a slow-release fertilizer to the potting mix at planting time to provide a steady supply of nutrients throughout the growing season.
How often should I water corn grown in sacks?
Corn grown in sacks needs to be watered regularly, especially during hot and dry weather. The frequency of watering will depend on the weather conditions, the size of the sacks, and the type of potting mix you are using. As a general rule, water deeply whenever the top inch of soil feels dry to the touch. Avoid overwatering, as this can lead to root rot. Ensure that the sacks have adequate drainage to prevent water from pooling at the bottom. During periods of heavy rain, you may need to protect the sacks from excessive moisture.
How do I fertilize corn grown in sacks?
Corn is a heavy feeder and requires regular fertilization to produce a good harvest. You can fertilize corn grown in sacks using a variety of methods, including slow-release fertilizers, liquid fertilizers, and organic amendments. A slow-release fertilizer can be added to the potting mix at planting time to provide a steady supply of nutrients throughout the growing season. Liquid fertilizers can be applied every 2-3 weeks to supplement the slow-release fertilizer. Organic amendments, such as compost tea or fish emulsion, can also be used to provide additional nutrients and improve soil health. Choose a fertilizer that is specifically formulated for corn or other heavy-feeding plants. Follow the instructions on the fertilizer label carefully to avoid over-fertilizing.
What are some common pests and diseases that affect corn grown in sacks?
Corn grown in sacks can be susceptible to a variety of pests and diseases, including aphids, corn earworms, and fungal diseases. To prevent pest and disease problems, choose disease-resistant corn varieties and practice good sanitation. Inspect your plants regularly for signs of pests or diseases, and take action promptly if you notice any problems. Aphids can be controlled with insecticidal soap or neem oil. Corn earworms can be handpicked or treated with Bacillus thuringiensis (Bt). Fungal diseases can be prevented by ensuring good air circulation and avoiding overwatering. If you experience severe pest or disease problems, consult with your local extension office for advice on appropriate control measures.
Can I grow different varieties of corn in sacks?
Yes, you can grow different varieties of corn in sacks, but it’s important to consider cross-pollination. If you are growing different varieties of corn that can cross-pollinate, they may produce kernels that are a mix of the two varieties. This is not a problem if you are only growing corn for animal feed, but it can affect the quality and flavor of the corn if you are growing it for human consumption. To prevent cross-pollination, you can grow different varieties of corn at a distance from each other or plant them at different times so that they don’t flower at the same time. You can also hand-pollinate the corn to ensure that you get the desired results.
How do I know when my corn is ready to harvest?
Corn is typically ready to harvest when the silks have turned brown and dry, and the kernels are plump and milky. To test for ripeness, peel back a portion of the husk and puncture a kernel with your fingernail. If the liquid that comes out is milky, the corn is ready to harvest. If the liquid is clear, the corn is not yet ripe. If the liquid is thick and pasty, the corn is overripe. Harvest the corn by twisting the ear off the stalk. Enjoy your fresh, homegrown corn!
Leave a Comment