

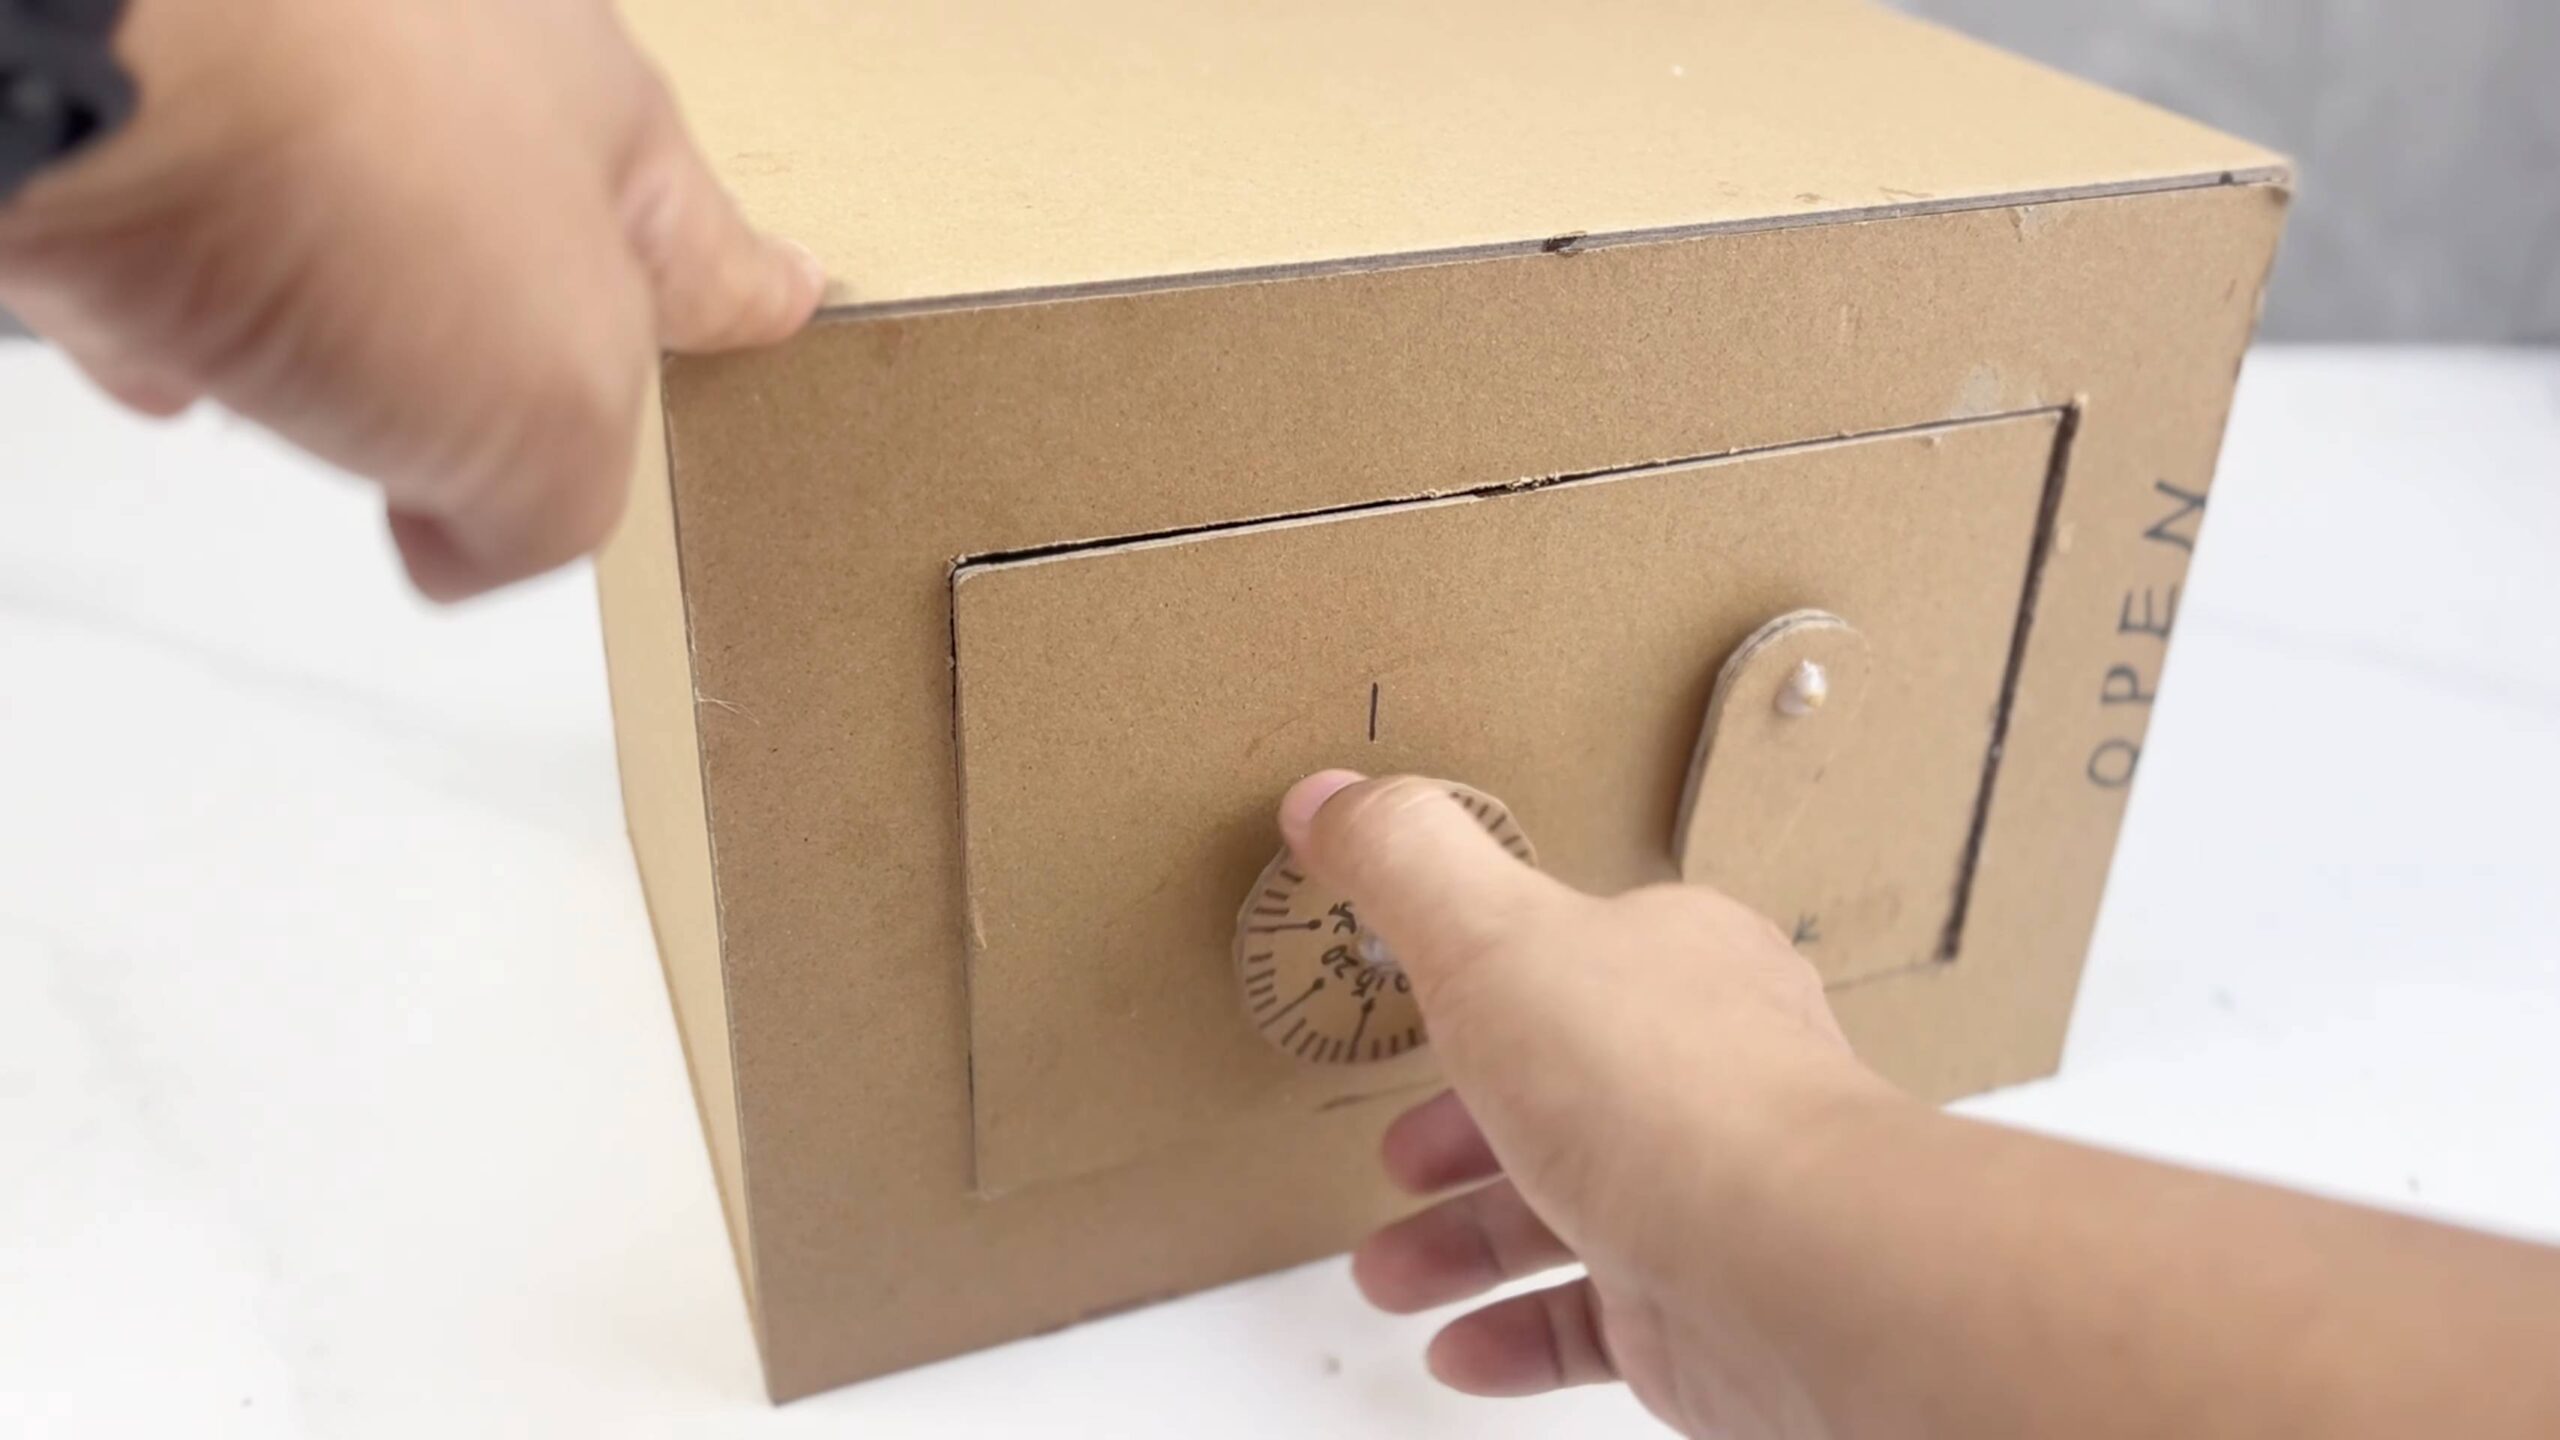
DIY Cardboard Safe: Ever dreamt of having a secret hiding spot, a place where your treasured trinkets and important documents are safe and sound? Well, you don’t need to be a master craftsman or spend a fortune to achieve that! I’m excited to share a fun and surprisingly effective DIY project that will let you create your very own cardboard safe.
Throughout history, the desire for secure storage has been a constant. From ancient Egyptians burying their valuables in hidden chambers to medieval castles with secret passages, people have always sought ways to protect what’s precious to them. While our needs might be a little less dramatic these days, the principle remains the same. Maybe you want to keep your emergency cash stash away from prying eyes, or perhaps you’re looking for a creative way to store your kids’ allowance. Whatever the reason, this DIY Cardboard Safe is the perfect solution.
In today’s world, where privacy and security are increasingly important, having a discreet and affordable storage option is more valuable than ever. This project is not only budget-friendly and eco-conscious (repurposing cardboard!), but it’s also a fantastic way to unleash your creativity and learn some basic crafting skills. Plus, the satisfaction of knowing you built something functional and secure with your own two hands is truly rewarding. So, grab your cardboard boxes, gather your tools, and let’s get started on building your very own secret safe haven!
DIY Cardboard Safe: Protect Your Treasures!
Hey there, fellow DIY enthusiasts! Ever wanted a secret hiding place, a mini-vault for your precious belongings? Well, look no further! Today, I’m going to guide you through building your very own cardboard safe. It’s a fun, budget-friendly project that’s perfect for kids and adults alike. Plus, it’s a great way to recycle those extra cardboard boxes lying around. Let’s get started!
Materials You’ll Need:
Before we dive in, let’s gather our supplies. Here’s what you’ll need:
* Cardboard Boxes: You’ll need a variety of sizes. A larger box for the main body of the safe, a medium box for the door, and smaller boxes or pieces of cardboard for internal mechanisms and reinforcements. Think cereal boxes, shipping boxes, or even shoe boxes. The sturdier the cardboard, the better!
* Craft Knife or Box Cutter: Be extremely careful when using these! Adult supervision is a must for younger crafters.
* Ruler or Measuring Tape: Accuracy is key for a functional safe.
* Pencil or Marker: For marking measurements and outlines.
* Hot Glue Gun and Glue Sticks: This is our primary adhesive. Low-temp glue guns are safer for younger users.
* Scissors: For smaller cuts and trimming.
* Skewer or Chopstick: This will act as our locking mechanism’s pivot point.
* Rubber Bands: For adding tension to the locking mechanism.
* Decorative Materials (Optional): Paint, markers, wrapping paper, stickers – personalize your safe!
* Combination Lock (Optional): If you want a more secure safe, you can incorporate a small combination lock.
* Hinges (Optional): Small metal or plastic hinges can make the door more durable. You can also create hinges from fabric or duct tape.
Planning and Design:
Before you start cutting, it’s a good idea to sketch out your design. Think about the size of the safe, the placement of the door, and the type of locking mechanism you want to use. Here are a few ideas to get you started:
* Size: Determine the overall dimensions of your safe based on the items you want to store inside.
* Door Placement: Decide whether you want the door on the front, side, or top of the safe.
* Locking Mechanism: We’ll be focusing on a simple lever-based locking mechanism in this guide, but feel free to get creative!
* Internal Compartments: Consider adding shelves or dividers inside the safe to organize your valuables.
Building the Safe Body:
Okay, let’s start building the main structure of our cardboard safe!
1. Choose Your Main Box: Select the largest cardboard box you have. This will be the foundation of your safe.
2. Reinforce the Box (Optional): If your box is flimsy, reinforce the corners and edges with extra cardboard strips and hot glue. This will make the safe more durable.
3. Cut the Opening for the Door: Decide where you want the door to be located. Using your ruler and pencil, draw a rectangle or square on the box. Carefully cut along the lines with your craft knife or box cutter. Be extremely careful!
4. Prepare the Door: Choose a piece of cardboard that’s slightly larger than the opening you just cut. This will be your door.
5. Attach Hinges (Optional): If you’re using hinges, attach them to the door and the safe body using hot glue or screws (if your hinges have screw holes). Make sure the door swings smoothly. If you don’t have hinges, you can create a hinge using a strip of fabric or duct tape. Attach one side of the fabric/tape to the door and the other side to the safe body.
6. Test the Door: Make sure the door opens and closes properly. Adjust the hinges or fabric/tape as needed.
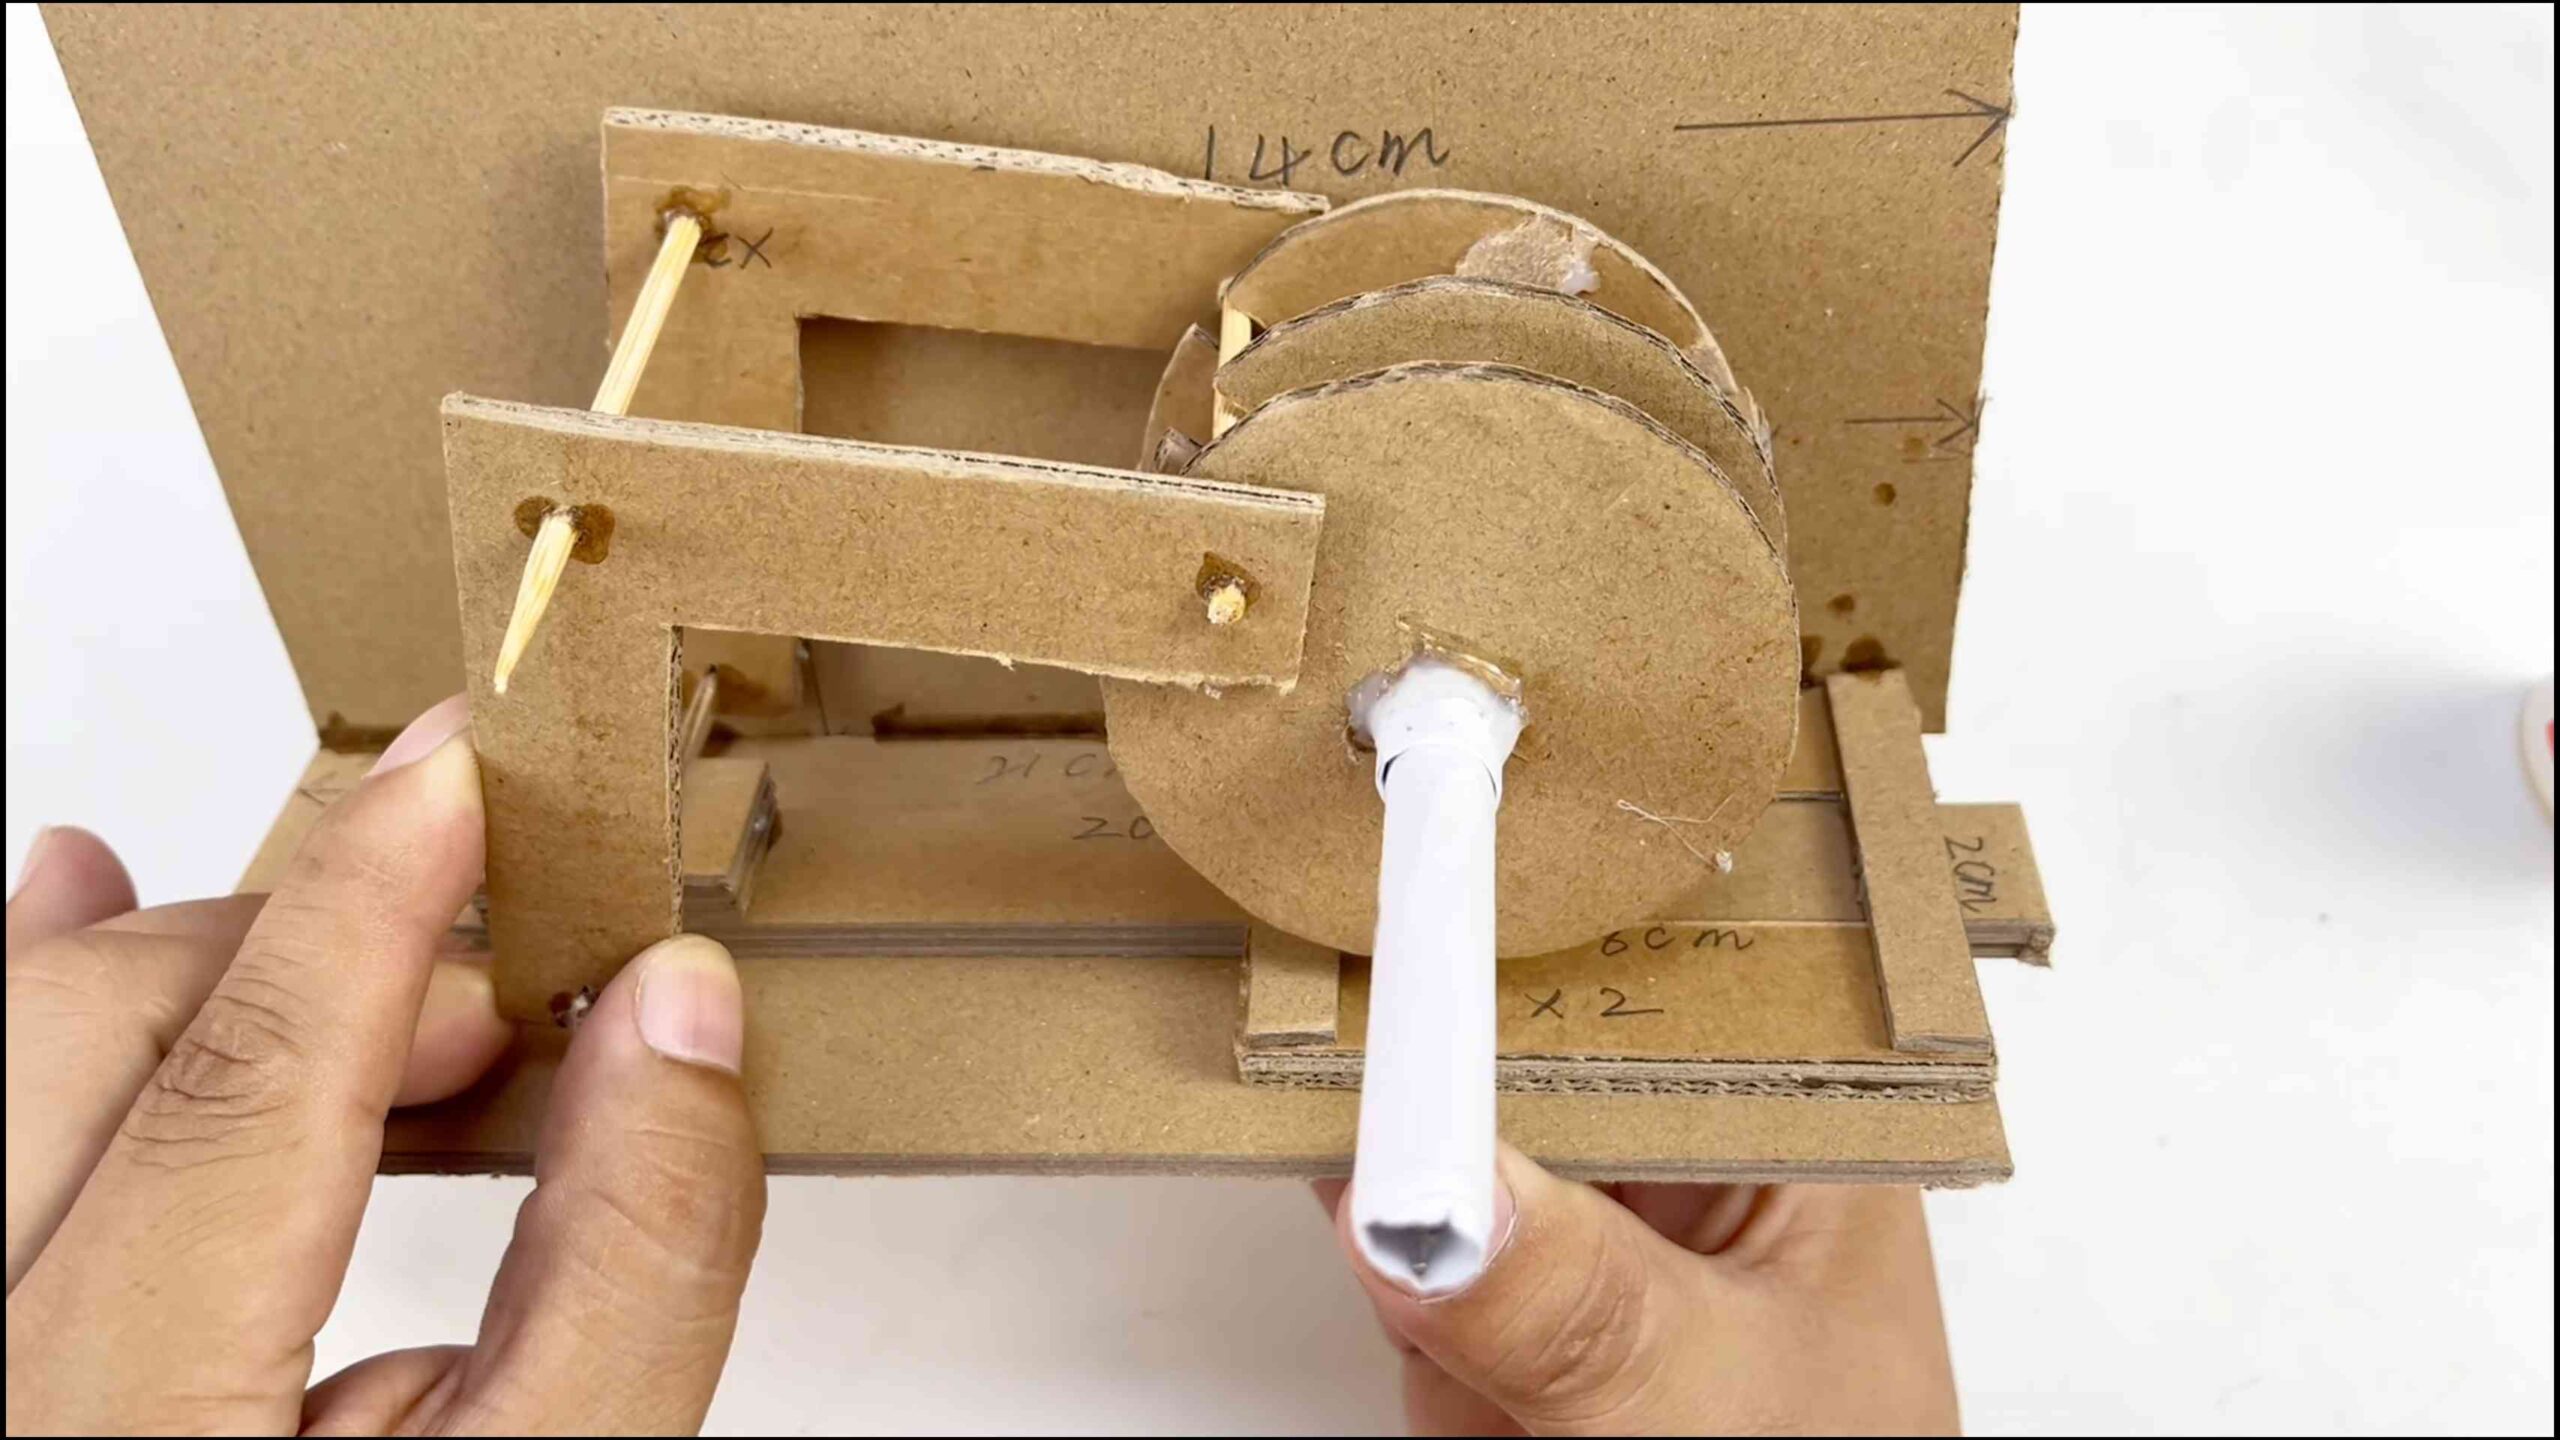
Creating the Locking Mechanism:
Now for the fun part – building the locking mechanism! We’ll be using a simple lever system that’s easy to construct with cardboard.
1. Cut the Lever: Cut a rectangular piece of cardboard, about 4-6 inches long and 1-2 inches wide. This will be our lever.
2. Create the Pivot Point: Using your skewer or chopstick, poke a hole through the lever, about one-third of the way from one end. This is where the lever will pivot.
3. Mount the Lever Inside the Safe: Position the lever inside the safe, near the door. Use hot glue to attach a small piece of cardboard to the inside of the safe to act as a support for the skewer/chopstick. Insert the skewer/chopstick through the hole in the lever and into the support. Make sure the lever can rotate freely.
4. Create the Locking Tab: Cut a small rectangular piece of cardboard. This will be the locking tab that prevents the door from opening.
5. Attach the Locking Tab to the Door: Glue the locking tab to the inside of the door, so that it lines up with the lever when the door is closed.
6. Add a Rubber Band for Tension: Attach one end of a rubber band to the lever and the other end to the inside of the safe. This will create tension that keeps the lever in the locked position. Experiment with different rubber band placements to find the right amount of tension.
7. Test the Locking Mechanism: Close the door and see if the lever locks the door in place. You should be able to move the lever to release the locking tab and open the door. Adjust the position of the lever, locking tab, and rubber band as needed.
8. Create a Handle (Optional): Glue a small piece of cardboard to the outside of the door to act as a handle. This will make it easier to open and close the door.
Adding a Combination Lock (Optional):
For added security, you can incorporate a small combination lock into your cardboard safe.
1. Choose Your Lock: Select a small combination lock that’s suitable for your safe.
2. Create a Hole for the Lock: Drill or cut a hole in the door and the safe body that’s large enough to accommodate the shackle of the lock.
3. Secure the Lock: Insert the shackle of the lock through the holes in the door and the safe body. Close the lock to secure the door.
Finishing Touches and Decoration:
Now that your cardboard safe is structurally sound, it’s time to add the finishing touches and decorate it!
1. Reinforce Weak Points: Check for any weak points in the construction and reinforce them with extra cardboard and hot glue.
2. Cover Exposed Edges: Cover any exposed edges of cardboard with tape or decorative paper to give the safe a cleaner look.
3. Paint or Decorate: Use paint, markers, wrapping paper, stickers, or any other decorative materials to personalize your safe. Get creative and have fun!
4. Add Internal Compartments (Optional): If you want to organize your valuables, add shelves or dividers inside the safe using cardboard and hot glue.
5. Test the Safe: Once everything is dry and secure, test the safe to make sure the door opens and closes properly and the locking mechanism works as expected.
Troubleshooting:
Sometimes things don’t go exactly as planned. Here are a few common problems and how to fix them:
* Door Doesn’t Close Properly: Make sure the door is aligned correctly and the hinges (if used) are properly attached. You may need to adjust the position of the door or the hinges.
* Locking Mechanism Doesn’t Work: Check the position of the lever, locking tab, and rubber band. Make sure the lever can rotate freely and the rubber band provides enough tension. You may need to adjust the position of these components.
* Safe is Too Flimsy: Reinforce the corners and edges of the safe with extra cardboard strips and hot glue. You can also add internal supports to make the safe more rigid.
* Glue Doesn’t Hold: Make sure you’re using a hot glue gun and glue sticks that are compatible with cardboard. Also, make sure the surfaces you’re gluing are clean and dry.
Alternative Locking Mechanisms:
If you’re feeling adventurous, here are a few alternative locking mechanisms you can try:
* Sliding Bolt: Create a sliding bolt out of cardboard that slides into a slot on the door to lock it.
* Combination Dial: Build a series of cardboard dials with numbers on them. When the dials are set to the correct combination, they release a locking mechanism. This is a more advanced project, but it’s a lot of fun!
* Magnetic Lock: Use a small magnet and a metal plate to create a magnetic lock.
Tips for Success
Conclusion
So, there you have it! Creating your own DIY Cardboard Safe isn’t just a fun afternoon project; it’s a surprisingly practical way to secure small valuables, teach kids about responsibility, and unleash your inner maker. Forget those expensive, impersonal safes you see in stores. This project allows you to customize the size, complexity, and even the aesthetic to perfectly match your needs and personality.
Why is this a must-try? Because it’s empowering! You’re taking control, using readily available materials, and building something functional with your own two hands. In a world of mass-produced goods, there’s a unique satisfaction in crafting something yourself. Plus, it’s incredibly budget-friendly. You’re likely to have most of the materials lying around your house already, making this a virtually free security solution.
But the benefits extend beyond cost and convenience. Building a DIY Cardboard Safe is a fantastic educational activity for children. It teaches them about design, construction, problem-solving, and the importance of keeping valuables safe. Imagine the pride they’ll feel showing off their creation and using it to protect their treasured possessions.
Looking for variations? Absolutely! Consider these ideas to personalize your safe:
* Camouflage it: Decorate the safe to blend in with its surroundings. Make it look like a stack of books, a toy box, or even a piece of furniture. The more inconspicuous it is, the better.
* Add a combination lock: For an extra layer of security, incorporate a simple combination lock mechanism using cardboard discs and dowels. There are plenty of tutorials online to guide you through this process.
* Line it with felt: Protect delicate items by lining the inside of the safe with felt or other soft material. This will prevent scratches and damage.
* Incorporate hidden compartments: Add secret compartments within the safe for storing even more valuable items. Think false bottoms or hidden panels.
* Make it modular: Design the safe in modules that can be stacked or rearranged to create different configurations. This allows you to adapt the safe to your changing needs.
* Use different types of cardboard: Experiment with different thicknesses and strengths of cardboard to create a more robust safe. Corrugated cardboard is ideal for the main structure, while thinner cardboard can be used for details and decorations.
Don’t be afraid to experiment and get creative! The beauty of this project is that it’s completely customizable. There’s no right or wrong way to do it. The most important thing is to have fun and learn something new.
We strongly encourage you to give this DIY Cardboard Safe project a try. It’s a rewarding experience that will leave you with a functional and unique security solution. And once you’ve built your safe, we’d love to hear about it! Share your photos, tips, and experiences in the comments below. Let’s inspire each other to create even more amazing DIY projects. What are you waiting for? Grab some cardboard and get building!
Frequently Asked Questions (FAQ)
How secure is a DIY Cardboard Safe, really?
That’s a great question! Let’s be realistic: a cardboard safe isn’t going to withstand a professional burglar with power tools. Its primary purpose is to deter casual theft, keep small valuables out of sight, and teach children about security. Think of it as a first line of defense or a clever hiding place, not a replacement for a high-security safe. The security level depends heavily on the construction quality, the complexity of any locking mechanisms you add, and how well it’s hidden. A well-camouflaged and cleverly designed cardboard safe can be surprisingly effective at deterring opportunistic thieves.
What kind of cardboard should I use?
The best type of cardboard to use is corrugated cardboard, which is the kind you find in shipping boxes. It’s strong, durable, and readily available. The thicker the cardboard, the more robust your safe will be. You can also use thinner cardboard for details, decorations, and internal compartments. Experiment with different types of cardboard to find what works best for your design. Don’t be afraid to recycle old boxes – that’s part of the fun!
What tools do I need to build a cardboard safe?
The basic tools you’ll need include:
* A sharp utility knife or box cutter (adult supervision required for children)
* A ruler or measuring tape
* A pencil or marker
* Glue (hot glue, white glue, or construction adhesive)
* Scissors
* Packing tape or duct tape (for reinforcement)
Optional tools that can be helpful include:
* A cutting mat (to protect your work surface)
* A compass (for drawing circles)
* A drill (for creating holes for locks or hinges)
* Clamps (to hold pieces together while the glue dries)
How can I make my cardboard safe more secure?
There are several ways to enhance the security of your cardboard safe:
* Reinforce the corners and edges: Use packing tape or duct tape to reinforce the corners and edges of the safe. This will make it more resistant to tearing and damage.
* Add multiple layers of cardboard: Use multiple layers of cardboard to create thicker and stronger walls.
* Incorporate a locking mechanism: Add a simple locking mechanism, such as a combination lock, a padlock, or a magnetic lock.
* Camouflage the safe: Decorate the safe to blend in with its surroundings. This will make it less likely to be noticed by thieves.
* Hide the safe in a discreet location: Choose a hiding place that is not easily accessible or visible.
* Add weight to the safe: Place heavy objects inside the safe to make it more difficult to move.
How long does it take to build a cardboard safe?
The time it takes to build a cardboard safe depends on the complexity of the design and your skill level. A simple safe can be built in a few hours, while a more elaborate safe may take a day or two. Don’t rush the process – take your time and enjoy the experience.
Is this project suitable for children?
Yes, building a cardboard safe can be a fun and educational activity for children, but adult supervision is required, especially when using sharp tools like utility knives or scissors. Adapt the complexity of the project to the child’s age and skill level. Start with a simple design and gradually increase the difficulty as they gain experience. This is a great way to teach children about design, construction, problem-solving, and the importance of keeping valuables safe.
What if I mess up? Can I fix it?
Absolutely! One of the great things about working with cardboard is that it’s easy to fix mistakes. If you cut a piece too short or glue something in the wrong place, simply cut a new piece of cardboard and start over. Don’t be afraid to experiment and learn from your mistakes. That’s part of the DIY process! You can also use tape or glue to patch up any errors.
Can I paint or decorate my cardboard safe?
Yes, you can definitely paint or decorate your cardboard safe! Use acrylic paints, markers, or even decoupage techniques to personalize your creation. Just be sure to let the paint or glue dry completely before using the safe. Consider using stencils or masking tape to create intricate designs.
What are some other uses for a cardboard safe besides storing valuables?
While designed for valuables, a DIY Cardboard Safe can be used for various purposes:
* A time capsule: Store memories and mementos to be opened in the future.
* A donation box: Collect donations for a charity or cause.
* A suggestion box: Gather feedback from employees or customers.
* A gift box: Present a special gift in a unique and memorable way.
* A prop for a play or movie: Create a realistic-looking safe for a theatrical production.
Where can I find inspiration for my cardboard safe design?
The internet is a treasure trove of inspiration! Search for “DIY cardboard safe,” “cardboard box projects,” or “cardboard crafts” on Google, Pinterest, or YouTube. You’ll find countless ideas and tutorials to spark your creativity. Don’t be afraid to adapt existing designs or come up with your own unique creations.

Leave a Comment