

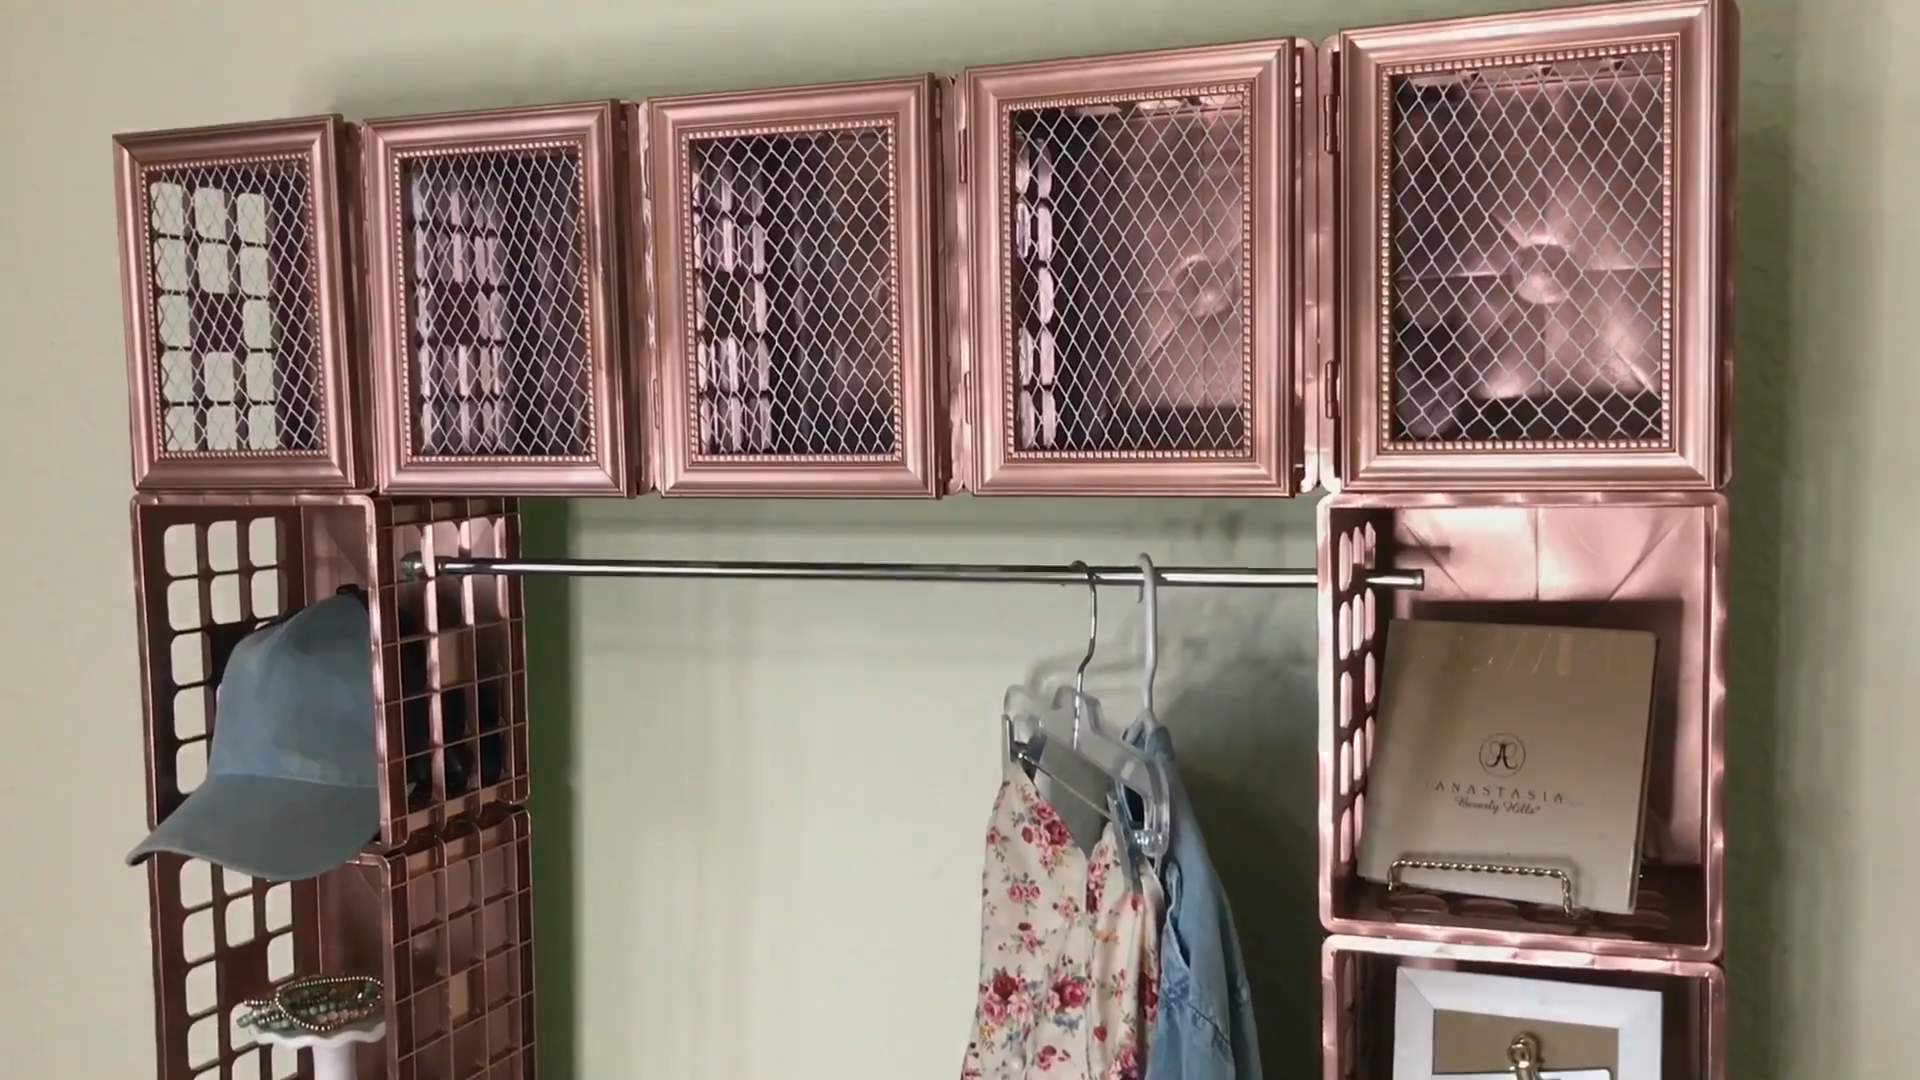
DIY fruit crate closet: Ever dream of a stylish, organized closet without breaking the bank? I know I have! Forget those expensive custom closet systems – we’re diving into a fun and surprisingly chic DIY project that transforms humble fruit crates into a storage masterpiece.
Fruit crates, with their rustic charm, have a surprisingly rich history. Originally designed for practical purposes – transporting fresh produce – they’ve evolved into a beloved symbol of resourcefulness and upcycling. Think about it: generations have relied on these sturdy wooden boxes, and now we’re giving them a stylish second life!
Let’s be honest, a cluttered closet can be a major source of stress. Searching endlessly for that one shirt, struggling to fit everything in… it’s a daily struggle many of us face. That’s where this DIY fruit crate closet comes in. It’s not just about aesthetics; it’s about creating a functional and organized space that simplifies your life. This DIY project is perfect for anyone looking to add a touch of rustic charm to their home while maximizing storage space on a budget. I’m excited to show you how easy and rewarding it can be!
DIY Fruit Crate Closet: Rustic Charm Meets Organized Storage
Okay, so you’re tired of your clothes overflowing from your dresser, and those flimsy plastic storage bins just aren’t cutting it anymore? I get it! I was there too. That’s why I decided to build my own closet using something unexpected: fruit crates! It’s a super affordable, surprisingly stylish, and totally customizable solution. Plus, it adds a touch of rustic charm to any room. Let’s get started!
What You’ll Need: Gathering Your Supplies
Before we dive in, let’s make sure you have everything you need. This is crucial for a smooth building process, trust me!
* **Fruit Crates:** The star of the show! You’ll need to decide how many you want based on the size of your desired closet. I used 8 for a decent-sized closet, but you can adjust accordingly. Look for sturdy wooden crates. You can often find them at farmers’ markets, antique stores, or even online. Make sure they’re relatively clean and free of splinters.
* **Sandpaper (Various Grits):** We’ll need this to smooth out any rough edges and prepare the crates for staining or painting. I recommend starting with a coarser grit (like 80) and working your way up to a finer grit (like 220).
* **Wood Stain or Paint (Optional):** This is where you can really personalize your closet! Choose a stain or paint color that complements your room’s decor. I went with a weathered gray stain for a rustic look.
* **Paintbrushes or Rags:** For applying the stain or paint. Rags work great for applying stain evenly.
* **Wood Screws:** To securely attach the crates together. I recommend using screws that are long enough to penetrate both crates but not so long that they poke through the other side.
* **Drill with Drill Bits:** You’ll need a drill to pre-drill holes for the screws and to drive the screws in.
* **Measuring Tape:** To ensure your closet is level and symmetrical.
* **Level:** Absolutely essential for making sure your closet is straight and stable.
* **Safety Glasses:** Protect your eyes from sawdust and flying debris.
* **Gloves:** To protect your hands from splinters and stain/paint.
* **Wood Glue (Optional):** For extra stability, you can use wood glue in addition to the screws.
* **Polyurethane or Varnish (Optional):** To seal and protect the stained or painted wood.
* **Hardware (Optional):** Things like drawer pulls, knobs, or even a closet rod can add functionality and style.
* **Shelf Liners (Optional):** To protect the bottom of the crates and prevent snags on your clothes.
* **Clamps (Optional):** These can be helpful for holding the crates together while the glue dries or while you’re screwing them together.
Step-by-Step Instructions: Building Your Crate Closet
Alright, let’s get building! This is where the fun begins. Remember to take your time and enjoy the process.
1. Preparing the Crates: Sanding and Cleaning
1. **Inspect the Crates:** Before you start sanding, give each crate a thorough inspection. Look for any loose nails, staples, or splinters. Remove any that you find.
2. **Sand the Crates:** Using your sandpaper, start with the coarser grit (80 or 120) and sand all surfaces of the crates, paying special attention to the edges and corners. This will remove any rough spots and prepare the wood for staining or painting.
3. **Smooth it Out:** Switch to a finer grit sandpaper (220) and sand the crates again. This will create a smooth, even surface.
4. **Clean the Crates:** After sanding, wipe down the crates with a damp cloth to remove any sawdust. Let them dry completely before moving on to the next step.
2. Staining or Painting (Optional): Adding Your Personal Touch
1. **Choose Your Finish:** Decide whether you want to stain or paint your crates. Stain will enhance the natural wood grain, while paint will provide a solid color.
2. **Prepare Your Workspace:** Cover your work surface with a drop cloth or newspaper to protect it from spills.
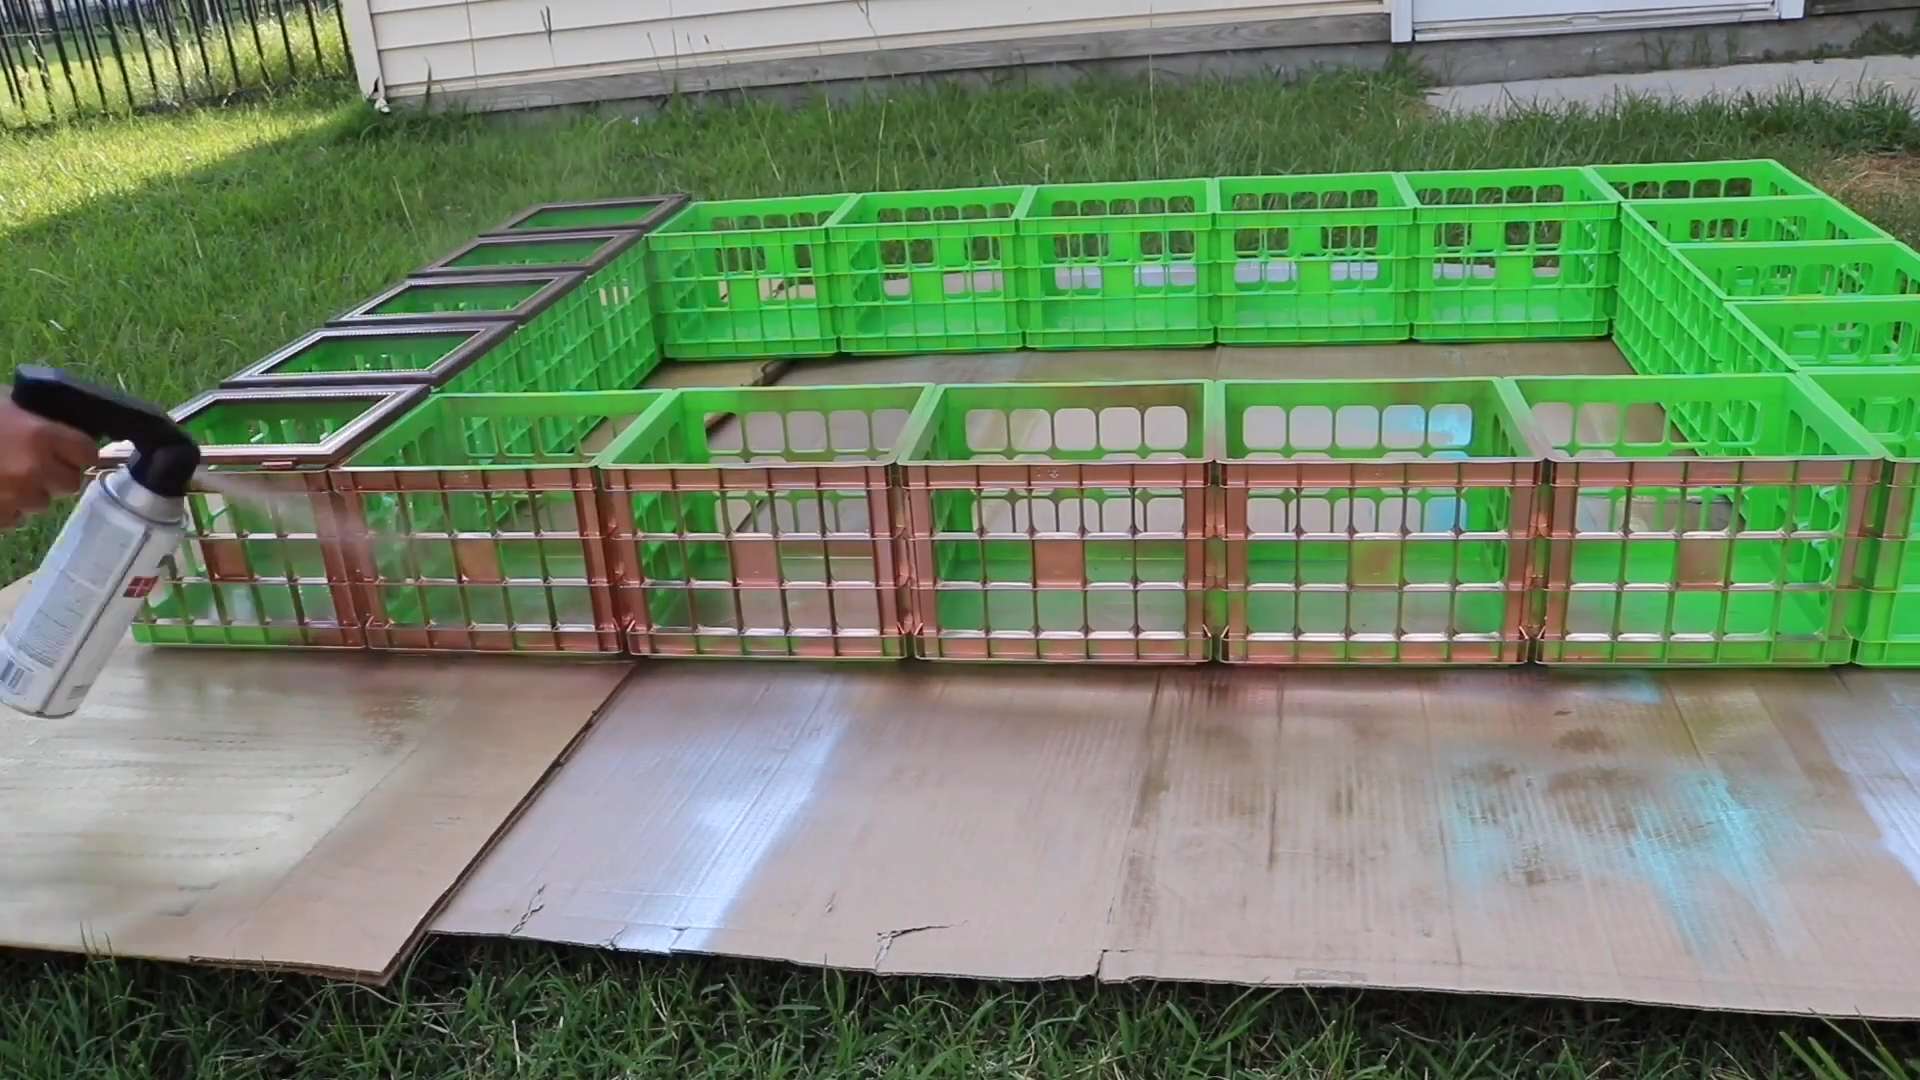
3. **Apply the Stain or Paint:** If you’re staining, use a rag to apply the stain evenly to the crates. Wipe off any excess stain with a clean rag. If you’re painting, use a paintbrush to apply the paint in thin, even coats.
4. **Let it Dry:** Allow the stain or paint to dry completely according to the manufacturer’s instructions. You may need to apply multiple coats for full coverage.
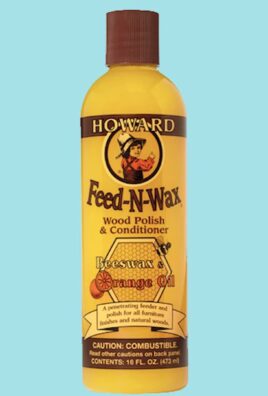
5. **Apply a Sealant (Optional):** Once the stain or paint is dry, you can apply a coat of polyurethane or varnish to seal and protect the wood. This will make your closet more durable and easier to clean.
3. Assembling the Closet: Putting it All Together
1. **Plan Your Layout:** Before you start screwing the crates together, experiment with different layouts to find the one that works best for your space and storage needs. Consider the height and width of your closet, as well as the placement of shelves and drawers. I laid mine out on the floor first to get a good visual.
2. **Pre-Drill Holes:** This is super important! Pre-drilling holes will prevent the wood from splitting when you drive in the screws. Use a drill bit that is slightly smaller than the diameter of your screws. Drill holes at each point where you want to connect the crates.
3. **Attach the Crates:** Apply a small amount of wood glue (optional) to the surfaces where the crates will connect. Then, using your drill and wood screws, attach the crates together. Make sure the screws are driven in straight and flush with the surface of the wood. Clamps can be helpful here to hold the crates in place while you screw them together.
4. **Check for Level:** As you assemble the closet, use a level to make sure everything is straight and even. Adjust the crates as needed to ensure a stable and balanced structure.
5. **Reinforce the Structure:** For added stability, you can add extra screws or metal brackets to the corners and joints of the closet.
4. Adding Hardware and Finishing Touches (Optional): Customizing Your Closet
1. **Install Hardware:** If you want to add drawer pulls, knobs, or a closet rod, now is the time to do it. Follow the manufacturer’s instructions for installing the hardware.
2. **Add Shelf Liners:** To protect the bottom of the crates and prevent snags on your clothes, you can add shelf liners. Cut the shelf liners to size and place them in the bottom of each crate.
3. **Organize Your Clothes:** Once the closet is assembled and finished, it’s time to organize your clothes! Hang your clothes on the closet rod, fold your clothes and place them on the shelves, and store your shoes and accessories in the drawers.
4. **Secure to the Wall (Highly Recommended):** For safety, especially if you have children or pets, I highly recommend securing your fruit crate closet to the wall. Use appropriate wall anchors and screws to attach the closet to a stud in the wall. This will prevent the closet from tipping over.
Tips and Tricks for a Perfect Crate Closet
* Source Your Crates Wisely: Don’t just grab the first crates you see. Look for crates that are in good condition, made of sturdy wood, and free of any major damage.
* Consider the Size of Your Crates: Fruit crates come in different sizes. Choose crates that are the right size for your storage needs.
* Don’t Be Afraid to Get Creative: This is your closet, so feel free to get creative with the design and customization. Add shelves, drawers, doors, or whatever else you need to make it perfect for you.
* Safety First: Always wear safety glasses and gloves when working with power tools and wood.
* Take Your Time: Building a fruit crate closet is a fun and rewarding project, but it’s not something you want to rush. Take your time, follow the instructions carefully, and enjoy the process.
* Embrace Imperfection: Remember, this is a rustic project, so don’t worry too much about perfection. A few imperfections will only add to the charm of your crate closet.
* Upcycle and Repurpose: If you have any old wood or other materials lying around, consider using them to add shelves, drawers, or other features to your crate closet.
* Personalize with Accessories: Add baskets, bins, or other accessories to your crate closet to further organize your belongings and add a personal touch.
* Lighting: Consider adding some lighting inside your closet. Battery-operated LED strip lights are a great option.
Alternative Ideas and Customizations
* Rolling Closet: Attach casters to the bottom of the crates to create a rolling closet that you can easily move around.
* Headboard: Use fruit crates
Conclusion
So, there you have it! Transforming humble fruit crates into a stylish and functional closet is not just a budget-friendly solution; it’s a statement. It’s a declaration that you value creativity, sustainability, and personalized design. This DIY fruit crate closet project is more than just storage; it’s about crafting a space that reflects your unique personality and needs.
Why is this a must-try? Because it’s incredibly versatile. Whether you’re dealing with a small apartment, a walk-in closet that needs organization, or a child’s room overflowing with toys, fruit crates offer a customizable solution. They’re lightweight, easy to handle, and readily available (often for free or at a very low cost). Plus, the satisfaction of creating something beautiful and functional with your own hands is simply unmatched.
But the beauty of this project lies in its adaptability. Feel free to experiment with different finishes. Leave the crates raw for a rustic, industrial look. Paint them in vibrant colors to brighten up a room. Stain them for a more sophisticated, classic feel. Consider adding fabric liners to protect delicate clothing or to create a more polished aesthetic.
For added functionality, think about incorporating other elements. Attach wheels to the bottom crates for easy mobility. Add shelves inside the crates to maximize vertical storage. Use hooks on the sides to hang accessories like scarves, belts, or jewelry. The possibilities are truly endless.
Don’t be afraid to get creative with the arrangement. Stack the crates in a traditional grid pattern for a clean, organized look. Create a staggered design for a more whimsical feel. Use different sized crates to add visual interest. The key is to tailor the design to your specific needs and preferences.
This project isn’t just about building a closet; it’s about building confidence in your DIY abilities. It’s about proving that you don’t need to spend a fortune to create a beautiful and functional space. It’s about embracing the joy of making something with your own two hands.
We wholeheartedly encourage you to give this DIY fruit crate closet a try. It’s a rewarding project that will not only transform your space but also inspire you to explore your creative potential. And most importantly, we want to hear about your experience! Share your photos, tips, and variations with us. Let’s build a community of DIY enthusiasts who are passionate about creating beautiful and sustainable spaces. Tell us about the challenges you faced, the solutions you found, and the unique touches you added to make your fruit crate closet truly your own. Your insights could inspire others to embark on their own DIY journey. So, grab some fruit crates, unleash your creativity, and let’s get building! We can’t wait to see what you create.
FAQ
What kind of fruit crates should I use?
The best fruit crates to use are those made from solid wood, as they are more durable and can withstand the weight of clothing and other items. Avoid crates that are heavily damaged or have splinters. You can often find used fruit crates at farmers’ markets, produce stores, or online marketplaces. Pallet wood can also be used, but requires more preparation. Make sure to thoroughly clean and sand the crates before using them in your closet. Consider the size of the crates as well, ensuring they are appropriate for the space you have available and the items you plan to store.
How do I clean and prepare the fruit crates?
Cleaning and preparing the fruit crates is crucial for a successful and aesthetically pleasing DIY project. Start by removing any staples, nails, or debris from the crates. Use a stiff brush and soapy water to scrub the crates thoroughly, removing any dirt, grime, or residue. Rinse the crates well with clean water and allow them to dry completely in the sun or a well-ventilated area. Once the crates are dry, sand them down with medium-grit sandpaper to smooth out any rough edges or splinters. For a smoother finish, follow up with fine-grit sandpaper. After sanding, wipe down the crates with a damp cloth to remove any sanding dust. Now they are ready for painting, staining, or sealing.
How do I assemble the fruit crate closet?
There are several ways to assemble your fruit crate closet, depending on your desired design and level of stability. For a simple, freestanding closet, you can stack the crates on top of each other, ensuring they are aligned and stable. You can use wood glue or screws to secure the crates together for added stability. For a more permanent solution, you can attach the crates to a wall using brackets or screws. This is especially recommended if you have young children or pets who might accidentally knock the closet over. Consider using L-brackets to reinforce the corners of the crates for extra support. Before attaching the crates to the wall, make sure to locate the studs to ensure a secure hold.
What are some creative ways to customize my fruit crate closet?
The possibilities for customizing your fruit crate closet are endless! Consider painting or staining the crates to match your existing decor. You can use stencils or freehand designs to add a personal touch. Line the inside of the crates with fabric or wallpaper to create a more polished look. Add shelves or dividers inside the crates to maximize storage space. Attach hooks to the sides of the crates to hang accessories like scarves, belts, or jewelry. Use baskets or bins to organize smaller items. You can also add wheels to the bottom crates for easy mobility. Get creative and experiment with different colors, patterns, and textures to create a closet that reflects your unique style.
How do I ensure the fruit crate closet is stable and safe?
Stability and safety are paramount when building any DIY project, especially one that involves storage. To ensure your fruit crate closet is stable, start by using sturdy, well-constructed crates. Secure the crates together using wood glue, screws, or brackets. If stacking the crates, make sure they are aligned and balanced. Attach the closet to a wall using brackets or screws, especially if you have young children or pets. Avoid overloading the crates with heavy items, as this can compromise their stability. Distribute the weight evenly throughout the closet. Regularly inspect the closet for any signs of wear or damage, and make any necessary repairs promptly. By taking these precautions, you can ensure that your fruit crate closet is both functional and safe.
What if I can’t find enough fruit crates?
Finding enough fruit crates can sometimes be a challenge, but there are several options to explore. Start by contacting local farmers’ markets, produce stores, and grocery stores. They often have surplus crates that they are willing to give away or sell at a low cost. Check online marketplaces like Craigslist or Facebook Marketplace for used fruit crates. You can also try contacting local farms or orchards. If you are unable to find enough used fruit crates, consider purchasing new ones from a craft store or online retailer. While new crates may be more expensive, they will be in better condition and may offer more consistent sizing. As a last resort, you could consider building your own crates from reclaimed wood or plywood.
How do I protect my clothes from snagging on the wood?
Protecting your clothes from snagging on the wood is essential to prevent damage and ensure the longevity of your wardrobe. Start by thoroughly sanding the inside of the crates to smooth out any rough edges or splinters. Apply a sealant or varnish to the wood to create a smooth, protective barrier. Line the inside of the crates with fabric or felt to provide an extra layer of protection. Use garment bags to store delicate items. Avoid overstuffing the crates, as this can increase the risk of snagging. Regularly inspect the crates for any new splinters or rough spots and address them promptly. By taking these precautions, you can keep your clothes safe and snag-free in your fruit crate closet.


Leave a Comment