

Bucket basket weaving: Ever looked at a humble bucket and thought, “There’s got to be more to life than just hauling water?” I have! For centuries, basket weaving has been a cherished craft, interwoven (pun intended!) with cultures around the globe. From ancient Egyptians using reeds to create intricate containers to indigenous communities crafting baskets for food gathering and storage, this art form is deeply rooted in human history.
But what if I told you that you could bring this timeless tradition into your home garden, transforming ordinary buckets into beautiful and functional planters? That’s right! Forget those boring plastic pots – with a few simple techniques, you can create stunning, woven bucket baskets that will elevate your gardening game and add a touch of rustic charm to your outdoor space.
Why should you try bucket basket weaving? Well, besides being incredibly satisfying, it’s a fantastic way to upcycle old buckets, reduce plastic waste, and create unique planters that reflect your personal style. Plus, it’s a surprisingly easy and affordable DIY project that anyone can tackle, regardless of their crafting experience. So, grab your buckets, gather your materials, and let’s weave some magic into your garden!
Transform a Humble Bucket into a Stylish Basket: A DIY Weaving Project
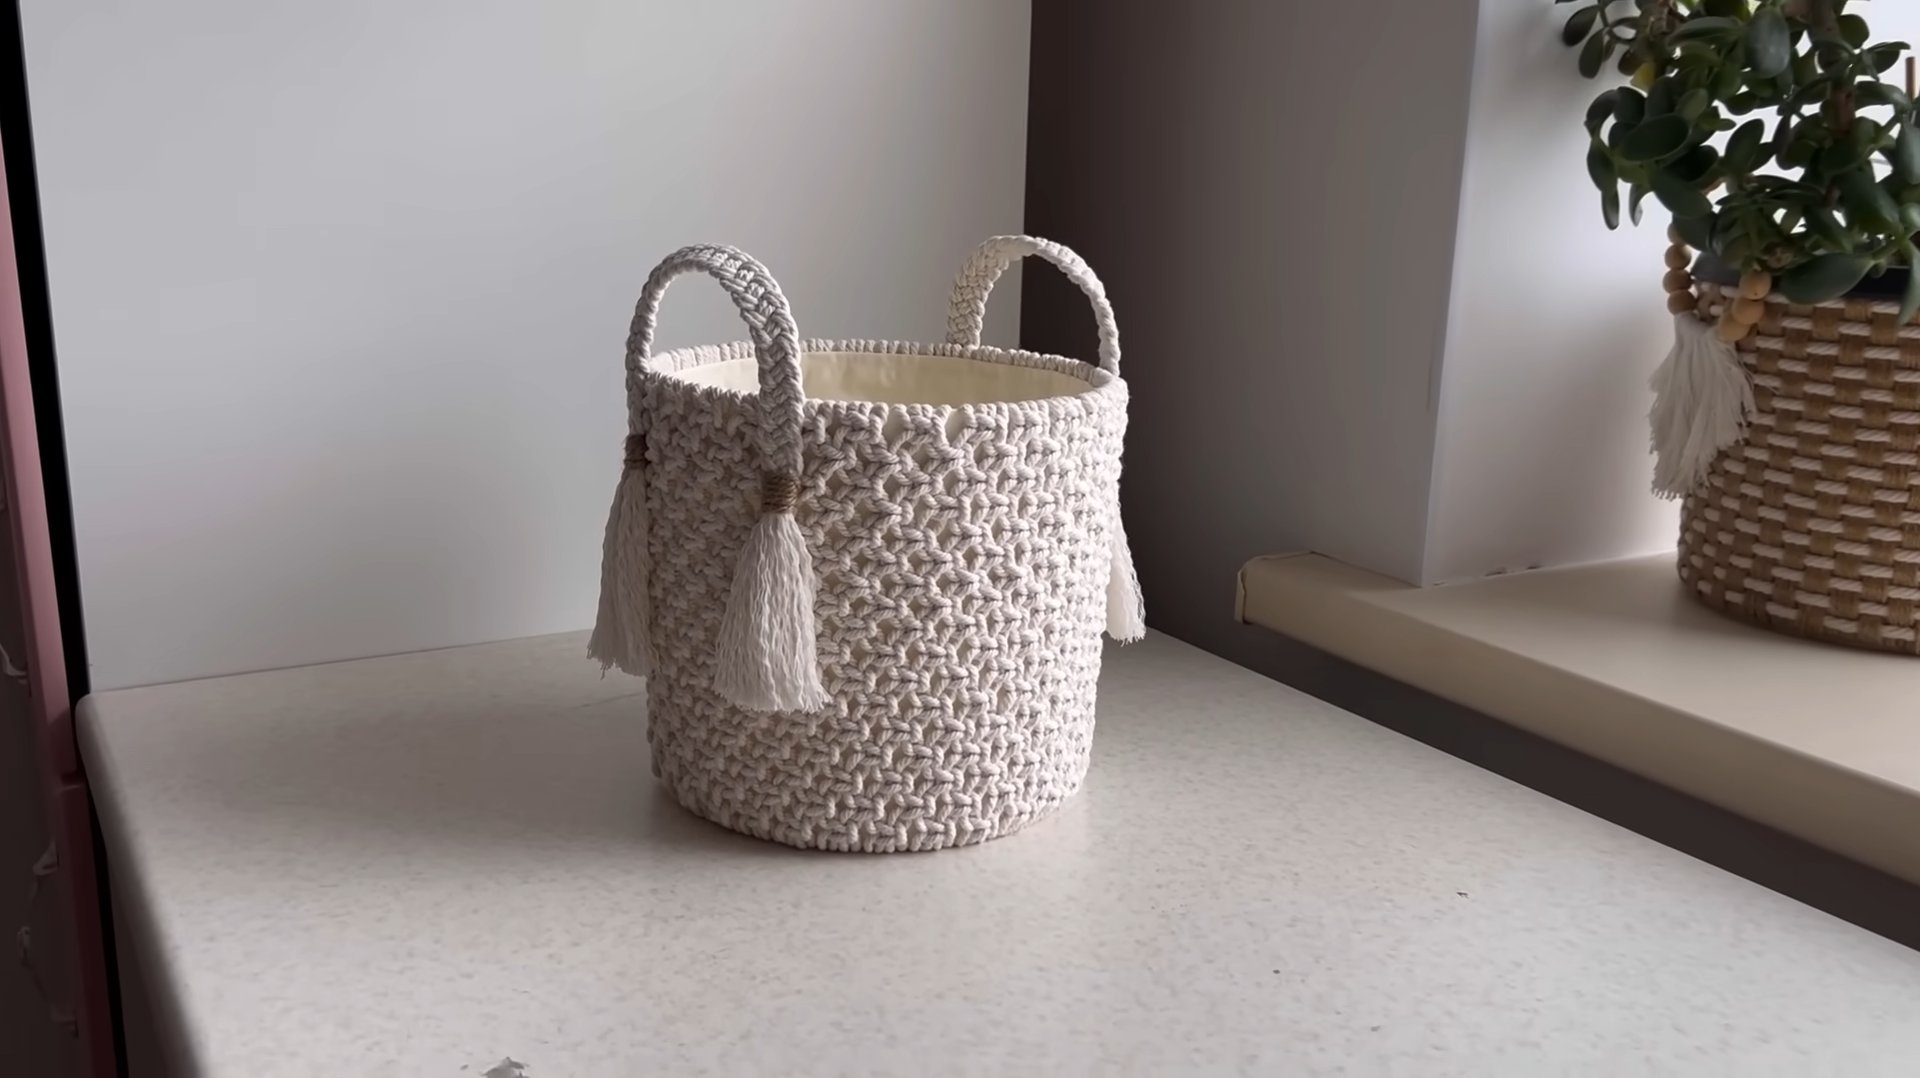
Hey there, fellow crafters! Ever looked at a plain, boring bucket and thought, “There has to be a better use for this?” Well, I have! I’m going to show you how to transform an ordinary bucket into a beautiful, woven basket that’s perfect for storage, planters, or just adding a touch of rustic charm to your home. This project is surprisingly easy, even for beginners, and the results are stunning. Let’s get weaving!
What You’ll Need
Before we dive in, let’s gather our supplies. This is crucial for a smooth and enjoyable crafting experience.
* A Bucket: Choose a bucket that’s sturdy and in good condition. Plastic or metal works, but I personally prefer plastic for its flexibility and ease of drilling. The size is up to you, depending on what you plan to use the basket for.
* Rope or Cord: This is your weaving material! I recommend using a natural fiber rope like jute, cotton, or hemp for a rustic look. You can also use synthetic rope, but natural fibers tend to be easier to work with and have a more appealing texture. Consider the thickness of the rope – thicker rope will create a chunkier basket, while thinner rope will result in a more delicate weave. You’ll need a generous amount, so overestimate rather than underestimate. For a standard-sized bucket, I usually get at least 100 feet.
* Drill and Drill Bits: You’ll need a drill to create holes around the rim of the bucket for weaving. Choose a drill bit size that’s slightly larger than your rope to allow it to pass through easily.
* Scissors or Utility Knife: For cutting the rope and trimming any stray ends.
* Measuring Tape or Ruler: To ensure even spacing of the holes.
* Marker or Pen: For marking the drill points.
* Sandpaper (Optional): If your bucket has any rough edges, sandpaper can smooth them out.
* Gloves (Optional): To protect your hands, especially if you’re working with rough rope.
* Hot Glue Gun and Glue Sticks (Optional): For securing the ends of the rope and adding extra reinforcement.
* Clamps (Optional): To hold the rope in place while the glue dries.
Preparing the Bucket: Drilling the Holes
This is a crucial step, so take your time and be precise. Evenly spaced holes are key to a professional-looking finished product.
1. Clean the Bucket: Make sure your bucket is clean and dry. Wipe it down with a damp cloth to remove any dirt or debris.
2. Mark the Drill Points: Using your measuring tape or ruler, mark evenly spaced points around the rim of the bucket. I usually aim for about 1-2 inches apart, but you can adjust this depending on the size of your bucket and the thickness of your rope. The more holes you have, the denser your weave will be. Use your marker or pen to clearly mark each point.
3. Drill the Holes: Now, carefully drill a hole at each marked point. Hold the drill steady and apply gentle pressure. Be careful not to crack the bucket, especially if it’s made of plastic. If you’re using a metal bucket, you might need to use a metal drill bit and apply more pressure.
4. Sand the Edges (Optional): If the drilled holes have any sharp or rough edges, use sandpaper to smooth them out. This will prevent the rope from fraying and make the weaving process more comfortable.
The Weaving Process: Bringing Your Basket to Life
This is where the magic happens! Get ready to transform that plain bucket into a work of art.
1. Prepare the Rope: Cut a long length of rope. I usually start with about 20-30 feet, but you can always add more as needed. It’s better to have too much than not enough.
2. Starting the Weave: Thread one end of the rope through one of the drilled holes from the inside of the bucket to the outside. Pull the rope through, leaving a tail of about 4-6 inches inside the bucket. This tail will be secured later.
3. The Over-Under Technique: This is the basic weaving technique we’ll be using. Take the rope and weave it over the next section of the bucket and then under the next. Continue this over-under pattern around the entire bucket.
4. Maintaining Tension: As you weave, make sure to keep the rope taut but not too tight. You want the weave to be snug and even, but you don’t want to distort the shape of the bucket.
5. Joining New Rope: When you run out of rope, don’t worry! Simply overlap the end of the old rope with the beginning of the new rope inside the bucket. Secure the overlapping ends with hot glue or by tying them together. Trim any excess rope.
6. Continuing the Weave: Continue weaving around and around the bucket, maintaining the over-under pattern. Each row of weaving will build upon the previous row, creating a beautiful woven texture.
7. Adjusting the Weave: As you weave, you might notice some gaps or unevenness. Don’t panic! You can gently adjust the rope to fill in any gaps and create a more uniform weave.
8. Reaching the Top: Continue weaving until you reach the top of the bucket. You can weave all the way to the rim, or you can leave a small portion of the bucket exposed for a different look.
9. Finishing the Weave: Once you’ve reached the desired height, thread the end of the rope through one of the drilled holes from the outside of the bucket to the inside. Trim the rope, leaving a tail of about 4-6 inches.
Securing the Ends: Ensuring a Lasting Finish
This final step is essential for preventing the weave from unraveling and ensuring that your basket lasts for years to come.
1. Securing the Tails: Take the tails of rope that are inside the bucket and secure them to the inside of the weave using hot glue. Apply a generous amount of glue to the ends of the rope and press them firmly against the woven material. You can also use clamps to hold the rope in place while the glue dries.
2. Reinforcing the Weave (Optional): For extra reinforcement, you can apply a thin layer of hot glue along the inside of the weave, especially at the top and bottom. This will help to prevent the rope from shifting or unraveling.
3. Final Touches: Once the glue is dry, trim any stray ends of rope. Inspect the basket for any imperfections and make any necessary adjustments.
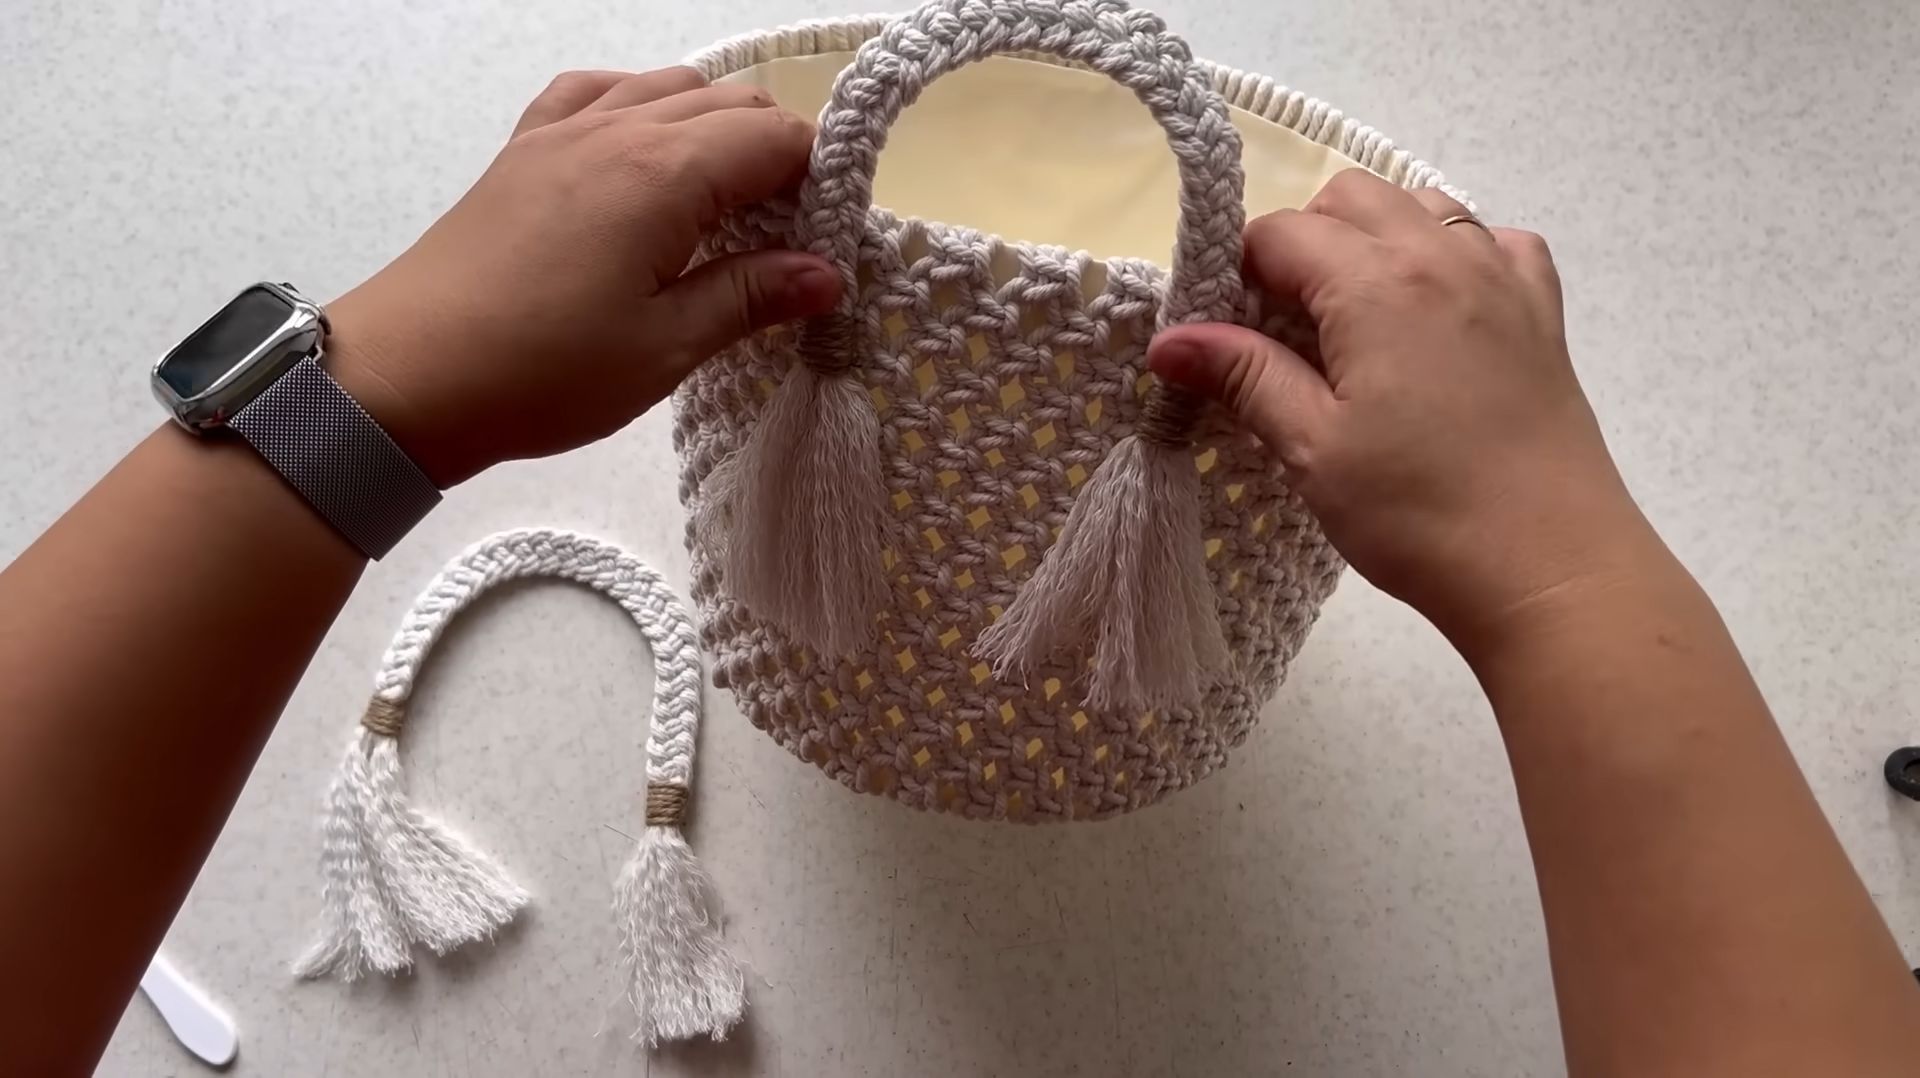
Adding Handles (Optional): For Easy Carrying
If you want to add handles to your basket, here’s how:
1. Choose Your Handle Material: You can use rope, leather straps, or even wooden dowels for handles.
2. Measure and Cut: Measure the desired length of your handles and cut two pieces of your chosen material.
3. Attach the Handles: Attach the handles to the basket using hot glue, screws, or by weaving them into the existing weave. Make sure the handles are securely attached and can support the weight of the basket.
Ideas for Customization: Making it Your Own
The beauty of DIY is that you can customize your project to suit your own style and preferences. Here are a few ideas to get you started:
* Paint the Bucket: Before you start weaving, paint the bucket a color that complements your decor.
* Use Different Colors of Rope: Create a striped or patterned weave by using different colors of rope.
* Add Embellishments: Embellish your basket with beads, buttons, or other decorative elements.
* Line the Basket: Line the basket with fabric to protect delicate items or to create a more polished look.
* Stain the Rope: Stain the rope with wood stain to give it a richer, more aged look.
Uses for Your Woven Bucket Basket: Endless Possibilities
Now that you’ve created your beautiful woven bucket basket, it’s time to put it to use! Here are just a few ideas:
* Storage: Use it to store blankets, toys, magazines, or other household items.
* Planter: Use it as a planter for your favorite plants. Just be sure to add drainage holes to the bottom of the bucket.
* Laundry Basket: Use it as a stylish laundry basket.
* Gift Basket: Fill it with goodies and give it as a thoughtful gift.
* Decorative Accent: Simply display it as a decorative accent in your home.
And there you have it! You’ve successfully transformed a plain bucket into a beautiful and functional woven basket. I hope you enjoyed this project as much as I did. Happy crafting!
Conclusion
So, there you have it! Transforming an ordinary bucket into a beautiful and functional basket using simple weaving techniques is not just a craft project; it’s a statement. It’s a statement about resourcefulness, creativity, and a commitment to reducing waste. In a world increasingly dominated by mass-produced items, taking the time to create something unique and handmade offers a profound sense of satisfaction. This bucket basket weaving project is more than just a DIY; it’s an opportunity to connect with a traditional craft while adding a personal touch to your home decor or storage solutions.
Why is this a must-try? Because it’s incredibly versatile. Imagine using your woven bucket basket as a stylish planter for your favorite herbs or flowers, adding a touch of rustic charm to your kitchen. Or perhaps you need a durable and attractive storage solution for toys, blankets, or gardening tools. The possibilities are truly endless. Beyond its functionality, this project is also surprisingly therapeutic. The repetitive motion of weaving can be incredibly calming and meditative, offering a welcome respite from the stresses of daily life.
But the best part? You don’t need to be an expert crafter to achieve stunning results. With a little patience and the right materials, anyone can master the art of bucket basket weaving. And don’t be afraid to experiment! Try using different types of rope or cord to create unique textures and patterns. Consider incorporating colorful accents or embellishments to personalize your basket and make it truly one-of-a-kind. You could even try using recycled materials like old t-shirts or fabric scraps to add an eco-friendly twist to your project.
Here are a few suggestions to get your creative juices flowing:
* Two-Tone Basket: Use two different colors of rope or cord to create a striking two-tone effect. Alternate rows of each color for a classic striped look, or experiment with more intricate patterns.
* Embellished Basket: Add decorative elements like beads, buttons, or shells to your woven basket for a touch of whimsy and personality.
* Handle Variations: Instead of a simple rope handle, try using a sturdy wooden dowel or a braided leather strap for a more sophisticated look.
* Vary the Weave: Explore different weaving patterns beyond the basic over-under technique. Experiment with twill weaves, herringbone patterns, or even incorporate some simple knotting techniques for added texture and visual interest.
* Waterproof Lining: If you plan to use your basket for plants or other items that may get wet, consider adding a waterproof lining to protect the bucket and prevent leaks.
We are confident that you’ll find this DIY project both enjoyable and rewarding. So, gather your materials, unleash your creativity, and get ready to transform an ordinary bucket into a stunning woven masterpiece. We can’t wait to see what you create!
We encourage you to try this bucket basket weaving project and share your creations with us! Post photos of your finished baskets on social media using [Your Hashtag Here] and tag us [Your Social Media Handle Here]. We’d love to see your unique designs and hear about your experience. Happy weaving!
Frequently Asked Questions (FAQ)
What kind of bucket is best for this project?
The ideal bucket for bucket basket weaving is a sturdy plastic bucket with a smooth, even surface. Avoid buckets with significant dents, cracks, or sharp edges, as these can make the weaving process more difficult and potentially damage your rope or cord. The size of the bucket is entirely up to you and depends on the intended use of the finished basket. Smaller buckets are great for decorative purposes or small storage, while larger buckets are better suited for heavier items or larger quantities. Food-grade buckets are a good choice if you plan to use the basket for storing food items.
What type of rope or cord should I use?
The type of rope or cord you use will significantly impact the look and feel of your finished basket. Natural fibers like jute, cotton, or hemp offer a rustic and organic aesthetic, while synthetic materials like nylon or polypropylene are more durable and water-resistant. Consider the intended use of your basket when choosing your rope or cord. For example, if you plan to use the basket outdoors or in a damp environment, a synthetic material would be a better choice. The thickness of the rope or cord is also a factor. Thicker materials will create a more substantial and textured weave, while thinner materials will result in a finer and more delicate look. Experiment with different materials and thicknesses to find what you like best.
How do I secure the rope or cord to the bucket?
There are several ways to secure the rope or cord to the bucket at the beginning of the weaving process. One common method is to use hot glue to attach the end of the rope to the inside of the bucket rim. Another option is to drill small holes around the rim of the bucket and thread the rope through the holes to create a secure anchor. You can also use strong tape, such as duct tape or packing tape, to temporarily hold the rope in place while you begin weaving. Once you have a few rows of weaving completed, the rope will be more secure and you can remove the tape.
How do I create a handle for my woven bucket basket?
Creating a handle for your woven bucket basket is relatively simple. You can use the same rope or cord that you used for the weaving, or you can choose a different material for a contrasting look. To create a basic rope handle, simply measure and cut two lengths of rope that are long enough to comfortably carry the basket. Attach each end of the rope to opposite sides of the bucket rim, either by tying a knot, using hot glue, or threading the rope through pre-drilled holes. For a more decorative handle, you can braid the rope or add embellishments like beads or tassels. You can also use a wooden dowel or a leather strap for a more sophisticated handle.
What if my rope or cord keeps slipping while I’m weaving?
If your rope or cord is slipping while you’re weaving, there are a few things you can try. First, make sure that you are pulling the rope tight as you weave each row. This will help to create a more secure and stable weave. You can also use clothespins or binder clips to temporarily hold the rope in place while you work on other sections of the basket. Another option is to apply a small amount of glue to the rope as you weave to help it adhere to the bucket. Be careful not to use too much glue, as this can make the weaving process more difficult.
Can I use recycled materials for this project?
Absolutely! Using recycled materials is a great way to add an eco-friendly twist to your bucket basket weaving project. Old t-shirts, fabric scraps, plastic bags, and even newspapers can be repurposed into weaving materials. To use t-shirts or fabric scraps, simply cut them into long strips and tie them together to create a continuous strand. Plastic bags can be cut into strips and woven in a similar manner. Newspapers can be rolled tightly and secured with tape to create sturdy weaving strands. Using recycled materials not only reduces waste but also adds a unique and personal touch to your finished basket.
How do I clean my woven bucket basket?
The best way to clean your woven bucket basket depends on the materials used. For baskets made with natural fibers like jute or cotton, spot cleaning with a damp cloth is usually sufficient. Avoid soaking the basket in water, as this can damage the fibers. For baskets made with synthetic materials like nylon or polypropylene, you can use a mild soap and water solution to clean the surface. Rinse thoroughly and allow the basket to air dry completely. If your basket has a waterproof lining, you can simply wipe it clean with a damp cloth. Regular cleaning will help to keep your woven bucket basket looking its best for years to come.

Leave a Comment