

Cardboard Table Fan DIY: Beat the heat and unleash your inner maker with this incredibly simple and satisfying project! Are you tired of sweltering summers and exorbitant electricity bills? I know I am! That’s why I’m so excited to share this ingenious DIY project that will keep you cool and comfortable without breaking the bank.
The concept of using simple materials to create cooling devices has been around for centuries. Think of the ancient Egyptians using wet cloths to cool the air or the ingenious punkah fans of India, manually operated to provide a refreshing breeze. While our cardboard table fan might not be as elaborate, it taps into that same spirit of resourcefulness and ingenuity.
In today’s world, where sustainability and cost-effectiveness are more important than ever, this cardboard table fan DIY is a game-changer. Not only does it repurpose readily available materials, reducing waste and promoting eco-consciousness, but it also empowers you to take control of your comfort. Imagine the satisfaction of creating a functional and stylish fan from something as simple as cardboard! Plus, it’s a fantastic project to do with kids, teaching them about basic engineering principles and the joy of creating something with their own hands. So, ditch the expensive store-bought fans and let’s get crafting! This guide will walk you through each step, ensuring you have a cool and breezy summer, all thanks to the magic of cardboard!
DIY Cardboard Table Fan: Stay Cool on a Budget!
Hey there, fellow DIY enthusiasts! Are you sweating through the summer heat but don’t want to break the bank on an expensive fan? Well, you’ve come to the right place! I’m going to show you how to build a surprisingly effective table fan using cardboard, a few basic electronics, and a little bit of elbow grease. Trust me, it’s a fun project, and the satisfaction of cooling yourself with something you built is totally worth it.
What You’ll Need: The Supply List
Before we dive in, let’s gather our materials. Here’s what you’ll need:
* Cardboard: Lots of it! Think old boxes from deliveries, cereal boxes, anything sturdy. The thicker, the better.
* Small DC Motor: A 3-6V DC motor will work perfectly. You can often salvage these from old toys or electronics.
* AA Battery Holder: To hold your batteries and connect them to the motor.
* AA Batteries: The number depends on your battery holder, usually 2 or 4.
* Electrical Wire: Thin, insulated wire to connect the battery holder to the motor.
* Switch (Optional): A small on/off switch for convenience.
* Hot Glue Gun and Glue Sticks: For assembling the cardboard structure.
* Craft Knife or Scissors: For cutting the cardboard. Be careful!
* Ruler or Measuring Tape: For accurate measurements.
* Pencil or Marker: For marking your cuts.
* Compass or Circular Object: For drawing circles.
* Wire Strippers (Optional): Makes stripping wires easier.
* Safety Glasses: Protect your eyes from flying debris.
* Sandpaper (Optional): For smoothing rough edges.
Phase 1: Building the Fan Blade
This is where the magic happens! The shape and balance of the fan blade are crucial for its performance.
1. Cut a Cardboard Circle: Using your compass or a circular object, draw a circle on a piece of cardboard. I recommend a diameter of around 6-8 inches for a good balance of size and power. Carefully cut out the circle with your craft knife or scissors.
2. Divide the Circle: Draw lines across the circle, dividing it into equal sections. I find that 6 or 8 sections work well. Think of it like slicing a pizza.
3. Cut and Twist the Blades: Now, carefully cut along each of the lines you drew, stopping about 1 inch from the center of the circle. This will create the individual blades.
4. Twist the Blades: This is the key to creating airflow! Gently twist each blade in the same direction. The angle of the twist will determine the direction of the airflow. Experiment with different angles to find what works best for you. I usually aim for a twist of about 30-45 degrees. Hot glue the base of each blade to the center circle to keep the blades in place.
5. Reinforce the Center (Important!): Cut a small cardboard circle (about 1-2 inches in diameter) and glue it to the center of the fan blade on both sides. This will reinforce the center and prevent it from tearing when you attach it to the motor.
Phase 2: Constructing the Fan Housing
The housing provides support for the motor and directs the airflow.
1. Cut the Base: Cut a rectangular piece of cardboard for the base of the fan. The size will depend on the size of your fan blade, but I recommend something around 6×8 inches.
2. Cut the Side Supports: Cut two identical rectangular pieces of cardboard for the side supports. These will hold the motor in place. The height of these pieces will determine the angle of the fan. I usually make them about 4-5 inches tall. The width should be slightly wider than the diameter of your motor.
3. Cut the Motor Mount: Cut a small piece of cardboard that will act as the motor mount. This piece should be large enough to securely hold the motor. You’ll need to cut a hole in the center of this piece that is slightly smaller than the diameter of the motor shaft. This will allow you to snugly fit the motor into the mount.
4. Assemble the Housing: Use hot glue to attach the side supports to the base. Make sure they are perpendicular to the base and parallel to each other. Then, glue the motor mount to the top of the side supports, centering it between them.
5. Reinforce the Structure: Cut small pieces of cardboard and glue them to the corners of the housing to reinforce the structure. This will make it more stable and prevent it from collapsing.
Phase 3: Wiring and Assembly
Time to bring the electronics into the mix!
1. Attach the Motor to the Mount: Carefully push the motor into the hole in the motor mount. It should fit snugly. If it’s too loose, add some hot glue around the edges to secure it.
2. Connect the Wires: Strip the ends of your electrical wires. Connect one wire to the positive (+) terminal of the battery holder and the other wire to the negative (-) terminal.
3. Connect the Motor: Connect the other end of the wires to the terminals of the DC motor. If the fan spins in the wrong direction, simply reverse the wires.
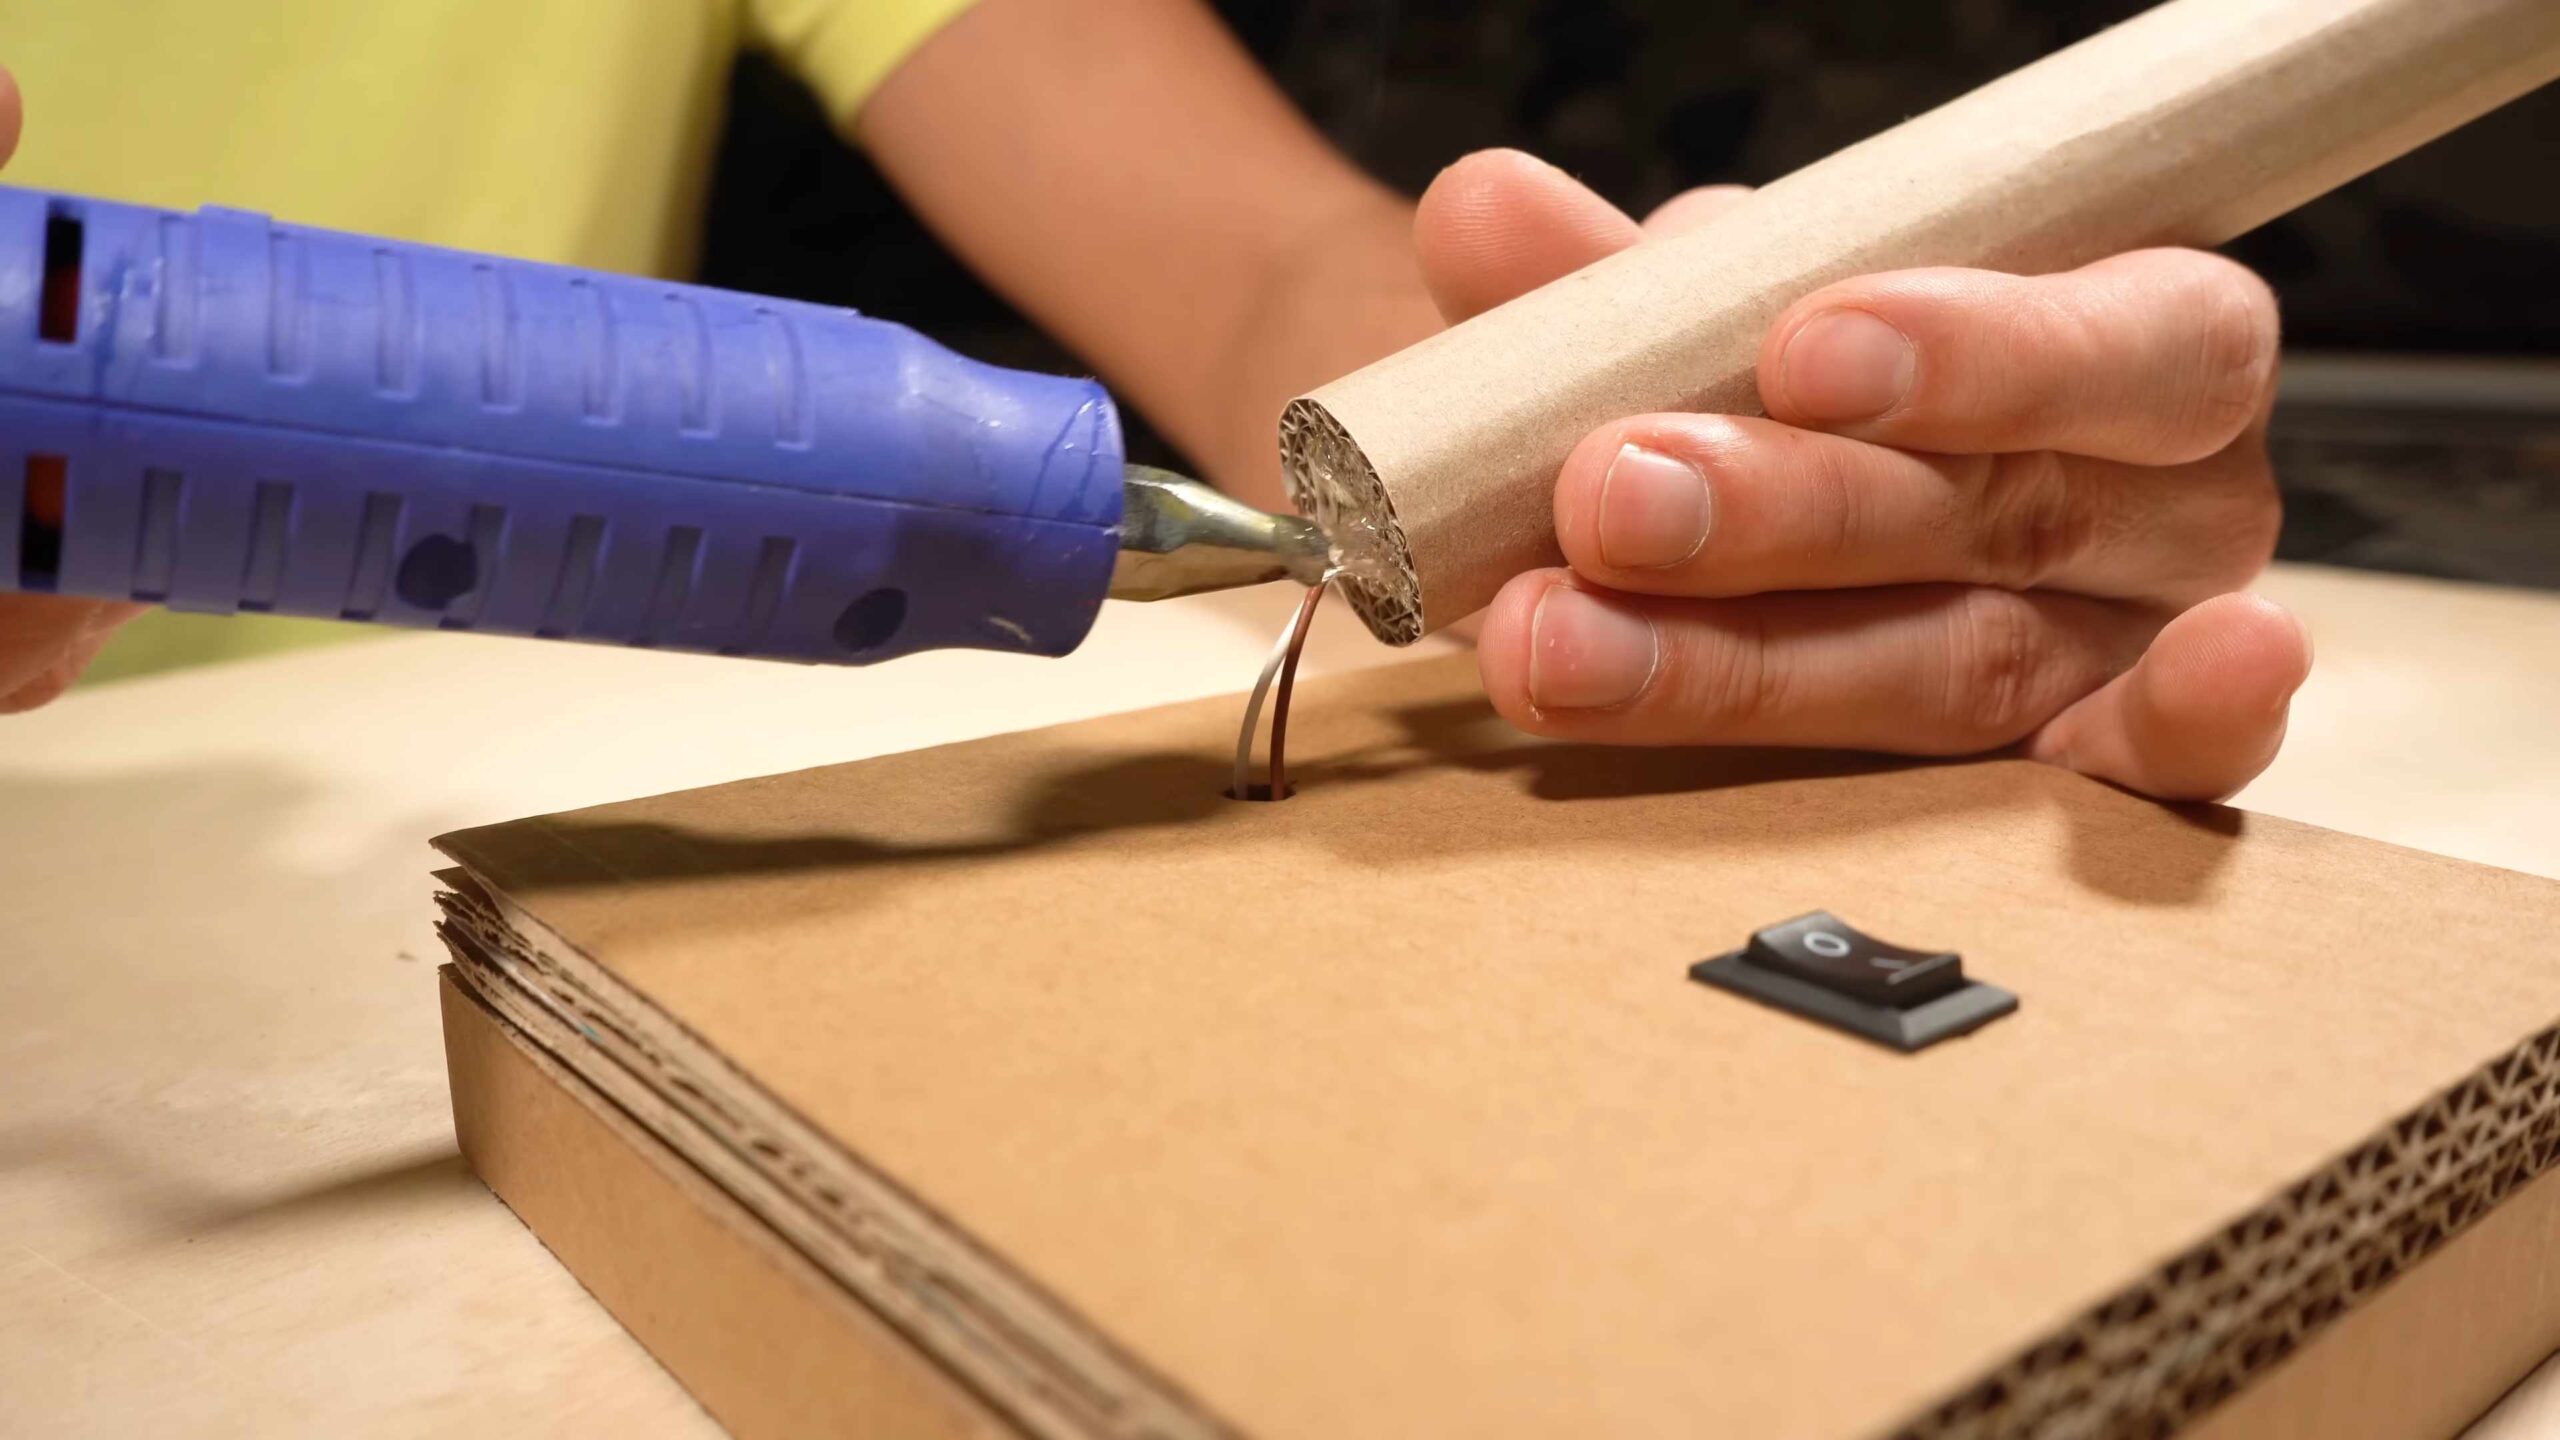
4. (Optional) Install the Switch: If you’re using a switch, cut one of the wires and connect the two ends to the terminals of the switch. This will allow you to turn the fan on and off easily.
5. Secure the Battery Holder: Use hot glue to attach the battery holder to the base of the fan. Make sure it’s in a convenient location for changing the batteries.
6. Attach the Fan Blade: This is the trickiest part. Carefully align the center of the fan blade with the motor shaft. You might need to use a small piece of cardboard or a straw as a spacer to ensure the blade doesn’t rub against the motor mount. Once aligned, use hot glue to securely attach the fan blade to the motor shaft. Be careful not to get glue on the motor itself. Make sure the fan blade is centered and balanced to prevent wobbling.
Phase 4: Testing and Refinement
Almost there! Let’s see if our creation works.
1. Insert Batteries: Insert the batteries into the battery holder.
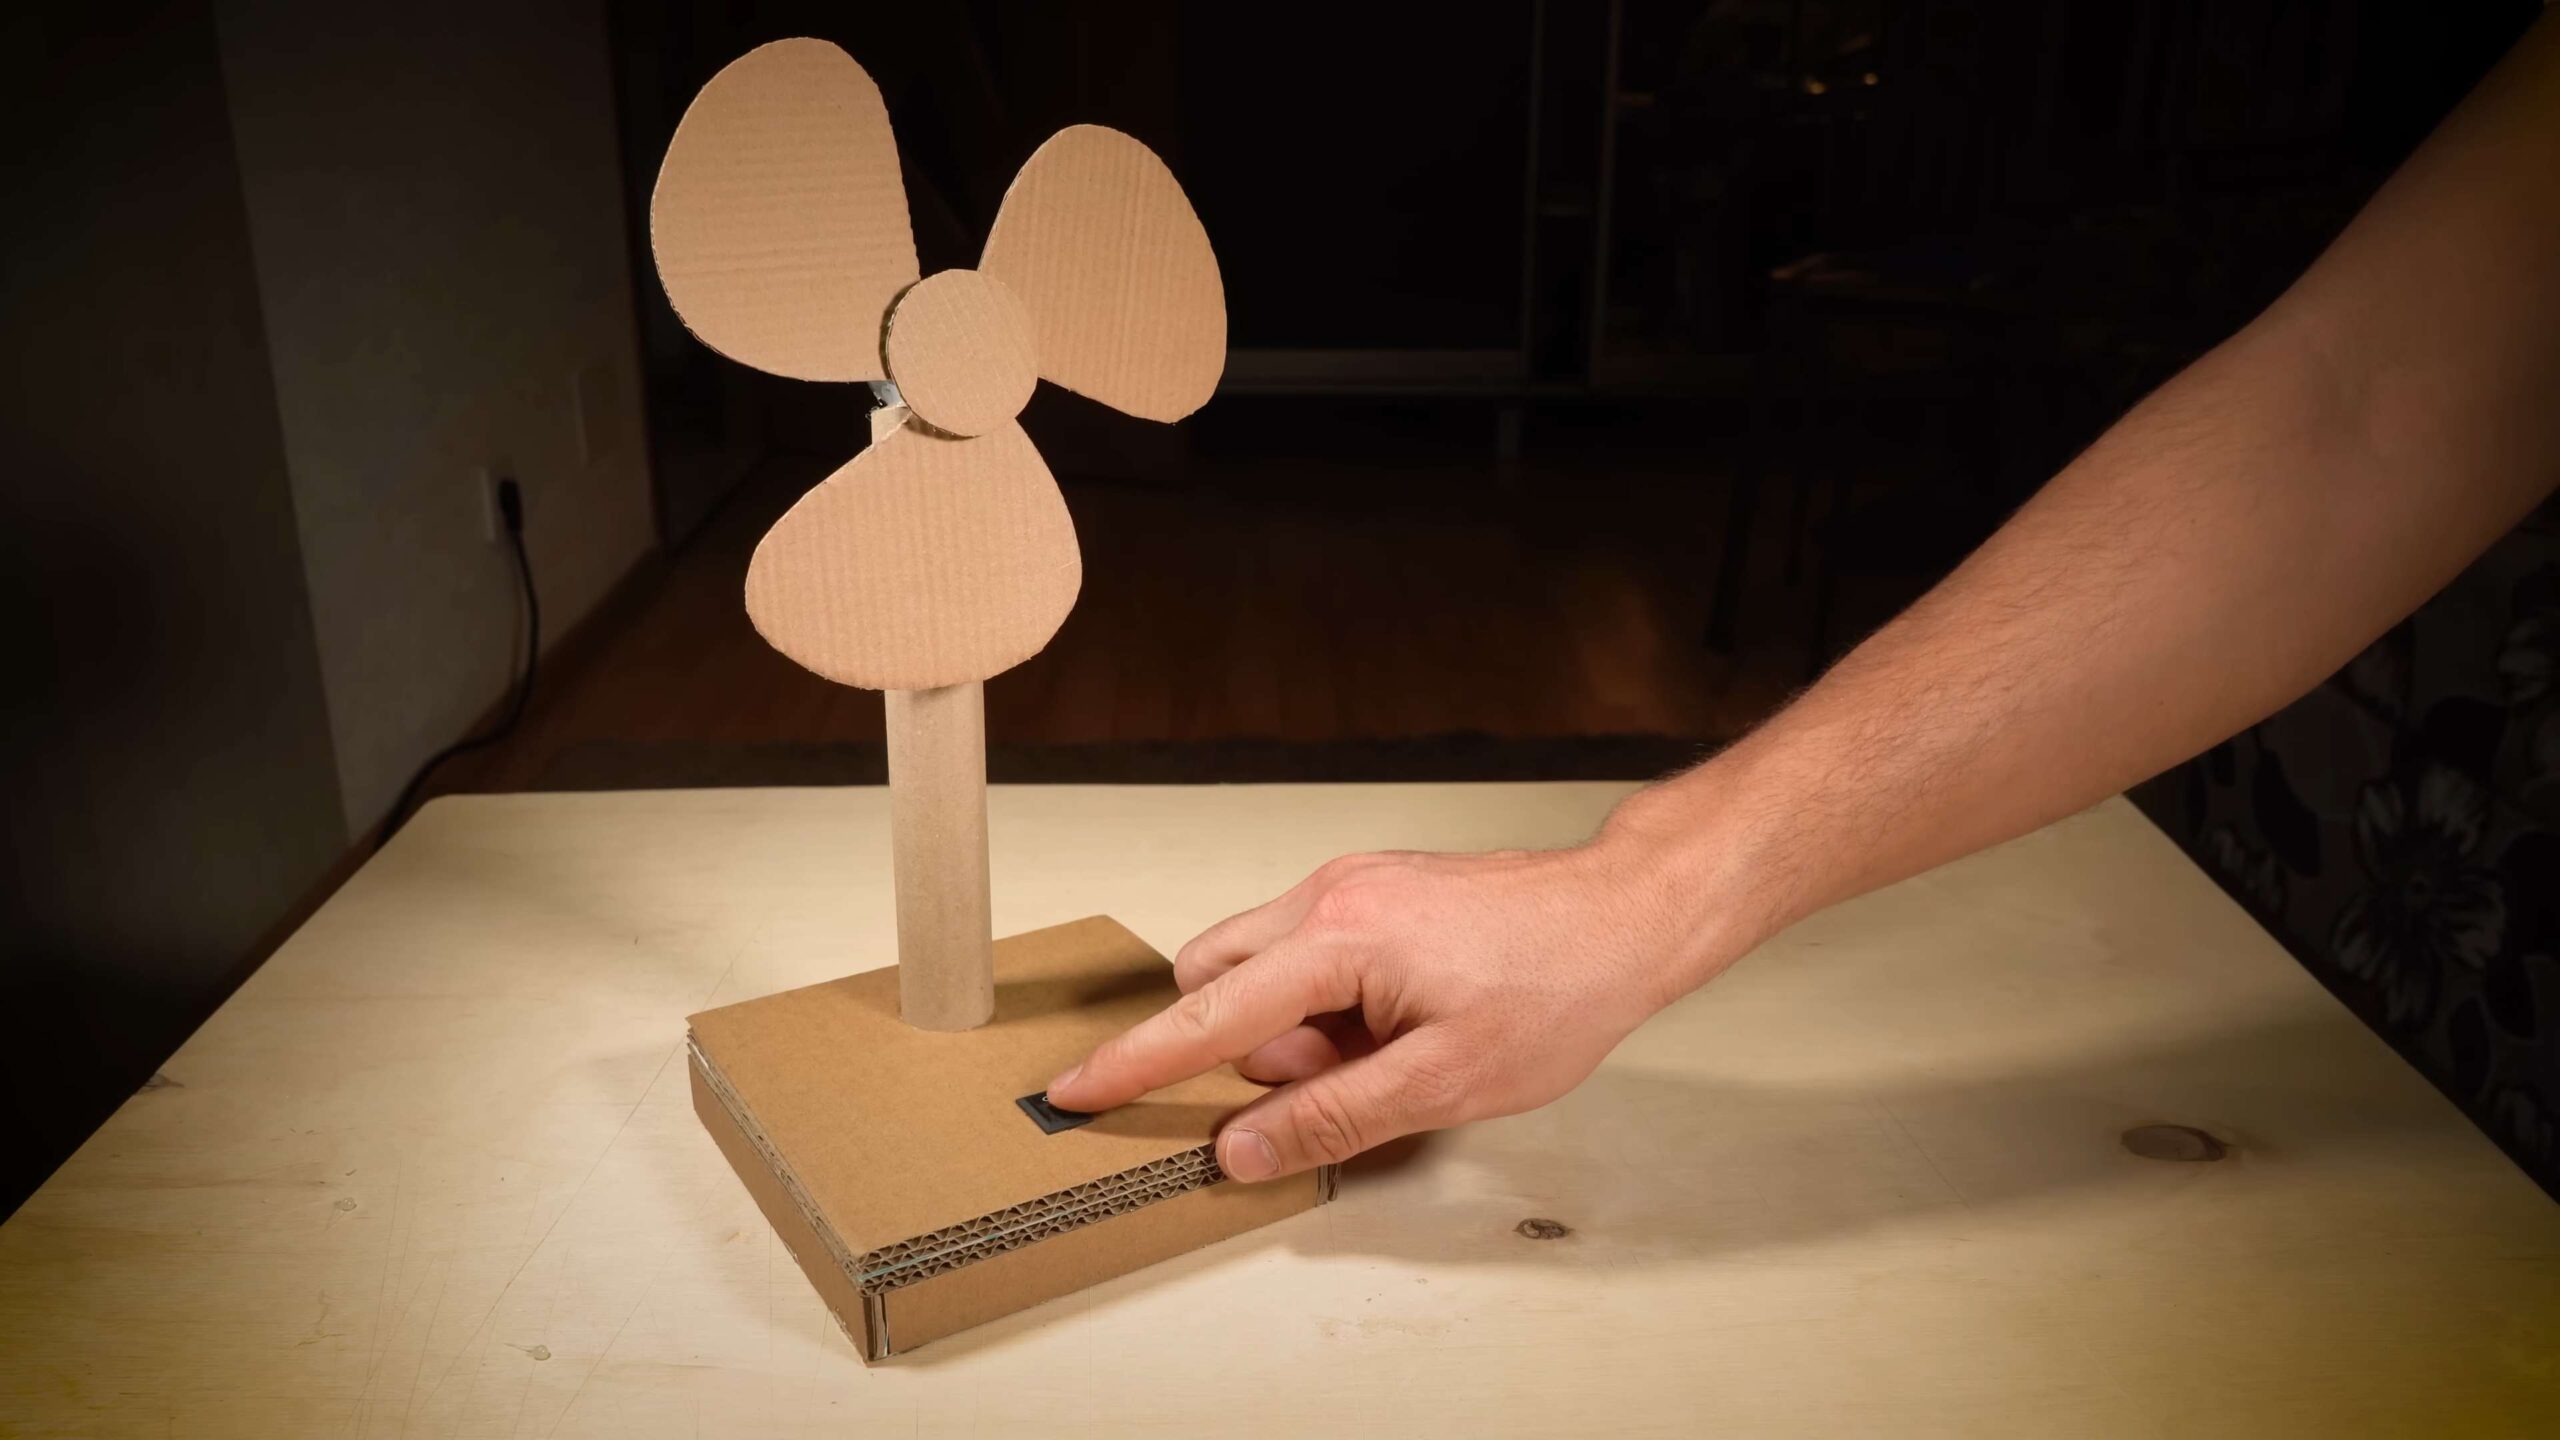
2. Test the Fan: If you installed a switch, turn it on. If not, the fan should start spinning as soon as you insert the batteries.
3. Troubleshooting: If the fan doesn’t spin, check the following:
* Battery Connection: Make sure the batteries are properly inserted and the battery holder is making good contact.
* Wire Connections: Ensure all the wires are securely connected to the battery holder, switch (if used), and motor.
* Motor Function: Test the motor by connecting it directly to the battery holder (bypassing the switch). If it still doesn’t spin, the motor might be faulty.
* Fan Blade Obstruction: Make sure the fan blade is not rubbing against anything.
4. Refinement: Once the fan is spinning, observe its performance.
* Wobbling: If the fan blade wobbles, it’s likely unbalanced. Try adding small pieces of cardboard to the lighter side of the blade to balance it.
* Airflow: Experiment with different blade angles to optimize airflow. You can also try adding a cardboard shroud around the fan blade to direct the airflow.
* Stability: If the fan is unstable, add weight to the base or widen the base.
Extra Tips and Tricks
* Decorate Your Fan: Get creative and decorate your fan with paint, markers, or stickers.
* Experiment with Blade Shapes: Try different blade shapes to see how they affect airflow.
* Use a Different Power Source: You can also power the fan with a USB cable and a USB power adapter. You’ll need a USB to DC power cable.
* Add a Grill: For safety, you can add a cardboard grill to the front of the fan to prevent fingers from getting caught in the blades.
And there you have it! Your very own DIY cardboard table fan. It might not be as powerful as a store-bought fan, but it’s a fun, affordable, and eco-friendly way to stay cool. Plus, you get the satisfaction of knowing you built it yourself! Enjoy your cool breeze!
Conclusion
So, there you have it! A surprisingly effective and incredibly simple way to create your own cardboard table fan. We know it might sound a little… unconventional, but trust us, the results speak for themselves. In a world increasingly concerned with sustainability and resourcefulness, this DIY project offers a fantastic opportunity to repurpose materials you likely already have lying around, saving you money and reducing waste.
But beyond the eco-friendly aspect, this project is just plain fun! It’s a fantastic activity to do with kids, teaching them about basic engineering principles, recycling, and the power of ingenuity. Imagine the satisfaction of creating something functional and useful from what others might consider trash. Plus, it’s a great conversation starter!
Why is this DIY trick a must-try? Because it’s:
* Affordable: The cost is practically zero! You’re using recycled cardboard and a few readily available components.
* Eco-Friendly: Reduce, reuse, recycle! This project embodies all three.
* Educational: Learn about basic circuits, airflow, and sustainable practices.
* Customizable: Get creative with the design and personalize your fan.
* Surprisingly Effective: Provides a gentle and refreshing breeze, perfect for personal cooling.
Feeling adventurous? Here are a few suggestions and variations to take your cardboard table fan to the next level:
* Power Source Alternatives: Experiment with different power sources. Instead of batteries, try using a USB cable connected to a power bank or computer. This makes it even more convenient and portable.
* Design Enhancements: Get artistic with the cardboard! Paint it, decorate it with stickers, or create intricate cut-out designs for a unique look. Consider adding a small stand or base for increased stability.
* Speed Control: For a more advanced project, research adding a potentiometer to control the fan speed. This will give you greater control over the airflow.
* Blade Variations: Experiment with different blade shapes and sizes to optimize airflow. Try creating curved blades or adding more blades for increased efficiency.
* Aromatic Breeze: Add a few drops of essential oil to a cotton ball and place it near the fan blades for a refreshing and fragrant breeze.
We truly believe that this cardboard table fan DIY project is a winner. It’s a simple, sustainable, and surprisingly effective way to stay cool. So, gather your cardboard, grab your supplies, and get ready to create your own personal breeze.
Don’t just take our word for it! We encourage you to try this DIY trick for yourself. We’re confident you’ll be impressed with the results. And most importantly, we want to hear about your experience! Share your creations, modifications, and any tips you discover in the comments below. Let’s build a community of DIY enthusiasts and inspire others to embrace sustainable and creative solutions. We can’t wait to see what you come up with!
FAQ
Frequently Asked Questions About Your Cardboard Table Fan
Q: What kind of cardboard is best for this project?
A: Corrugated cardboard, the kind used for shipping boxes, is ideal. It’s sturdy and provides good structural support for the fan blades and housing. Avoid thin or flimsy cardboard, as it may not hold up well. Cereal boxes can be used for smaller components or decorative elements, but the main structure should be made from thicker cardboard.
Q: What size motor should I use?
A: A small DC motor, typically in the 3-6V range, is perfect for this project. You can often find these motors in old toys or electronics. The size isn’t as critical as the voltage rating. Make sure the motor’s voltage matches the voltage of your power source (e.g., batteries or USB). A motor with a higher RPM (revolutions per minute) will generally produce a stronger breeze.
Q: How do I attach the fan blades to the motor shaft?
A: The most common method is to create a small hole in the center of the cardboard fan blades that is slightly smaller than the diameter of the motor shaft. Then, carefully push the blades onto the shaft, ensuring they are centered and secure. You can use a small amount of hot glue or super glue to further secure the blades, but be careful not to get glue inside the motor. Another option is to use a small plastic or metal connector that fits both the motor shaft and the cardboard blades.
Q: What if my fan blades are wobbly or unbalanced?
A: An unbalanced fan will vibrate and be less efficient. To fix this, carefully trim the edges of the blades to ensure they are all the same size and shape. You can also add small pieces of tape or glue to the lighter blades to balance them out. Experiment with different adjustments until the fan runs smoothly.
Q: How long will the batteries last?
A: Battery life depends on the size of the batteries, the voltage of the motor, and how often you use the fan. Alkaline batteries will generally last longer than rechargeable batteries. To extend battery life, consider using a lower voltage motor or adding a switch to turn the fan off when not in use. You can also explore using a USB power source, which can provide a more consistent and longer-lasting power supply.
Q: Can I use this fan outdoors?
A: While the cardboard table fan can be used outdoors, it’s not designed for wet or windy conditions. Cardboard is susceptible to moisture damage, so avoid using the fan in the rain or near water. The fan is best suited for indoor use or in sheltered outdoor areas.
Q: Is this project safe for children?
A: This project can be a fun and educational activity for children, but adult supervision is required. Be careful when using sharp tools like scissors or knives. Also, ensure that the electrical connections are properly insulated to prevent shocks. It’s a good idea to teach children about basic electrical safety before starting the project.
Q: My fan isn’t producing much airflow. What can I do?
A: Several factors can affect airflow. First, make sure the motor is running at its optimal voltage. Second, check that the fan blades are properly angled and balanced. Third, ensure that the fan housing is directing the airflow in the desired direction. You can also experiment with different blade shapes and sizes to optimize airflow. Finally, make sure there are no obstructions blocking the airflow around the fan.
Q: Can I add a switch to turn the fan on and off?
A: Yes, adding a switch is a simple and effective way to control the fan. You can use a small SPST (single-pole, single-throw) switch, which is readily available at most electronics stores. Simply connect the switch in series with one of the wires leading to the motor. When the switch is closed, the circuit is complete, and the fan will turn on. When the switch is open, the circuit is broken, and the fan will turn off.
Q: How can I make my cardboard table fan more durable?
A: To increase the durability of your fan, consider reinforcing the cardboard with tape or glue. You can also apply a sealant or varnish to protect the cardboard from moisture. For the fan blades, you can use thicker cardboard or laminate them with plastic film. Additionally, consider adding a sturdy base to prevent the fan from tipping over.

Leave a Comment