

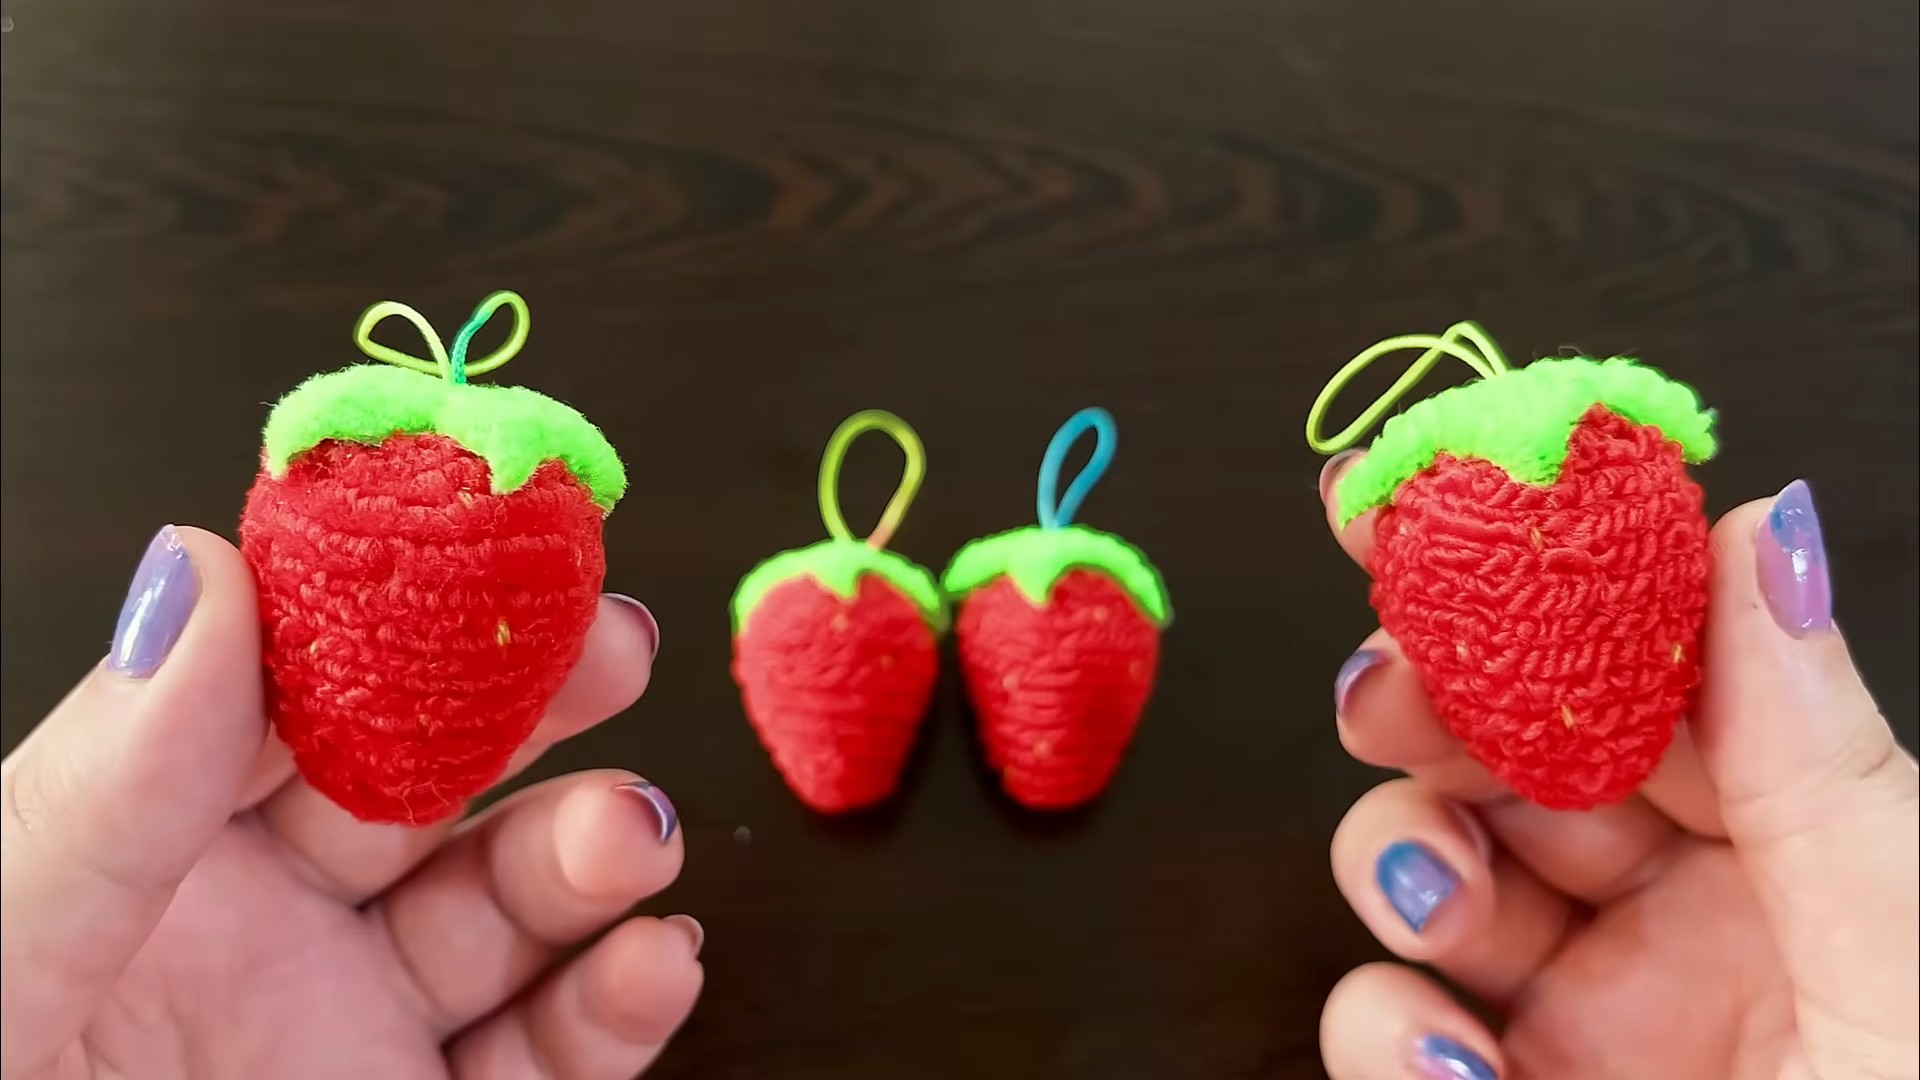
Strawberry Keychain DIY: Who doesn’t love a little burst of summery sweetness hanging from their keys or bag? I know I do! And what could be more charming than a handmade strawberry keychain? This isn’t just a craft; it’s a tiny, portable piece of joy you can create yourself.
Humans have been crafting keychains and charms for centuries, dating back to ancient civilizations who used them as amulets and symbols of good luck. While our modern keychains might not ward off evil spirits, they certainly add a personal touch to our everyday lives. And let’s be honest, in a world of mass-produced items, a handmade gift or accessory stands out.
Why do you need this Strawberry Keychain DIY in your life? Because it’s fun, it’s easy, and it’s a fantastic way to unleash your creativity! Plus, it’s a perfect project for using up those scraps of felt or yarn you’ve been hoarding. Imagine the satisfaction of gifting a personalized strawberry keychain to a friend or family member, knowing you poured your heart and soul into creating something special. In this article, I’ll guide you through each step, ensuring even beginners can create adorable strawberry keychains that will brighten anyone’s day. Let’s get crafting!
DIY Adorable Strawberry Keychain: A Sweet Project for Any Skill Level
Hey there, fellow crafters! I’m so excited to share this super cute and surprisingly easy DIY project with you: a strawberry keychain! It’s perfect for adding a touch of sweetness to your keys, backpack, or even as a little handmade gift. Don’t worry if you’re a beginner; I’ll walk you through every step. Let’s get started!
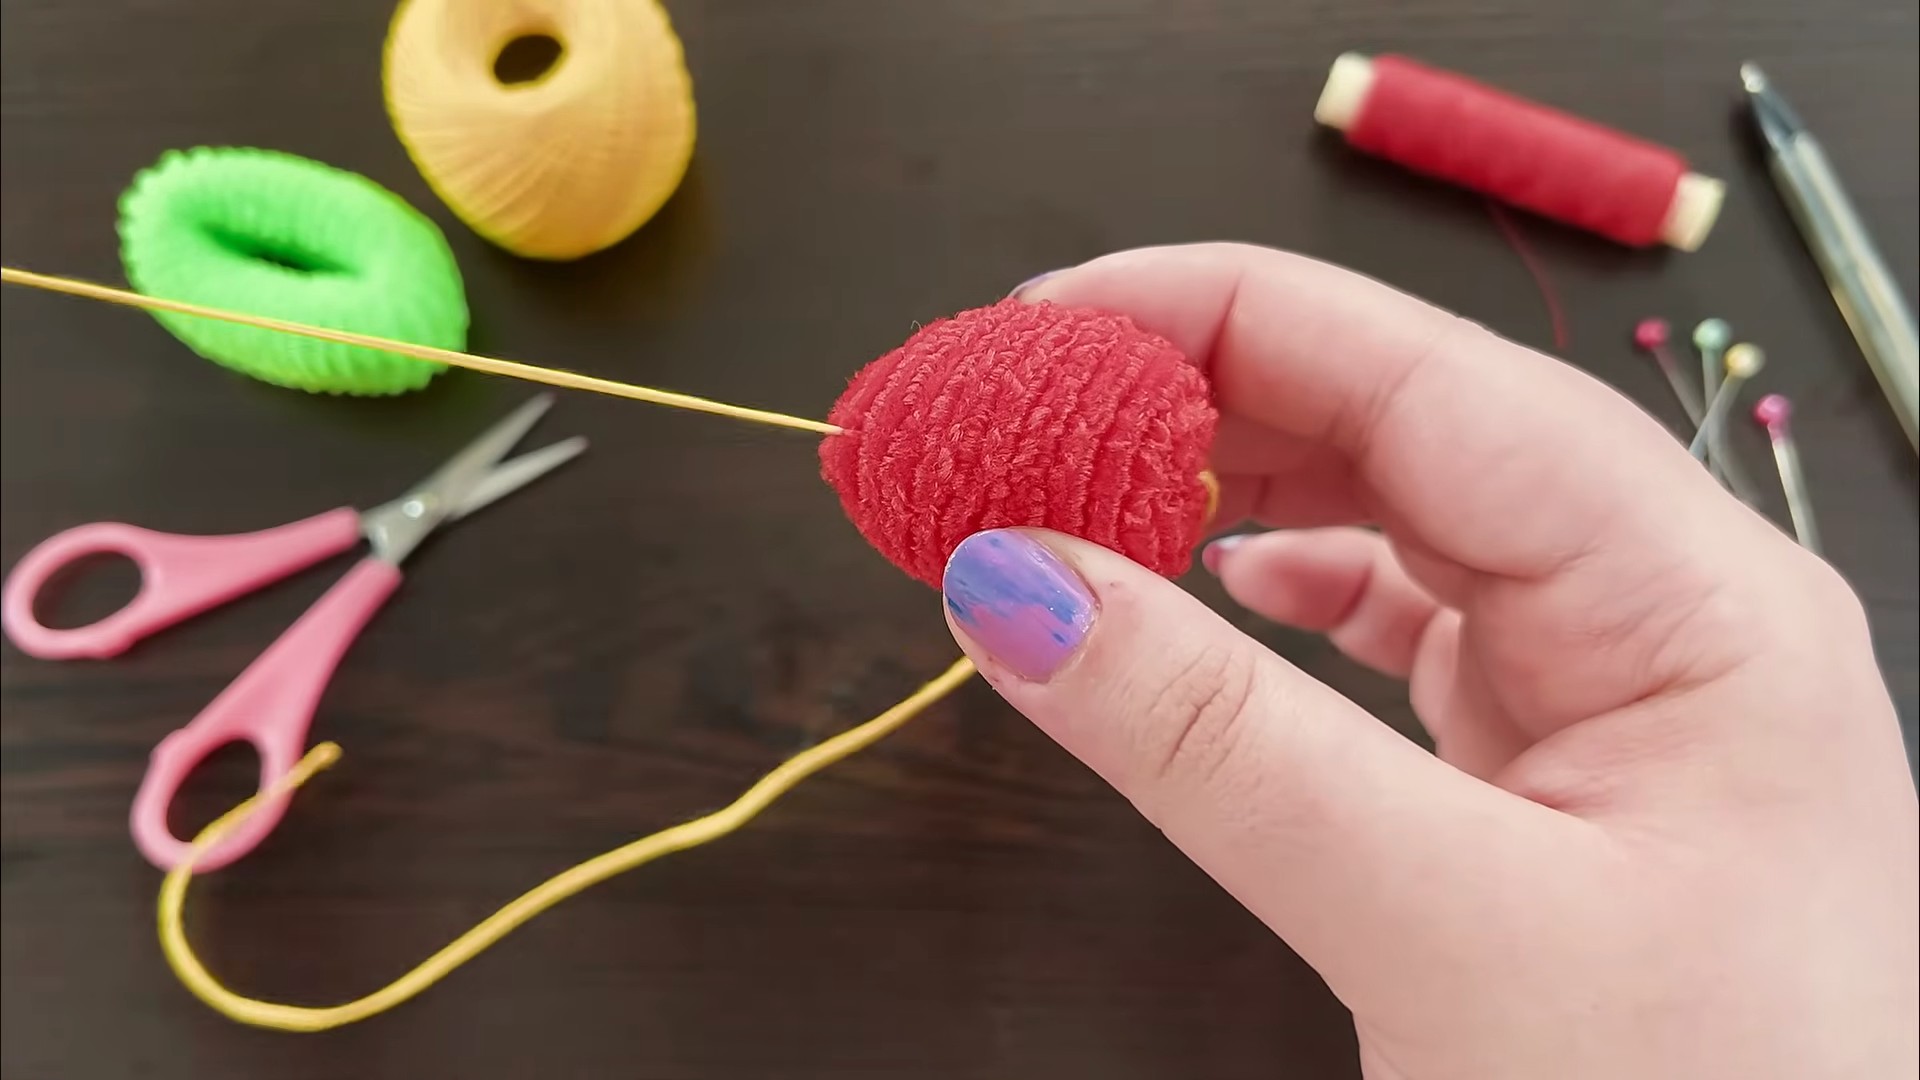
What You’ll Need: The Supply List
Before we dive in, let’s gather all the materials. Having everything ready will make the process smooth and enjoyable.
* **Felt:** Red, green, and black felt are essential. You can also use pink for a slightly different look. I prefer wool felt for its durability and texture, but acrylic felt works just as well, especially if you’re on a budget.
* **Embroidery Floss:** Matching colors to your felt (red, green, black) are ideal. I also like to have a cream or white floss on hand for adding highlights.
* **Embroidery Needle:** Choose one with a large eye that’s easy to thread with embroidery floss.
* **Scissors:** A sharp pair of scissors is crucial for clean cuts. I recommend having both small embroidery scissors and larger fabric scissors.
* **Stuffing:** Polyester fiberfill is my go-to for stuffing plushies and keychains. It’s lightweight, washable, and readily available.
* **Keychain Ring:** You can find these at most craft stores or online. Make sure it’s sturdy enough to hold your keychain.
* **Jump Ring:** This connects the strawberry to the keychain ring.
* **Pliers (Optional):** These can be helpful for opening and closing jump rings.
* **Pencil or Fabric Marker:** For tracing your pattern onto the felt. A water-soluble fabric marker is best, as it disappears with water.
* **Strawberry Template:** You can easily find free printable strawberry templates online. I’ll also provide instructions on how to draw your own.
* **Glue (Optional):** Fabric glue can be helpful for securing small pieces, but it’s not strictly necessary.
Creating Your Strawberry Template: Two Options
You have two options for creating your strawberry template: printing one or drawing your own. I’ll explain both.
**Option 1: Printing a Template**
1. **Search Online:** A quick Google search for “free printable strawberry template” will yield tons of results. Choose one that you like the size and shape of. I usually aim for a strawberry that’s about 2-3 inches tall.
2. **Print and Cut:** Print the template onto regular printer paper. Carefully cut out the strawberry shape and the leaf shape.
**Option 2: Drawing Your Own Template**
1. **Draw the Strawberry Body:** On a piece of paper, draw a teardrop shape. This will be the main body of your strawberry. Round out the bottom and make sure the top is slightly wider than the bottom.
2. **Draw the Leaves:** Above the strawberry body, draw a small cluster of leaves. I usually draw 3-5 leaves, each with a slightly pointed shape.
3. **Adjust and Refine:** Take a look at your drawing and make any adjustments you feel are necessary. Once you’re happy with the shape, cut out the strawberry and leaf shapes.
Cutting the Felt Pieces: Precision is Key
Now that we have our templates, it’s time to cut out the felt pieces.
1. **Pin or Trace:** Place the strawberry template onto the red felt and either pin it in place or trace around it with a pencil or fabric marker. If you’re pinning, make sure the pins are close together to prevent the template from shifting.
2. **Cut the Strawberry Body:** Carefully cut out the strawberry shape along the traced line. Try to be as precise as possible for a clean, professional look. You’ll need two identical strawberry body pieces.
3. **Cut the Leaves:** Repeat the process with the green felt and the leaf template. Cut out one leaf piece.
4. **Cut the Seeds:** Cut out tiny teardrop shapes from the black felt. These will be the strawberry seeds. You’ll need about 10-15 seeds per strawberry side.
Embroidering the Details: Adding Personality
This is where your strawberry really comes to life! We’ll be adding the seeds and some optional decorative stitching.
1. **Attaching the Seeds:** Thread your embroidery needle with black embroidery floss. Knot the end of the floss.
2. **Sewing the Seeds:** On one of the red felt strawberry pieces, randomly arrange the black felt seeds. Use a small stitch to secure each seed in place. I like to use a simple straight stitch or a French knot for a more textured look.
3. **Optional Decorative Stitching:** If you want to add some extra flair, you can use a contrasting color of embroidery floss (like cream or white) to add some decorative stitching around the edges of the strawberry. A running stitch or a blanket stitch works well for this.
4. **Repeat for the Other Side:** Repeat steps 2 and 3 on the other red felt strawberry piece. Try to mirror the seed placement on both sides for a more balanced look.
Assembling the Strawberry: Bringing it All Together
Now it’s time to sew the strawberry pieces together and add the stuffing.
1. **Pinning the Pieces:** Place the two red felt strawberry pieces together, with the embroidered sides facing out. Pin them together around the edges, leaving a small opening at the top for stuffing.
2. **Sewing the Edges:** Thread your embroidery needle with red embroidery floss. Knot the end of the floss.
3. **Choose Your Stitch:** Use a blanket stitch or a running stitch to sew the two strawberry pieces together. I personally prefer the blanket stitch because it creates a nice, clean edge.
* **Blanket Stitch:** Bring the needle up through the edge of the felt, then loop the floss around the edge and back through the same hole. Repeat this process around the entire edge of the strawberry, keeping the stitches close together.
* **Running Stitch:** Simply sew a series of small, evenly spaced stitches around the edge of the strawberry.
4. **Stuffing the Strawberry:** Once you’ve sewn most of the way around, start stuffing the strawberry with polyester fiberfill. Use a small amount of stuffing at a time and make sure to push it into all the corners. Don’t overstuff it, or it will look lumpy.
5. **Finishing the Seam:** Once the strawberry is stuffed to your liking, finish sewing the remaining opening. Secure the thread with a knot and trim the excess floss.
Attaching the Leaves and Keychain: The Final Touches
We’re almost there! Now we just need to attach the leaves and the keychain.
1. **Attaching the Leaves:** Position the green felt leaf piece at the top of the strawberry. You can either sew it in place using a few small stitches or glue it on with fabric glue. I prefer sewing because it’s more secure.
2. **Creating the Loop:** Cut a small piece of red felt (about 1 inch long and 1/4 inch wide). Fold it in half to create a loop.
3. **Sewing the Loop:** Sew the ends of the felt loop to the top of the strawberry, right behind the leaves. This loop will be used to attach the jump ring.
4. **Attaching the Jump Ring:** Use pliers (if needed) to open the jump ring. Thread the jump ring through the felt loop and then close it securely.
5. **Attaching the Keychain Ring:** Attach the keychain ring to the jump ring. Make sure it’s securely attached so your strawberry doesn’t fall off.
Admire Your Creation: You Did It!
And there you have it! Your adorable DIY strawberry keychain is complete. I hope you enjoyed this project as much as I did. Feel free to experiment with different colors, sizes, and embellishments to create your own unique strawberry keychains. These make wonderful gifts for friends and family, or just a sweet little treat for yourself. Happy crafting!
Conclusion
So, there you have it! Creating your own adorable strawberry keychain is not only incredibly simple, but it’s also a fantastic way to personalize your belongings, craft unique gifts, or even start a small side hustle. This strawberry keychain DIY project is a winner because it’s budget-friendly, requiring minimal materials that you likely already have on hand. Forget those mass-produced, generic keychains – imagine the satisfaction of carrying around something you made with your own two hands, a little burst of summery sweetness wherever you go.
But the best part? The possibilities are endless! Feel free to experiment with different shades of felt to create variations like golden raspberries or even blueberries. Add tiny seed beads for a more realistic texture, or use embroidery floss to stitch on a cute little face. You could even scale up the pattern to create larger strawberry plushies for your kids or pets. Think about adding a small bell inside for a delightful jingle, or using scented felt for an extra sensory experience.
Don’t be afraid to get creative and put your own spin on this project. The beauty of DIY is that there are no hard and fast rules. It’s all about having fun and expressing your individuality.
We truly believe that this strawberry keychain DIY is a must-try for crafters of all skill levels. It’s a quick, rewarding, and utterly charming project that’s guaranteed to bring a smile to your face. So, gather your supplies, unleash your inner artist, and get ready to create some seriously sweet keychains!
We’re confident that you’ll love the process and the final result. And most importantly, we want to hear about your experience! Share your creations with us on social media using #StrawberryKeychainDIY and tell us about any variations or tips you discovered along the way. We can’t wait to see what you come up with! Happy crafting!
Frequently Asked Questions (FAQ)
What kind of felt should I use for my strawberry keychain?
The best type of felt for this project is acrylic felt or wool felt. Acrylic felt is more affordable and readily available, making it a great option for beginners. It comes in a wide range of colors and is easy to cut and sew. Wool felt, on the other hand, is a higher-quality option that is softer, more durable, and has a richer texture. It’s a bit more expensive, but it will result in a keychain that lasts longer and looks more luxurious. Ultimately, the choice depends on your budget and desired aesthetic.
Can I use a sewing machine instead of hand-sewing?
Absolutely! While this project is designed to be easily hand-sewn, you can definitely use a sewing machine if you prefer. Just be sure to use a small stitch length and a needle appropriate for felt. A sewing machine can speed up the process, especially if you’re making multiple keychains. However, hand-sewing allows for more control and precision, especially when working with small details.
How do I attach the keychain hardware securely?
The key to a secure keychain attachment is to reinforce the area where the jump ring or keychain loop is attached. You can do this by adding a small piece of felt behind the attachment point for extra support. When sewing the jump ring or loop in place, use a strong thread and make several passes through the felt to ensure it’s firmly secured. You can also use a small dab of fabric glue to further reinforce the attachment.
What if I don’t have felt? Can I use another material?
While felt is the ideal material for this project due to its durability and ease of use, you can experiment with other fabrics. Consider using fleece, cotton fabric (with interfacing for added structure), or even repurposed fabric scraps. Keep in mind that different fabrics may require different sewing techniques and may not hold their shape as well as felt.
How can I make my strawberry keychain more durable?
To increase the durability of your strawberry keychain, consider using a thicker felt or layering two pieces of felt together for each component. You can also reinforce the seams with a double stitch or use a stronger thread. Additionally, avoid overstuffing the keychain, as this can put stress on the seams.
What are some other variations I can try?
The possibilities are endless! Here are a few ideas to get you started:
* Add embellishments: Use seed beads, sequins, or embroidery floss to add details like seeds, leaves, or a cute face.
* Experiment with colors: Try different shades of red, pink, or even yellow to create unique strawberry variations.
* Create different fruit keychains: Use the same basic technique to create keychains shaped like other fruits, such as apples, lemons, or watermelons.
* Add a scent: Use scented felt or add a few drops of essential oil to the stuffing for a fragrant keychain.
* Make it a zipper pull: Instead of a keychain ring, attach a small lobster clasp to use it as a zipper pull on your bag or jacket.
Where can I find a good template for the strawberry shape?
You can easily find free strawberry templates online by searching for “strawberry template printable.” Alternatively, you can draw your own template on a piece of paper. Start with a basic triangle shape and round off the edges to create a more realistic strawberry silhouette.
What kind of stuffing should I use?
Polyester fiberfill is the most common and readily available stuffing material for plush toys and keychains. It’s lightweight, washable, and hypoallergenic. You can also use cotton stuffing, but it tends to be heavier and may not hold its shape as well. Avoid using materials like beans or rice, as they can attract moisture and mold.
How do I clean my strawberry keychain?
To clean your strawberry keychain, gently spot clean it with a damp cloth and mild soap. Avoid submerging it in water, as this can damage the stuffing and felt. Allow it to air dry completely before using it again.
Is this project suitable for children?
This project is suitable for older children and teenagers with some sewing experience. Younger children may need adult supervision and assistance, especially when using sharp needles and scissors. Consider using pre-cut felt shapes or simplifying the design for younger children. The strawberry keychain DIY can be a fun family activity with proper supervision.


Leave a Comment