

Growing sweet cantaloupes in your own backyard might seem like a challenge reserved for seasoned farmers, but I’m here to tell you it’s totally achievable, even for beginner gardeners! Imagine biting into a juicy, sun-ripened cantaloupe that you nurtured from seed to fruit – the taste is simply unmatched. Forget those bland, store-bought melons; we’re talking about cantaloupes bursting with flavor and sweetness, grown with your own two hands.
Cantaloupes, with their vibrant orange flesh and delicate aroma, have a rich history, dating back to ancient times. Evidence suggests they were cultivated in Africa and Asia centuries ago, eventually making their way to Europe and the Americas. For generations, families have passed down secrets for cultivating these delicious melons, and now, I’m excited to share some of those time-tested tricks with you.
Why should you embark on this growing sweet cantaloupes adventure? Well, beyond the incredible taste, home-grown cantaloupes are free from harmful pesticides and you have complete control over their growing environment. Plus, it’s incredibly rewarding to watch a tiny seed transform into a bountiful harvest. In this article, I’ll guide you through simple DIY techniques and hacks that will ensure you have a thriving cantaloupe patch, even if you have limited space or experience. Get ready to impress your friends and family with your homegrown sweetness!
Growing Sweet Cantaloupes: A DIY Guide to Juicy Success!
Okay, let’s talk cantaloupes! There’s nothing quite like biting into a perfectly ripe, sweet cantaloupe you’ve grown yourself. It’s a summer dream come true. But growing these delicious melons can seem a little daunting. Don’t worry, I’m here to break it down for you. This guide will walk you through every step, from seed to sweet, juicy reward.
Choosing the Right Cantaloupe Variety
First things first, let’s pick the right cantaloupe for your garden. Not all cantaloupes are created equal, and some varieties are better suited for certain climates and growing conditions.
* ‘Hales Best Jumbo’: A classic choice, known for its reliable yields and sweet flavor. It’s a good all-around option.
* ‘Athena’: This is a popular hybrid variety that’s disease-resistant and produces uniform, flavorful melons.
* ‘Ambrosia’: If you’re looking for extra sweetness, ‘Ambrosia’ is a great pick. It’s known for its exceptional flavor.
* ‘Minnesota Midget’: For those with limited space, this compact variety is perfect. It produces smaller melons but still packs a flavorful punch.
* ‘Sugar Cube’: Another smaller variety, ‘Sugar Cube’ is early maturing and incredibly sweet.
Consider your local climate, the amount of space you have, and your personal taste preferences when making your selection. I personally love ‘Athena’ because it’s so reliable and disease-resistant, but experiment and find what works best for you!
Preparing Your Garden for Cantaloupe Glory
Cantaloupes are sun-loving, nutrient-hungry plants. So, preparing your garden bed is crucial for success.
* Sunlight: Cantaloupes need at least 6-8 hours of direct sunlight per day. Choose a location in your garden that gets plenty of sunshine.
* Soil: Well-drained, fertile soil is essential. Cantaloupes don’t like soggy feet! Amend your soil with compost or well-rotted manure to improve drainage and add nutrients.
* Soil pH: Cantaloupes prefer a slightly acidic to neutral soil pH, ideally between 6.0 and 6.8. You can test your soil pH with a simple soil testing kit.
* Space: Cantaloupes need plenty of space to sprawl. Allow at least 2-3 feet between plants. If you’re growing them in rows, space the rows 4-6 feet apart.
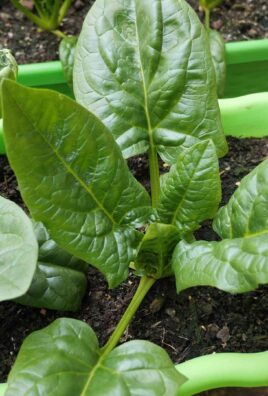
Starting Your Cantaloupe Seeds (Indoors or Out)
You have two options for starting your cantaloupe seeds: indoors or directly in the garden. Starting indoors gives you a head start, especially in cooler climates.
Starting Seeds Indoors:
1. Timing is Key: Start your seeds indoors about 3-4 weeks before the last expected frost in your area.
2. Seed Starting Mix: Use a high-quality seed starting mix. This is important because it’s sterile and provides the right nutrients for seedlings.
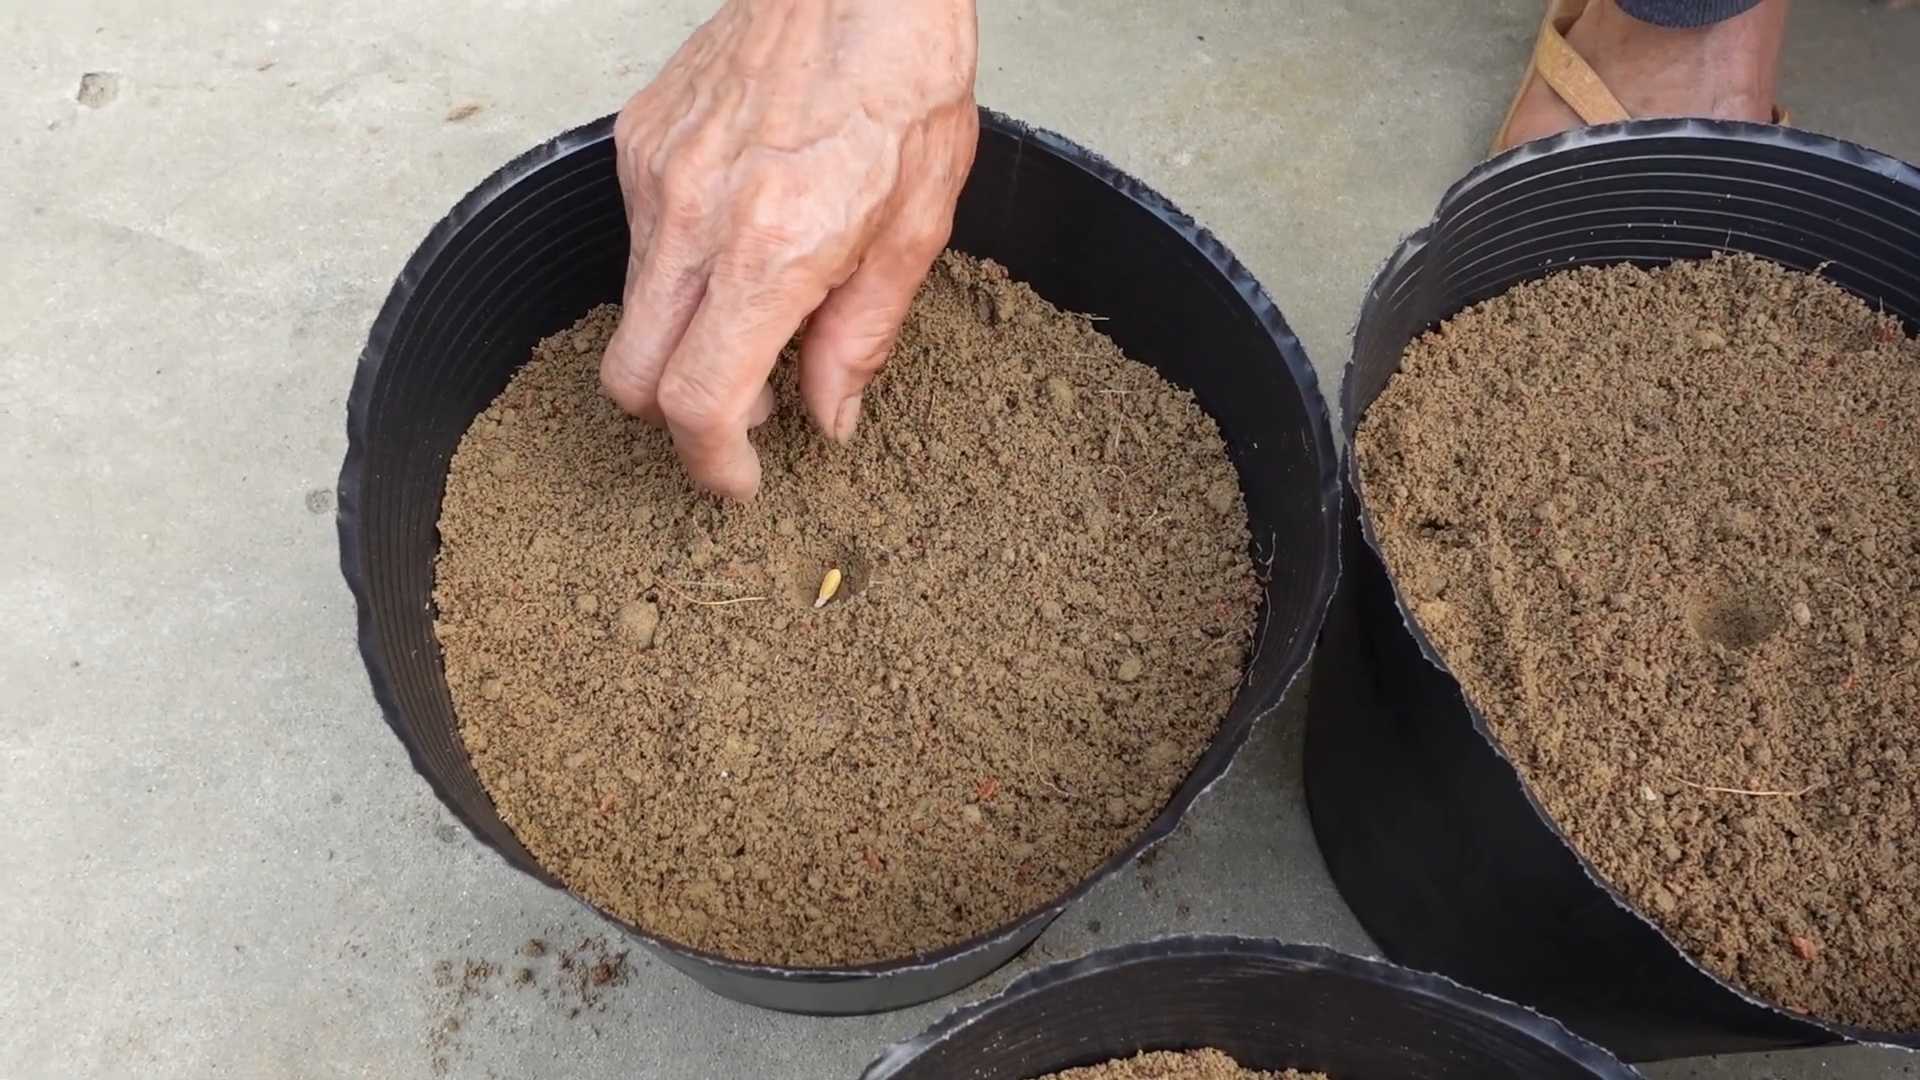
3. Planting the Seeds: Sow the seeds about ½ inch deep in small pots or seed trays. I like to use biodegradable pots so I can plant the whole thing directly into the ground later, minimizing root disturbance.
4. Warmth and Light: Keep the soil consistently moist but not soggy. Place the pots in a warm location (around 70-80°F) or use a heat mat. Provide plenty of light, either from a sunny window or a grow light.
5. Thinning: If more than one seed germinates in a pot, thin to the strongest seedling.
6. Hardening Off: Before transplanting your seedlings outdoors, you need to “harden them off.” This means gradually exposing them to outdoor conditions over a period of 7-10 days. Start by placing them in a sheltered spot for a few hours each day, gradually increasing the amount of time they spend outdoors.
Direct Sowing Seeds Outdoors:
1. Wait for Warm Weather: Direct sowing is best when the soil has warmed up to at least 65°F. This is usually a few weeks after the last expected frost.
2. Prepare the Soil: Make sure the soil is well-drained and amended with compost.
3. Planting the Seeds: Sow the seeds about ½ inch deep and 2-3 feet apart.
4. Watering: Keep the soil consistently moist until the seedlings emerge.
5. Thinning: Once the seedlings have a few true leaves, thin them to the strongest plant.
Transplanting Your Cantaloupe Seedlings
Whether you started your seeds indoors or out, transplanting is a crucial step.
1. Choose a Cloudy Day: Transplant on a cloudy day or in the late afternoon to minimize stress on the seedlings.
2. Dig the Holes: Dig holes that are slightly larger than the root ball of your seedlings.
3. Gently Remove Seedlings: Carefully remove the seedlings from their pots, being careful not to damage the roots. If you used biodegradable pots, you can plant the whole pot.
4. Planting Depth: Plant the seedlings at the same depth they were growing in their pots.
5. Water Thoroughly: Water the seedlings thoroughly after transplanting.
6. Mulch: Apply a layer of mulch around the plants to help retain moisture, suppress weeds, and regulate soil temperature. I like to use straw or shredded leaves.
Caring for Your Growing Cantaloupes
Once your cantaloupe plants are established, it’s time to provide them with the care they need to thrive.
* Watering: Cantaloupes need consistent watering, especially during hot, dry weather. Water deeply and regularly, aiming for about 1-2 inches of water per week. Avoid overhead watering, as this can promote fungal diseases. Drip irrigation or soaker hoses are ideal.
* Fertilizing: Cantaloupes are heavy feeders. Fertilize them regularly with a balanced fertilizer. I like to use an organic fertilizer that’s rich in phosphorus and potassium. Follow the instructions on the fertilizer package.
* Weeding: Keep the area around your cantaloupe plants free of weeds. Weeds compete with the plants for nutrients and water.
* Pest Control: Keep an eye out for common cantaloupe pests, such as aphids, squash bugs, and cucumber beetles. Use organic pest control methods, such as insecticidal soap or neem oil, to control these pests.
* Pruning: While not essential, pruning can help improve air circulation and fruit production. Remove any dead or diseased leaves and any suckers (small shoots that grow from the base of the plant).
* Support: As the cantaloupes grow, they may need support to prevent them from rotting on the ground. You can use trellises or cradles made from old pantyhose to support the melons.
Protecting Your Cantaloupes from Pests and Diseases
Cantaloupes are susceptible to a few common pests and diseases. Here’s how to protect your crop:
* Cucumber Beetles: These pests can transmit bacterial wilt, a deadly disease for cantaloupes. Use row covers to protect young plants and handpick beetles as you see them.
* Squash Bugs: These pests suck the sap from leaves, weakening the plants. Handpick bugs and their eggs (which are usually found on the undersides of leaves).
* Aphids: These tiny pests can cause distorted growth and transmit viruses. Spray plants with insecticidal soap or neem oil.
* Powdery Mildew: This fungal disease causes a white, powdery coating on leaves. Improve air circulation by pruning plants and avoid overhead watering. You can also spray plants with a fungicide if necessary.
* Fusarium Wilt: This soilborne disease causes wilting and yellowing of leaves. Choose disease-resistant varieties and practice crop rotation.
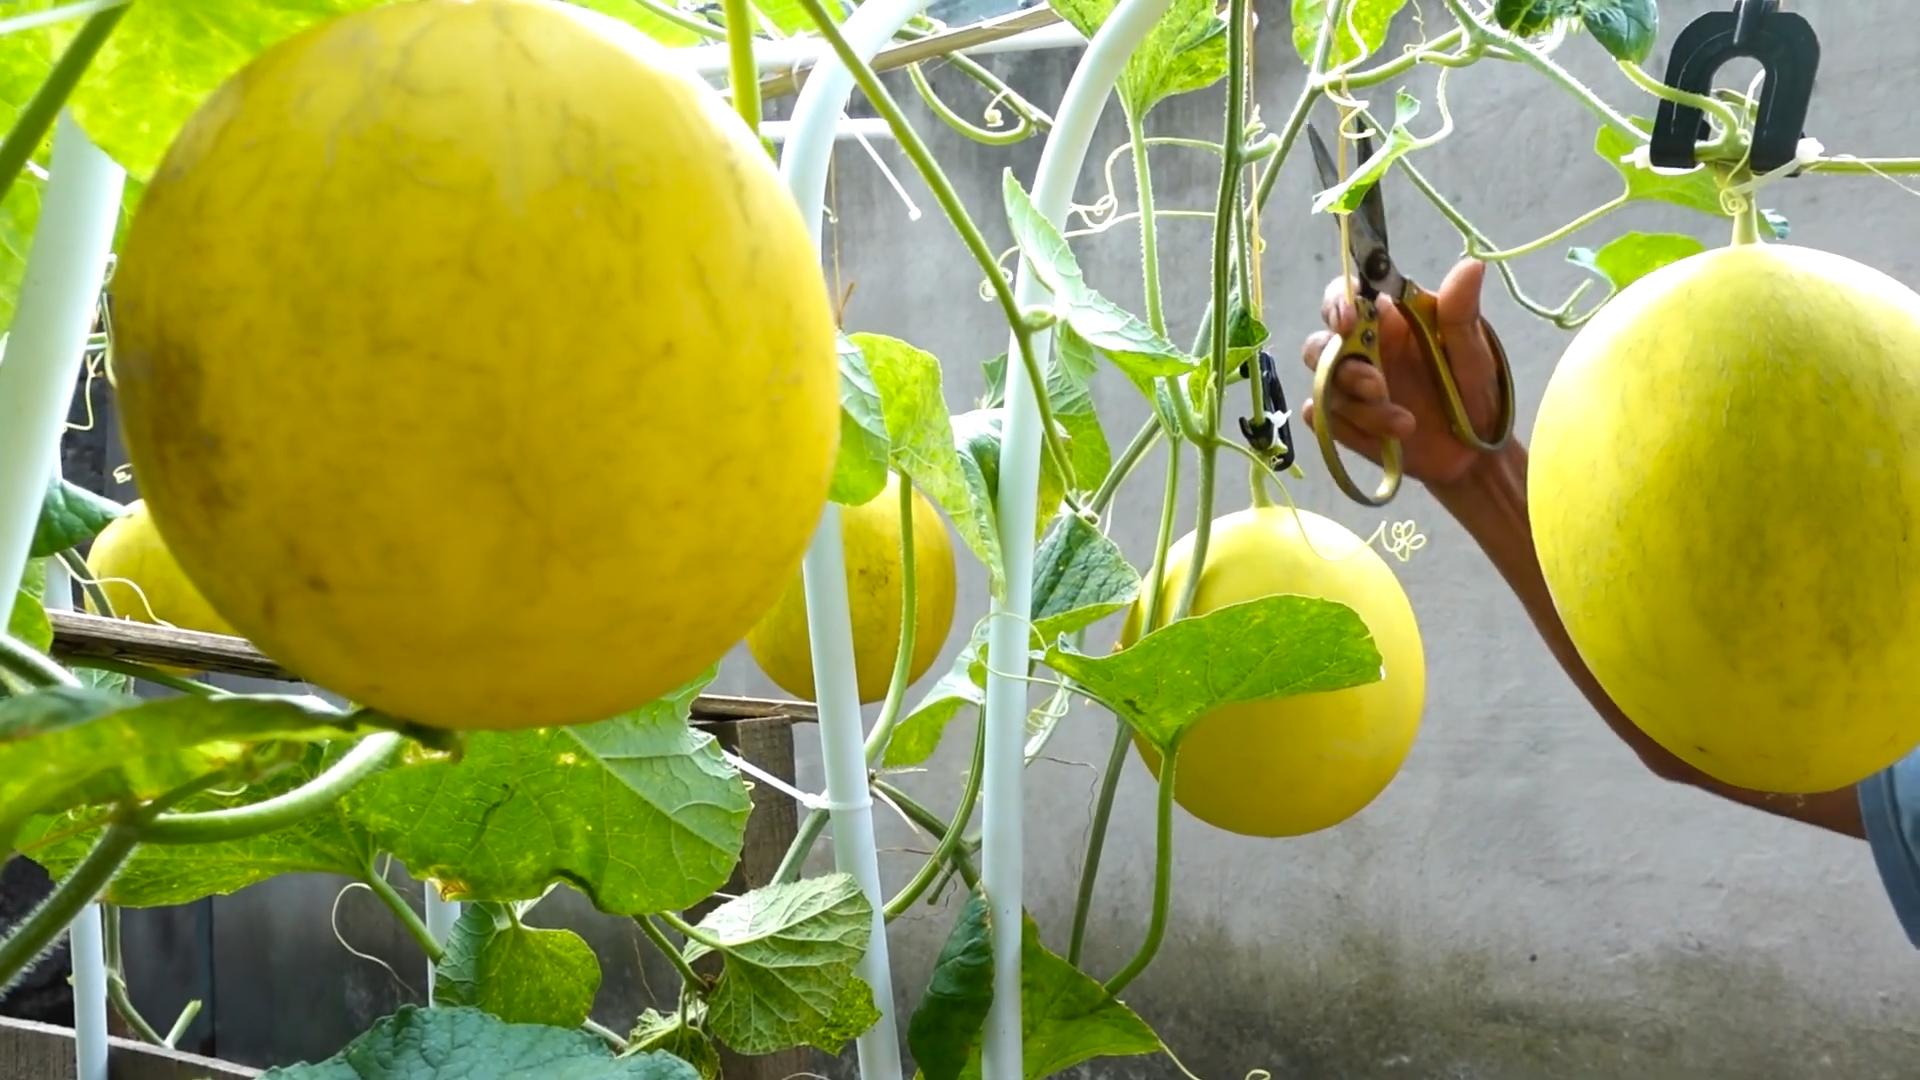
Harvesting Your Sweet Cantaloupes
Harvesting is the most exciting part! Knowing when to pick your cantaloupes is key to enjoying their full sweetness and flavor.
* The “Slip” Test: The most reliable way to tell if a cantaloupe is ripe is the “slip” test. When the melon is ripe, the stem will easily separate (or “slip”) from the vine with a gentle tug.
* Aroma: Ripe cantaloupes have a sweet, musky aroma.
* Color: The skin of a ripe cantaloupe will turn from green to a tan or yellowish color.
* Sound: A ripe cantaloupe will have a dull, hollow sound when you tap it.
Once you’ve harvested your cantaloupes, store them in the refrigerator for up to a week.
Troubleshooting Common Cantaloupe Problems
Even with the best care
Conclusion
So, there you have it! Growing sweet cantaloupes at home, while it might seem daunting initially, is entirely achievable with a little patience, the right techniques, and a whole lot of love. We’ve walked you through the process, from selecting the perfect seeds to harvesting those juicy, fragrant fruits. But the real magic lies in the hands-on experience, the connection you forge with nature, and the unparalleled satisfaction of biting into a cantaloupe you nurtured from a tiny seed.
Why is this DIY trick a must-try? Because store-bought cantaloupes, while convenient, often lack the intense sweetness and nuanced flavor of homegrown varieties. Commercial growers prioritize yield and shelf life, sometimes at the expense of taste. By growing your own, you control every aspect of the process, ensuring optimal conditions for sweetness development. Plus, you’ll be reducing your carbon footprint by eliminating transportation and packaging. And let’s be honest, there’s nothing quite like bragging rights when you serve a cantaloupe you grew yourself!
But don’t stop there! Experiment with different cantaloupe varieties to discover your personal favorite. Try growing ‘Athena’ for its disease resistance, or ‘Hales Best Jumbo’ for its classic cantaloupe flavor. Consider companion planting with basil or marigolds to deter pests and attract pollinators. You can even try vertical gardening techniques to maximize space in smaller gardens.
Growing sweet cantaloupes is more than just a gardening project; it’s an investment in flavor, sustainability, and personal satisfaction. It’s a chance to connect with the earth, learn new skills, and enjoy the fruits (literally!) of your labor.
We wholeheartedly encourage you to give this DIY trick a try. Don’t be afraid to get your hands dirty, embrace the challenges, and celebrate the successes. And most importantly, share your experience with us! We’d love to hear about your triumphs, your tribulations, and any tips or tricks you discover along the way. Post pictures of your cantaloupe patch, share your favorite recipes, and let’s build a community of cantaloupe enthusiasts!
So, grab your seeds, prepare your soil, and get ready to embark on a delicious adventure. Your homegrown, incredibly sweet cantaloupes await!
Frequently Asked Questions (FAQ)
What is the best time to start cantaloupe seeds?
The ideal time to start cantaloupe seeds depends on your local climate. Generally, you should start seeds indoors about 3-4 weeks before the last expected frost. Cantaloupes are warm-weather crops and are sensitive to frost. If you live in a warmer climate with a longer growing season, you can direct sow seeds into the ground after the danger of frost has passed and the soil has warmed to at least 60°F (15°C). Check your local weather forecasts and planting calendars for the most accurate timing for your region.
How much sunlight do cantaloupes need?
Cantaloupes require at least 6-8 hours of direct sunlight per day to thrive and produce sweet, flavorful fruit. Choose a planting location that receives full sun throughout the day. If your garden is partially shaded, try to plant your cantaloupes in the area that receives the most sunlight. Insufficient sunlight can lead to smaller fruits, reduced sweetness, and increased susceptibility to diseases.
What kind of soil is best for growing cantaloupes?
Cantaloupes prefer well-drained, fertile soil that is rich in organic matter. The ideal soil pH is between 6.0 and 6.8. Before planting, amend your soil with compost, aged manure, or other organic materials to improve drainage, fertility, and water retention. Avoid heavy clay soils, as they can become waterlogged and hinder root development. If you have clay soil, consider growing cantaloupes in raised beds or containers with a well-draining potting mix.
How often should I water my cantaloupe plants?
Cantaloupe plants need consistent moisture, especially during fruit development. Water deeply and regularly, aiming to keep the soil consistently moist but not waterlogged. Water at the base of the plants to avoid wetting the foliage, which can increase the risk of fungal diseases. During hot, dry weather, you may need to water daily. As the fruits ripen, reduce watering slightly to concentrate the sugars and enhance sweetness.
How do I know when my cantaloupe is ripe?
Determining when a cantaloupe is ripe can be tricky, but there are several telltale signs to look for. First, the skin color will change from green to a tan or yellowish hue. Second, the stem will begin to separate from the fruit, a process known as “slipping.” You should be able to gently tug on the stem, and it will easily detach from the fruit. Third, the cantaloupe will emit a sweet, musky aroma. Finally, the blossom end (opposite the stem) will soften slightly. Once you observe these signs, your cantaloupe is likely ripe and ready to harvest.
What are some common pests and diseases that affect cantaloupes?
Cantaloupes are susceptible to several pests and diseases, including aphids, squash bugs, cucumber beetles, powdery mildew, and fusarium wilt. To prevent pest and disease problems, practice good garden hygiene, such as removing weeds and debris, and rotate your crops annually. Inspect your plants regularly for signs of infestation or disease, and take action promptly. You can use organic pest control methods, such as insecticidal soap or neem oil, to control pests. For fungal diseases, consider using a copper-based fungicide. Choose disease-resistant cantaloupe varieties whenever possible.
Can I grow cantaloupes in containers?
Yes, you can grow cantaloupes in containers, but you’ll need to choose a large container (at least 20 gallons) and provide adequate support for the vines. Select a bush or compact cantaloupe variety that is well-suited for container gardening. Use a high-quality potting mix and ensure that the container has good drainage. Water regularly and fertilize every 2-3 weeks with a balanced fertilizer. Provide a trellis or other support structure for the vines to climb.
How can I improve the sweetness of my cantaloupes?
Several factors can influence the sweetness of your cantaloupes. First, ensure that your plants receive plenty of sunlight. Second, provide adequate water and nutrients, but avoid over-fertilizing with nitrogen, which can promote leafy growth at the expense of fruit development. Third, reduce watering slightly as the fruits ripen to concentrate the sugars. Finally, harvest your cantaloupes at the peak of ripeness.
What are some good companion plants for cantaloupes?
Companion planting can help to improve the health and productivity of your cantaloupe plants. Some good companion plants for cantaloupes include basil, marigolds, nasturtiums, oregano, and thyme. Basil repels aphids and other pests, while marigolds attract beneficial insects that prey on pests. Nasturtiums act as a trap crop, luring pests away from your cantaloupe plants. Oregano and thyme are aromatic herbs that can deter pests and attract pollinators.
How do I store cantaloupes after harvesting?
Once harvested, cantaloupes can be stored at room temperature for a few days. To extend their shelf life, store them in the refrigerator. Whole cantaloupes can be stored in the refrigerator for up to a week. Cut cantaloupe should be stored in an airtight container in the refrigerator and consumed within 3-4 days.
Leave a Comment