

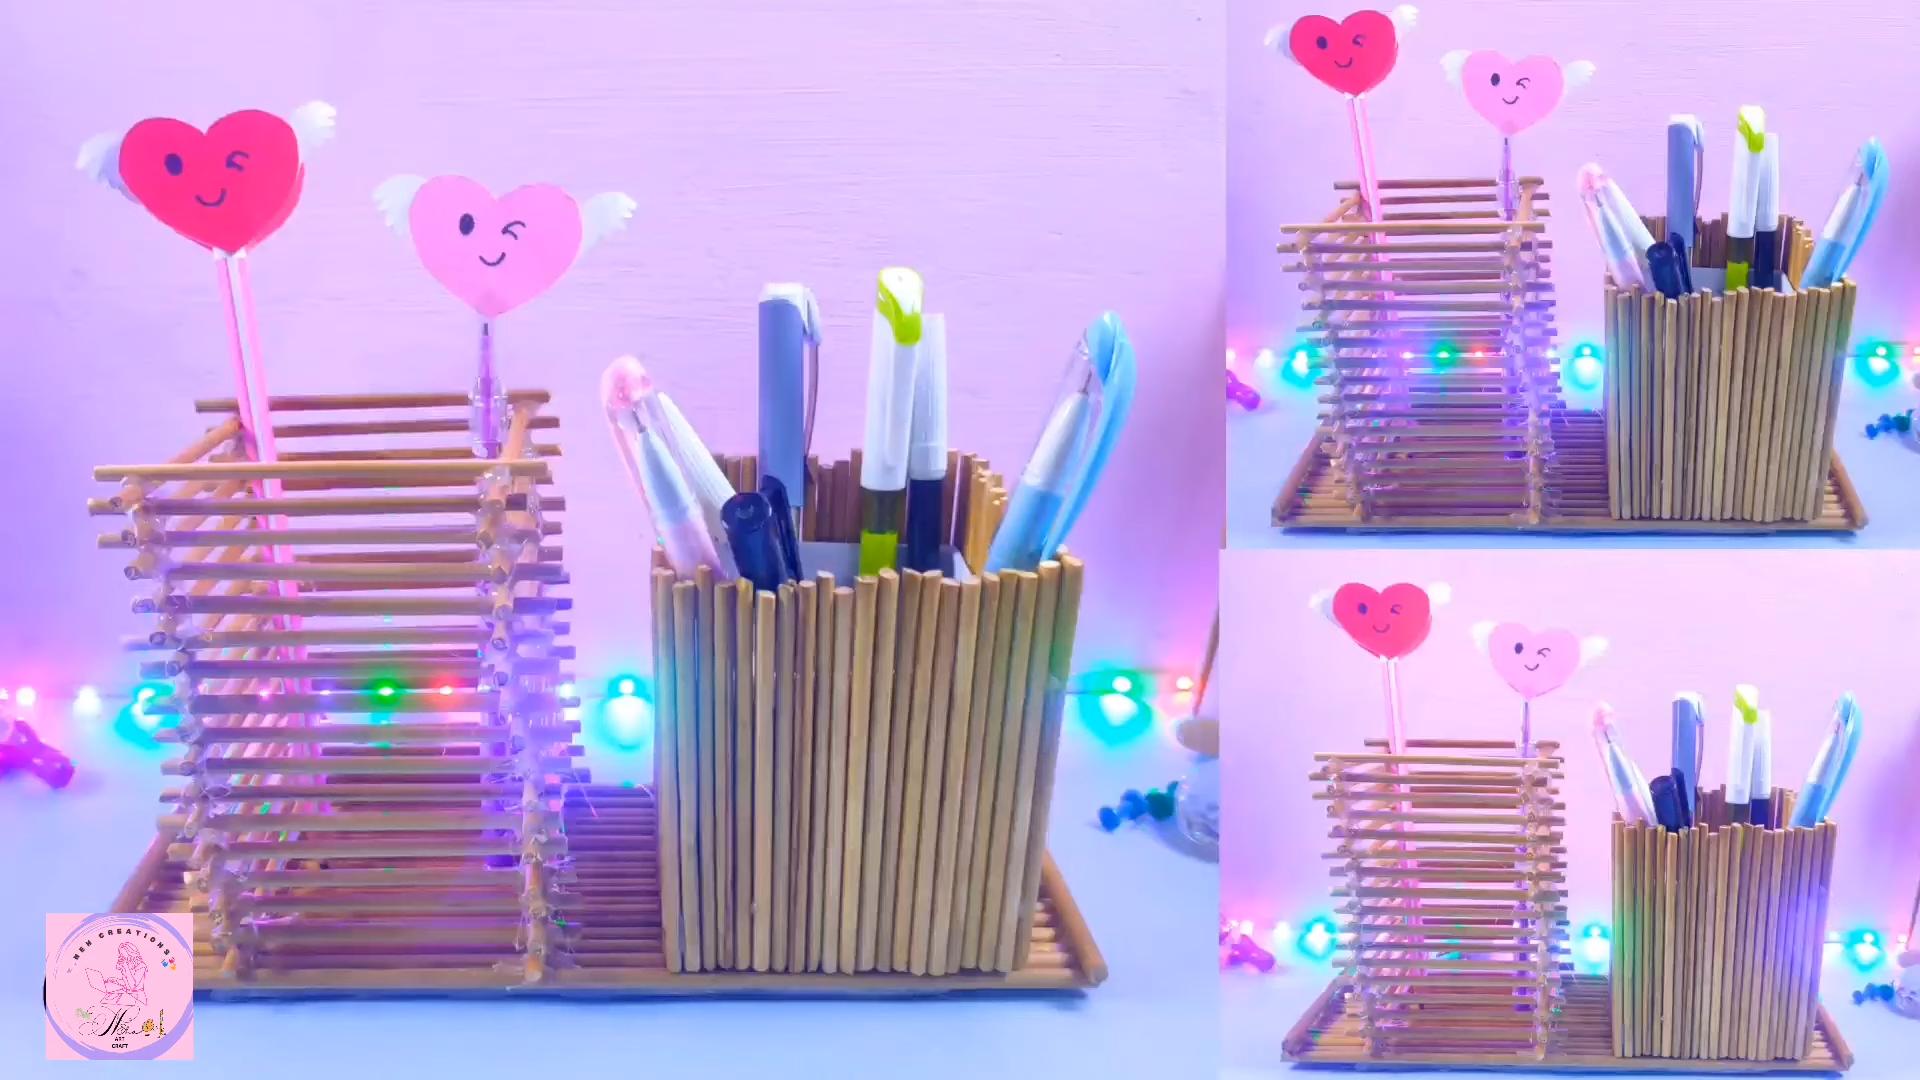
DIY Pen Holder: Tired of your desk looking like a stationery explosion? I know the feeling! Pens scattered everywhere, highlighters playing hide-and-seek, and sticky notes clinging for dear life. It’s a common problem, and the solution is surprisingly simple and satisfying: creating your own DIY pen holder!
Humans have been organizing their writing tools for centuries. From ancient scribes carefully arranging their reeds and inks to Renaissance artists meticulously placing their quills, the need for a dedicated space for writing implements is deeply ingrained. While the materials and methods have evolved, the underlying principle remains the same: a tidy workspace fosters creativity and efficiency.
But why buy a generic, mass-produced pen holder when you can unleash your inner artist and craft something unique and perfectly suited to your needs? This DIY project isn’t just about tidying up; it’s about adding a personal touch to your workspace, expressing your creativity, and even upcycling materials you might otherwise throw away. Plus, let’s be honest, there’s a certain satisfaction in saying, “I made that!” when someone compliments your stylish and functional DIY pen holder.
In this article, I’ll guide you through some fun and easy DIY pen holder ideas, using everything from repurposed tin cans to decorative paper. Get ready to transform your desk from chaotic to chic in just a few simple steps!
DIY Upcycled Denim Pen Holder: A Stylish and Sustainable Desk Organizer
Hey there, fellow crafters! Are you drowning in pens, pencils, and markers? Do you have a pair of old jeans that are just taking up space in your closet? Well, I’ve got the perfect solution for you: a super cute and incredibly easy DIY denim pen holder! This project is not only a fantastic way to declutter your desk but also a great way to give those old jeans a new lease on life. Plus, it adds a touch of rustic charm to your workspace. Let’s get started!
Materials You’ll Need
Before we dive in, let’s gather all the necessary materials. Trust me, having everything ready beforehand will make the whole process much smoother and more enjoyable.
* Old pair of jeans (the thicker the denim, the sturdier the holder)
* Scissors or rotary cutter
* Ruler or measuring tape
* Pencil or fabric marker
* Hot glue gun and glue sticks (or fabric glue)
* Cardboard tube (from paper towels or wrapping paper)
* Cardboard sheet (for the base)
* Optional: Decorative elements like buttons, patches, lace, ribbon, paint, or stencils
Preparing the Denim
Okay, first things first, we need to get our denim ready. This involves cutting and prepping the fabric to create the perfect wrap for our pen holder.
1. Cut the Jean Leg: Lay your jeans flat and carefully cut off one of the legs. I usually aim for just below the knee, but you can adjust this depending on the length you want your pen holder to be. Remember, you can always trim it later, so it’s better to start with a bit more fabric than you need.
2. Open the Seam: Now, we need to open up the leg so we can work with a flat piece of denim. Use your scissors or a seam ripper to carefully cut along the inner seam of the jean leg. Be patient and try not to tear the fabric. Once the seam is open, you’ll have a large rectangular piece of denim.
3. Iron the Denim: This step is crucial for a neat and professional finish. Iron the denim piece to remove any wrinkles or creases. This will make it much easier to work with and ensure that the glue adheres properly.
4. Measure and Cut the Denim to Size: Measure the height of your cardboard tube. Add about an inch to this measurement for overlap at the top and bottom. For example, if your tube is 6 inches tall, cut the denim to 7 inches. Next, measure the circumference of the tube. Add about an inch to this measurement as well to ensure a snug fit. For example, if the circumference is 9 inches, cut the denim to 10 inches. Use your ruler and pencil or fabric marker to mark the dimensions on the denim, and then carefully cut along the lines.
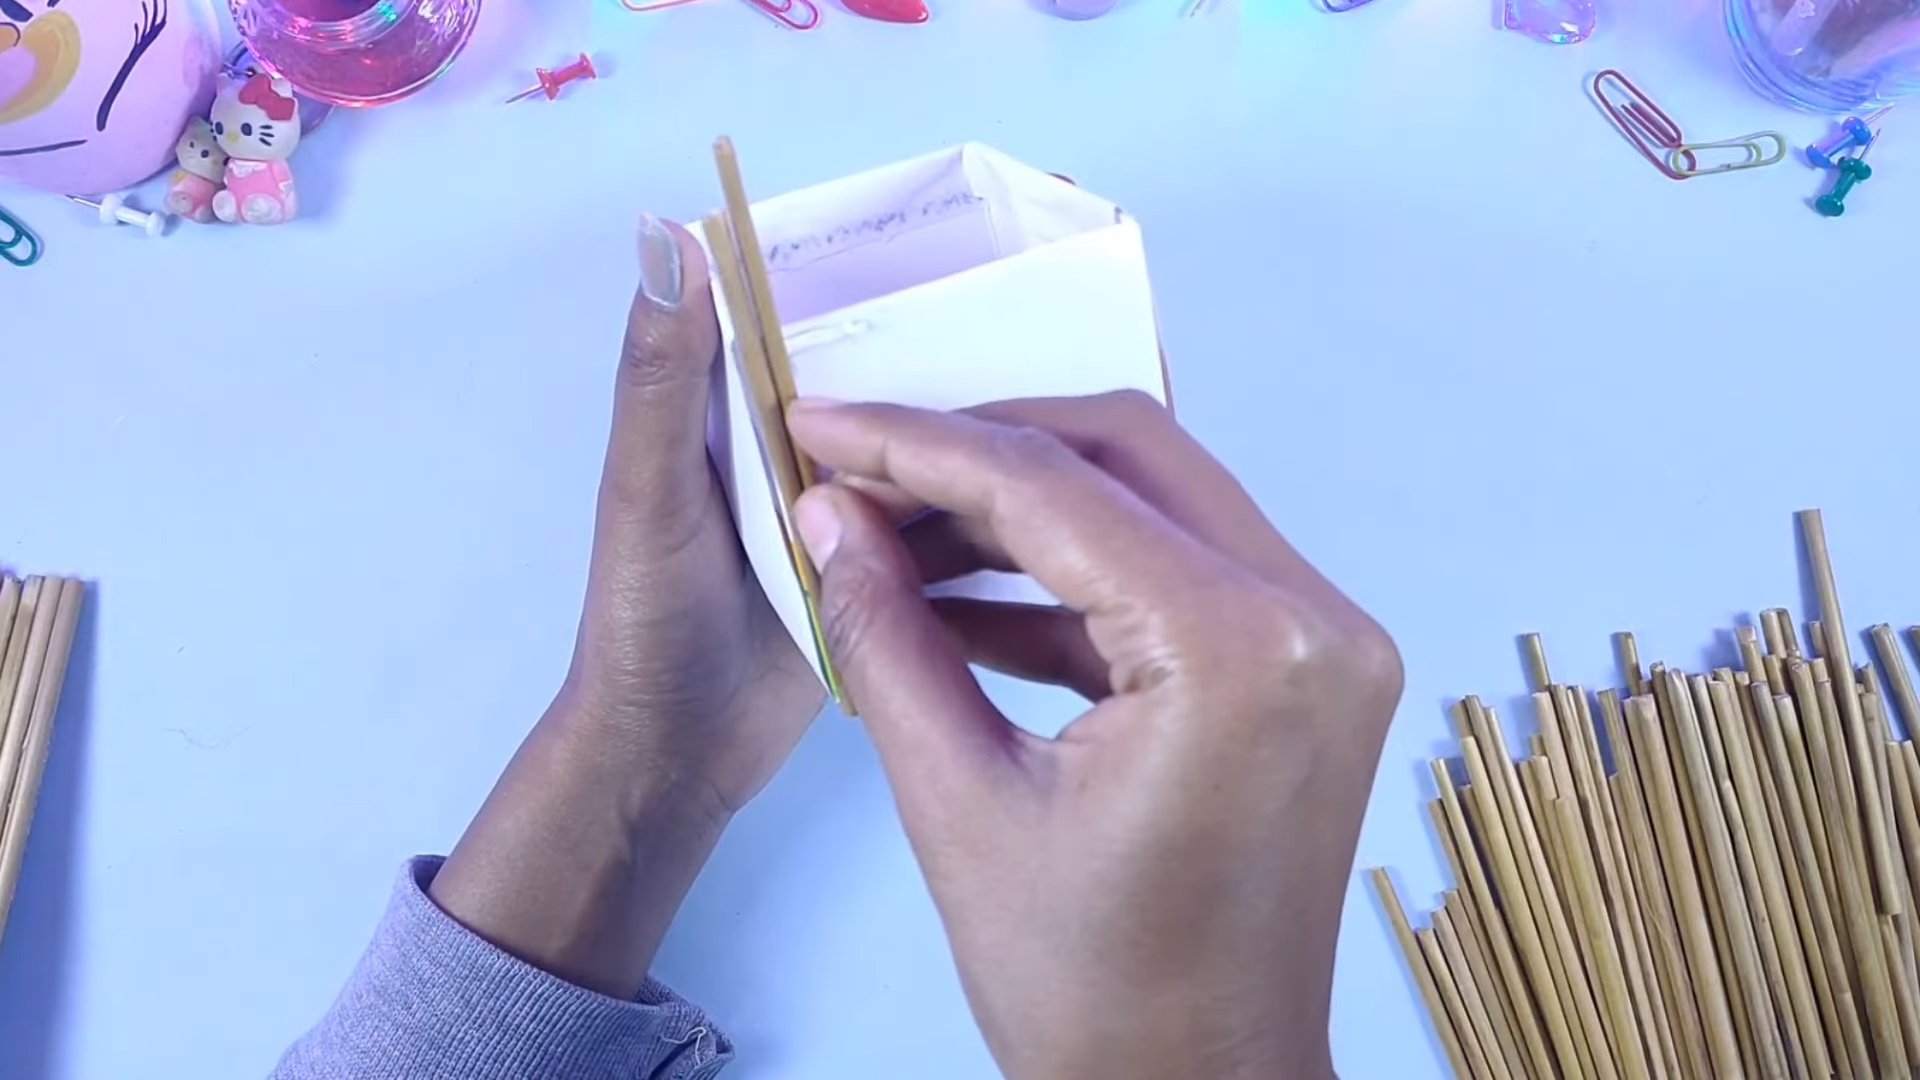
Assembling the Pen Holder
Now for the fun part – putting everything together! This is where your creativity can really shine.
1. Prepare the Cardboard Tube: Make sure your cardboard tube is clean and free of any debris. If it’s a bit flimsy, you can reinforce it by wrapping it with a layer of paper or cardstock and gluing it in place.
2. Apply Glue to the Denim: Using your hot glue gun (or fabric glue), apply a thin line of glue along one of the long edges of the denim piece. Be careful not to use too much glue, as it can seep through the fabric and create a messy finish.
3. Attach the Denim to the Tube: Carefully align the glued edge of the denim with the edge of the cardboard tube. Press firmly to secure the denim in place.
4. Wrap the Denim Around the Tube: Continue applying glue in small sections along the denim and wrapping it around the tube. Keep the denim taut and smooth as you go to avoid any wrinkles or bubbles.
5. Secure the Final Edge: Once you’ve wrapped the entire tube, apply glue to the final edge of the denim and press it firmly against the wrapped section. Make sure the seam is neat and secure.
6. Fold and Glue the Overlapping Edges: Now, we need to deal with the extra inch of denim at the top and bottom of the tube. Fold the denim over the top edge of the tube, creating a clean, finished look. Apply glue to the inside of the denim and press it firmly against the inside of the tube. Repeat this process for the bottom edge of the tube.
Creating the Base
A sturdy base is essential for keeping your pen holder upright and stable. Here’s how to make one.
1. Trace the Tube on Cardboard: Place the cardboard tube on a piece of cardboard and trace around the base with a pencil.
2. Cut Out the Circle: Carefully cut out the cardboard circle using scissors. Make sure the circle is slightly larger than the traced line to allow for a snug fit.
3. Attach the Base to the Tube: Apply a generous amount of hot glue to the bottom edge of the denim-wrapped tube.
4. Center the Tube on the Cardboard Circle: Carefully center the tube on the cardboard circle and press firmly to secure it in place. Hold it for a few seconds until the glue sets.
5. Reinforce the Base (Optional): For extra stability, you can cut out another cardboard circle and glue it to the bottom of the first one. This will make the base thicker and more durable.
Adding Decorative Touches
This is where you can really let your personality shine! Decorate your pen holder to match your style and workspace.
1. Choose Your Decorations: Gather your decorative elements, such as buttons, patches, lace, ribbon, paint, or stencils.
2. Glue on Buttons and Patches: If you’re using buttons or patches, arrange them on the denim-covered tube to create a visually appealing design. Once you’re happy with the arrangement, use hot glue to attach them securely.
3. Add Lace or Ribbon: Wrap lace or ribbon around the pen holder and glue it in place. You can create a simple band or add more intricate designs.
4. Paint or Stencil Designs: If you’re feeling artistic, use fabric paint and stencils to create unique designs on the denim. Let the paint dry completely before using the pen holder.
5. Embellish with Embroidery (Optional): If you’re skilled with embroidery, you can add hand-stitched details to the denim for a truly personalized touch.
Alternative Decoration Ideas
* Distressed Denim Look: Use sandpaper to gently rub the denim and create a worn, distressed look.
* Bleach Splatter: Carefully splatter bleach onto the denim for a tie-dye effect. Be sure to wear gloves and protect your work surface.
* Fabric Markers: Use fabric markers to draw designs or write inspirational quotes on the denim.
* Denim Pockets: Cut out pockets from other old jeans and glue them onto the pen holder for extra storage.
* Beads and Sequins: Add beads and sequins for a touch of sparkle and glamour.
Final Touches and Tips
* Let the Glue Dry Completely: Before using your pen holder, make sure all the glue is completely dry. This will prevent any accidental messes.
* Test the Stability: Place your pen holder on a flat surface and test its stability. If it wobbles, add more glue to the base to secure it.
* Clean Up Any Glue Strings: Use a toothpick or your fingers to remove any stray glue strings.
* Consider the Weight: If you plan to store heavy items in your pen holder, consider using a thicker cardboard tube or reinforcing the base with extra cardboard.
* Experiment with Different Fabrics: While denim is a great choice for this project, you can also experiment with other fabrics like canvas, corduroy, or even old t-shirts.
* Customize the Size: Adjust the dimensions of the denim and cardboard tube to create pen holders of different sizes. You can make a small one for your desk or a larger one for storing art supplies.
* Gift Idea: These DIY denim pen holders make fantastic gifts for friends, family, or teachers. Personalize them with their favorite colors or designs for a thoughtful and unique present.
Enjoy Your New Upcycled Pen Holder!
And there you have it! A stylish, sustainable, and totally awesome denim pen holder made from upcycled materials. I hope you had as much fun making it as I did. Now, go ahead and fill it with your favorite pens, pencils, and markers, and enjoy a clutter-free and organized workspace. Happy crafting!
Conclusion
So, there you have it! Transforming everyday items into functional and stylish organizers is not only incredibly satisfying but also a fantastic way to declutter and personalize your workspace. This DIY pen holder project is more than just a craft; it’s a statement about resourcefulness, creativity, and adding a personal touch to your environment.
Why is this DIY pen holder a must-try? Because it’s simple, cost-effective, and endlessly customizable. Forget those generic, mass-produced desk organizers. With just a few readily available materials and a little imagination, you can create a pen holder that perfectly reflects your style and meets your specific needs. It’s a fantastic way to upcycle materials that might otherwise end up in the trash, contributing to a more sustainable lifestyle. Plus, the sense of accomplishment you’ll feel after completing this project is truly rewarding.
But the fun doesn’t stop there! Feel free to experiment with different materials and embellishments.
* Go rustic: Use reclaimed wood or branches for a natural, earthy look.
* Add some sparkle: Incorporate glitter, sequins, or paint for a touch of glamour.
* Get colorful: Use vibrant paints, washi tape, or fabric scraps to create a bold and eye-catching design.
* Personalize it: Add your initials, favorite quotes, or meaningful symbols to make it truly unique.
* Vary the size and shape: Create multiple pen holders of different sizes to accommodate various writing instruments and desk accessories. Consider making a taller one for paintbrushes or a wider one for scissors and rulers.
* Incorporate different textures: Use textured paint, burlap, or even small pebbles to add visual interest and tactile appeal.
The possibilities are truly endless! This DIY pen holder project is a blank canvas for your creativity. It’s a chance to express yourself, declutter your space, and create something beautiful and functional all at the same time.
We wholeheartedly encourage you to give this DIY pen holder project a try. It’s a fantastic activity for crafters of all skill levels, and the results are sure to impress. Once you’ve created your masterpiece, we’d love to see it! Share your creations with us on social media using #DIYPenHolder and tell us about your experience. What materials did you use? What challenges did you overcome? What unique touches did you add? We can’t wait to see your inspiring creations and learn from your experiences. Let’s build a community of creative crafters who are passionate about upcycling, personalizing, and making the world a more beautiful place, one DIY project at a time. So grab your supplies, unleash your inner artist, and get ready to create a DIY pen holder that you’ll love for years to come!
Frequently Asked Questions (FAQ)
What kind of materials can I use to make a DIY pen holder?
The beauty of this project lies in its versatility! You can use a wide range of materials, depending on the look you’re going for and what you have readily available. Some popular options include:
* Recycled cans or jars: These are a great way to upcycle and give new life to items that would otherwise be thrown away. Make sure to clean them thoroughly and remove any sharp edges before starting.
* Cardboard tubes: Paper towel rolls, toilet paper rolls, or even mailing tubes can be transformed into sturdy and functional pen holders.
* Wooden blocks or planks: These offer a more rustic and durable option. You can use scrap wood or purchase inexpensive wood from a craft store.
* Plastic bottles: Cut the bottles to the desired height and decorate them to your liking.
* Fabric scraps: Wrap fabric around a cardboard tube or can for a soft and textured look.
* Clay: Mold clay into the desired shape and bake it for a permanent and personalized pen holder.
Don’t be afraid to get creative and experiment with different materials! The key is to choose materials that are sturdy enough to hold your pens and pencils and that can be easily decorated.
How do I decorate my DIY pen holder?
Again, the possibilities are endless! Here are some ideas to get you started:
* Paint: Acrylic paint, spray paint, or even chalkboard paint can be used to create a variety of looks.
* Washi tape: This decorative tape is easy to use and comes in a wide range of colors and patterns.
* Fabric scraps: Glue fabric scraps onto the pen holder for a textured and colorful design.
* Glitter: Add some sparkle with glitter glue or loose glitter.
* Buttons, beads, and sequins: Glue these embellishments onto the pen holder for a unique and eye-catching look.
* Stickers and decals: These are a quick and easy way to add personality to your pen holder.
* Markers and pens: Draw designs or write quotes directly onto the pen holder.
* Decoupage: Use Mod Podge to glue paper cutouts onto the pen holder for a vintage or collage-style look.
Remember to let your creativity shine and have fun with the decorating process!
How do I make my DIY pen holder more stable?
Stability is key to ensuring that your pen holder doesn’t tip over easily. Here are a few tips to make your pen holder more stable:
* Use a heavy base: If you’re using a lightweight material like cardboard, consider adding a heavier base, such as a piece of wood or a layer of pebbles.
* Add weight to the bottom: Fill the bottom of the pen holder with sand, gravel, or small stones to add weight and stability.
* Use a wide base: A wider base will provide more stability than a narrow base.
* Glue the pen holder to a surface: If you’re using the pen holder in a permanent location, you can glue it to a desk or shelf for added stability.
* Apply non-slip pads: Attach non-slip pads to the bottom of the pen holder to prevent it from sliding around.
Is this DIY pen holder project suitable for kids?
Yes, this project can be a fun and engaging activity for kids, but adult supervision is recommended, especially when using sharp tools or hot glue. Choose age-appropriate materials and decorations, and encourage kids to express their creativity and personalize their pen holders. This is a great way to teach them about upcycling, resourcefulness, and the joy of creating something with their own hands.
How long does it take to make a DIY pen holder?
The time it takes to make a DIY pen holder will vary depending on the materials you use, the complexity of your design, and your skill level. A simple pen holder made from a recycled can and decorated with paint or washi tape can be completed in as little as 30 minutes. More elaborate designs or projects that involve multiple steps may take several hours.
Can I sell my DIY pen holders?
Absolutely! If you enjoy making DIY pen holders and have a knack for creating unique and beautiful designs, you can definitely sell them online or at local craft fairs. This can be a great way to earn some extra money and share your creativity with others. Be sure to price your pen holders fairly, taking into account the cost of materials, the time it takes to make them, and the value of your artistic skills.
What if I don’t have all the materials listed?
Don’t worry! The beauty of DIY projects is that you can often substitute materials based on what you have available. Get creative and think outside the box. For example, if you don’t have paint, you can use markers or crayons. If you don’t have fabric scraps, you can use paper or wrapping paper. The key is to be resourceful and find alternative materials that will work for your project.
How do I clean my DIY pen holder?
The cleaning method will depend on the materials you used to make your pen holder. For pen holders made from cans or jars, you can simply wipe them down with a damp cloth. For pen holders made from fabric or paper, you may need to spot clean them with a mild detergent. Avoid using harsh chemicals or abrasive cleaners, as these can damage the materials.
Leave a Comment