

Deep clean your fridge – just the thought of it might send shivers down your spine! But fear not, my friend, because I’m here to tell you that tackling this chore doesn’t have to be a daunting task. In fact, with a few simple DIY tricks and hacks, you can transform your refrigerator from a chaotic mess into a sparkling, organized oasis.
For generations, keeping food fresh and safe has been a cornerstone of healthy living. While our ancestors may not have had the luxury of electric refrigerators, they employed clever methods like root cellars and ice houses to preserve their provisions. Today, we rely on our trusty fridges, but they often become neglected spaces, harboring spills, odors, and forgotten leftovers.
Why is a deep clean so important? Well, beyond the obvious aesthetic benefits, a clean fridge is crucial for preventing the growth of harmful bacteria and mold, which can contaminate your food and lead to illness. Plus, a well-organized fridge makes it easier to find what you need, reduces food waste, and even saves you money! So, let’s dive into some easy-to-follow DIY tips and tricks that will help you deep clean your fridge like a pro and maintain a healthy, happy home.
Deep Clean Your Fridge Like a Pro: A DIY Guide
Okay, let’s face it, cleaning the fridge is probably on everyone’s “least favorite chores” list. But a sparkling clean fridge isn’t just about aesthetics; it’s about food safety, preventing funky smells, and making your groceries last longer. So, grab your cleaning supplies, put on some music, and let’s dive into this deep clean! I promise, it’s not as daunting as it seems.
What You’ll Need: The Cleaning Arsenal
Before we get started, let’s gather our supplies. Having everything ready will make the process much smoother.
* Baking Soda: This is my go-to for absorbing odors and gently scrubbing surfaces.
* White Vinegar: A natural disinfectant and degreaser. Plus, it’s super affordable!
* Warm Water: Essential for diluting cleaning solutions and rinsing.
* Dish Soap: For tackling greasy spills and stubborn stains.
* Microfiber Cloths: These are lint-free and perfect for wiping down surfaces. I recommend having a few on hand.
* Soft Sponge: For scrubbing without scratching.
* Old Toothbrush: Ideal for getting into those hard-to-reach corners and crevices.
* Trash Bags: For disposing of expired food and packaging.
* Cooler or Insulated Bag: To keep perishable items cold while you’re cleaning.
* Optional: Essential Oils (Lemon, Tea Tree): For a fresh, natural scent.
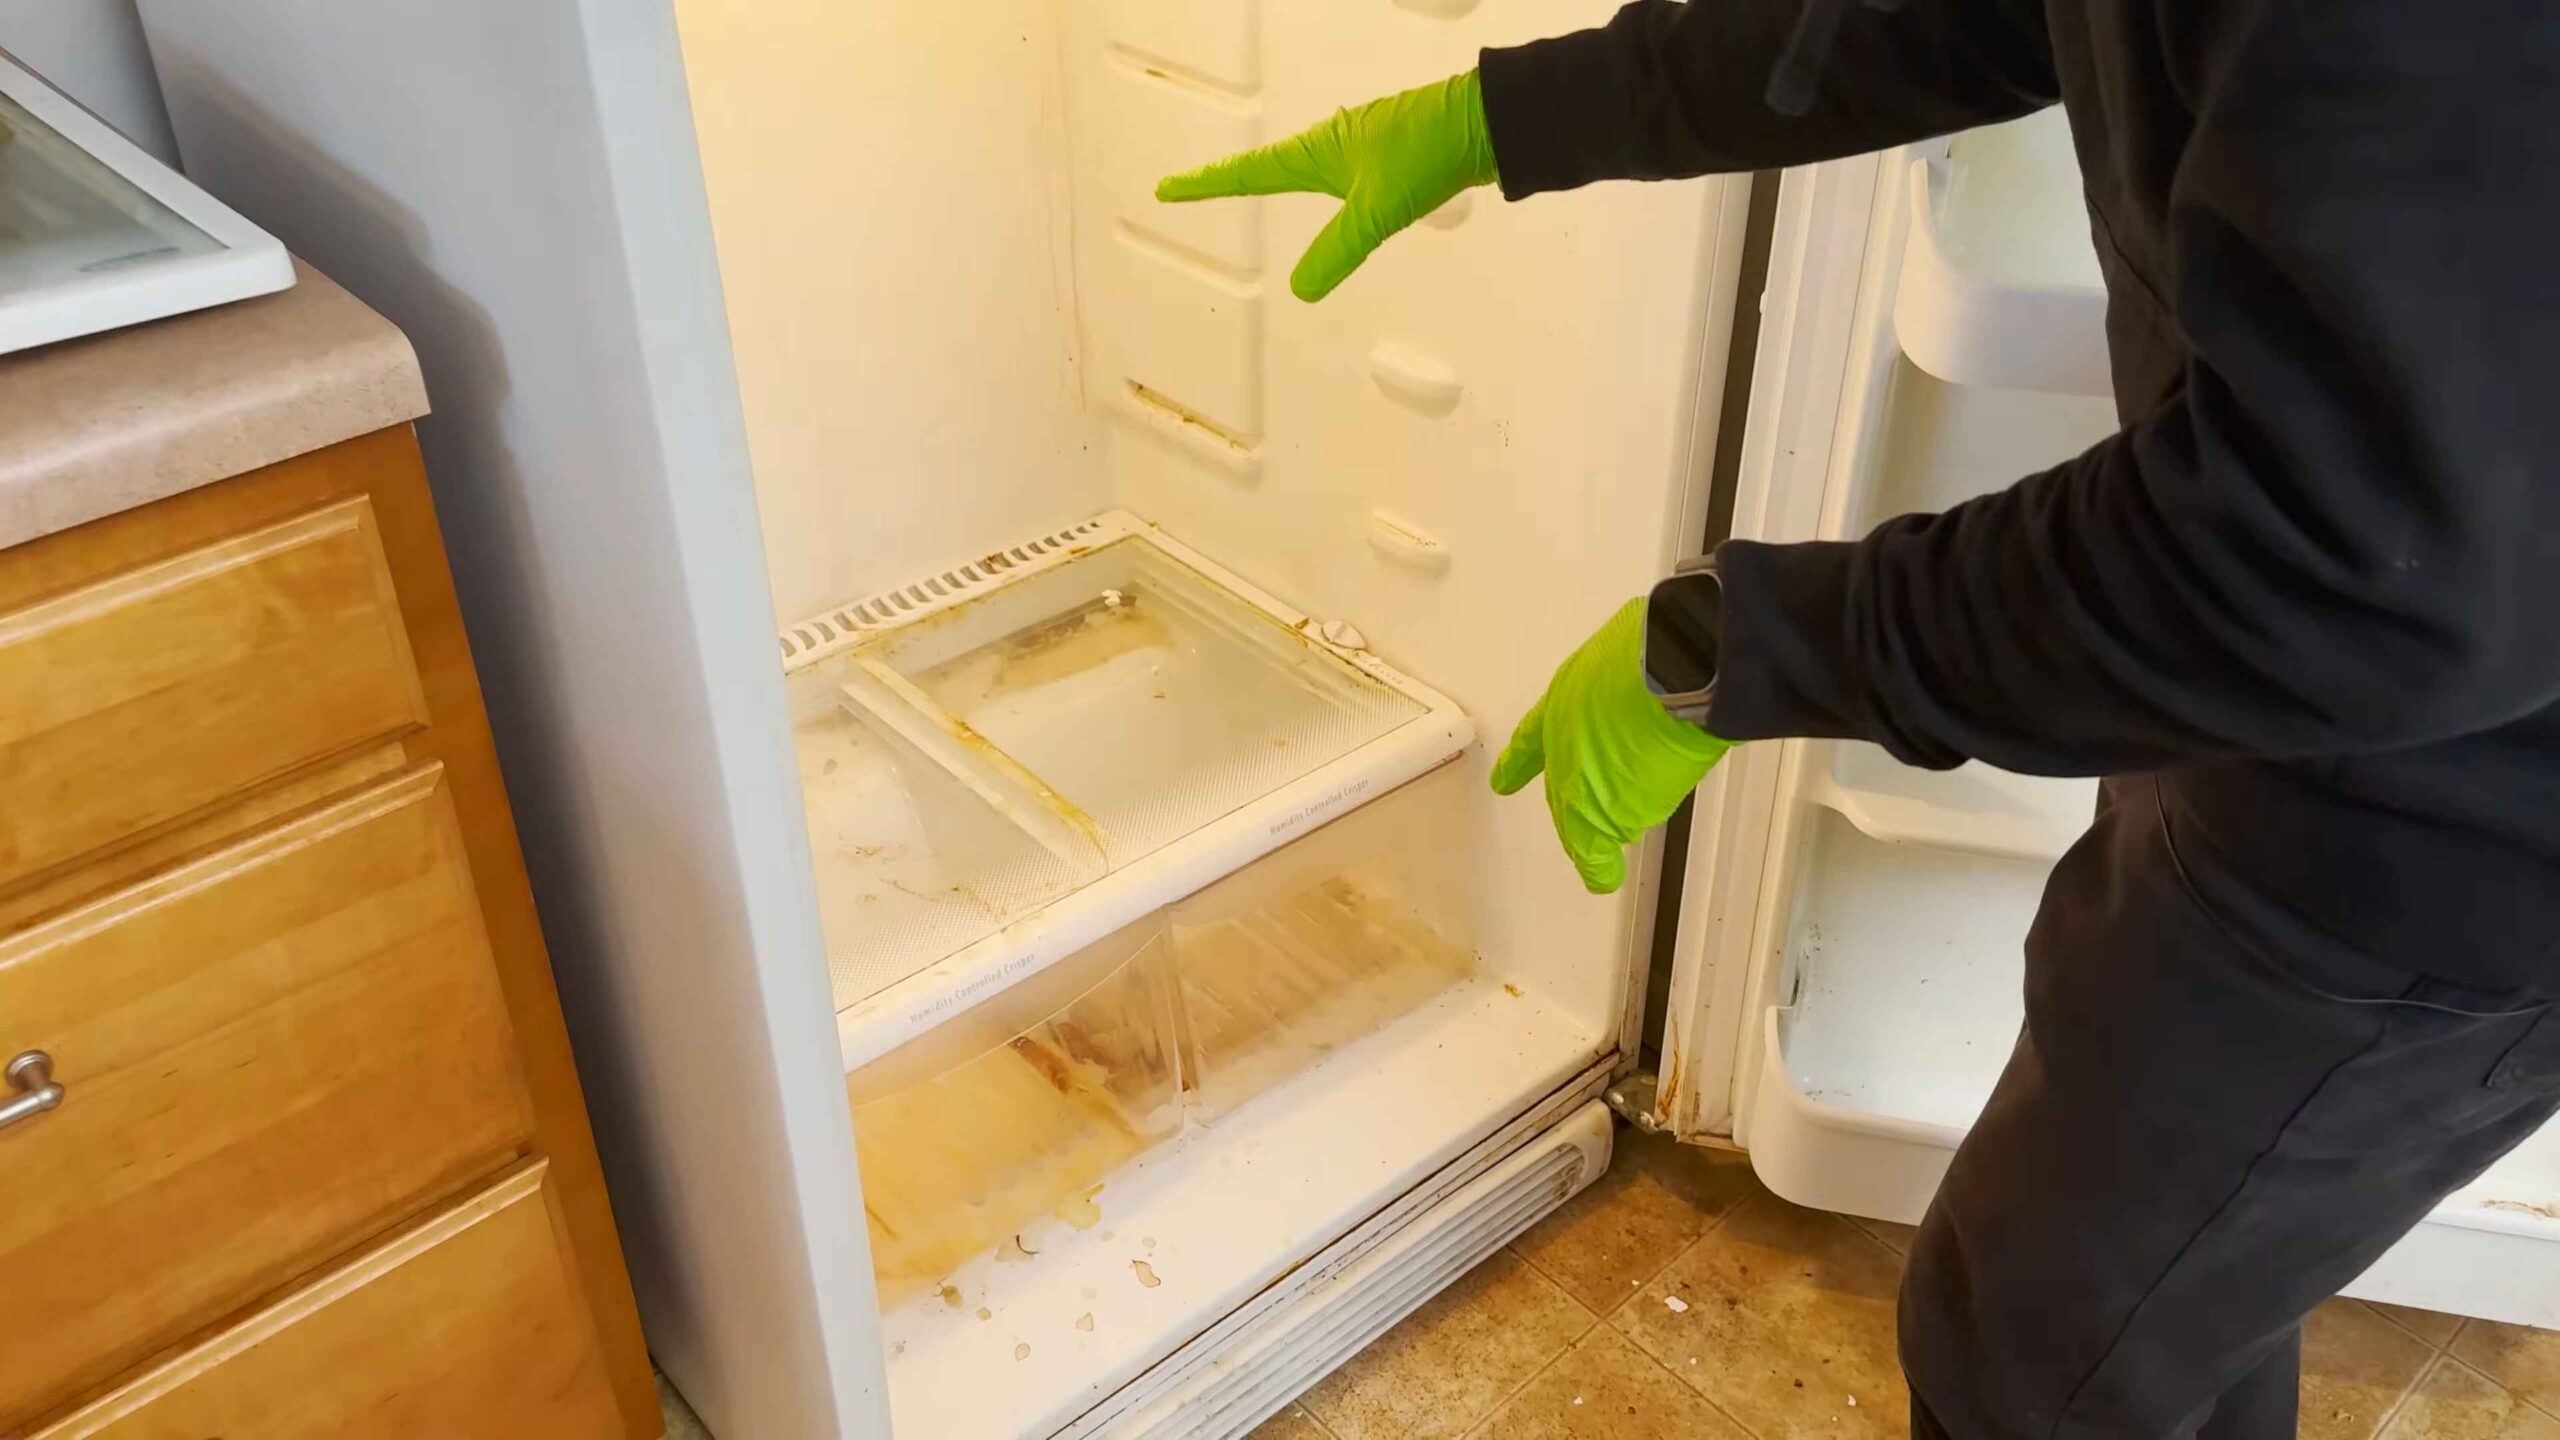
Phase 1: Emptying and Assessing the Fridge
This is the “before” picture moment. It might be a little scary, but trust me, it’ll be worth it!
1. Unplug the Fridge: Safety first! Unplugging the fridge will prevent any accidental shocks and save energy while you’re working.
2. Remove All Food Items: Take everything out of the fridge, including condiments, leftovers, and produce. This is the perfect time to check expiration dates and toss anything that’s past its prime. Be honest with yourself – that mystery container from two weeks ago probably needs to go!
3. Sort and Organize: As you remove items, sort them into categories:
* Keep: Items that are still good and will be returned to the fridge.
* Toss: Expired or spoiled items that need to be thrown away.
* Eat Soon: Items that are nearing their expiration date and should be consumed in the next day or two.
4. Transfer Perishables to a Cooler: Place all perishable items (meat, dairy, eggs) into a cooler or insulated bag with ice packs to keep them cold while you’re cleaning. This is crucial to prevent food spoilage.
5. Remove Shelves, Drawers, and Bins: Take out all removable parts of the fridge, such as shelves, drawers, and bins. This will allow you to clean them thoroughly and access all areas of the fridge interior.
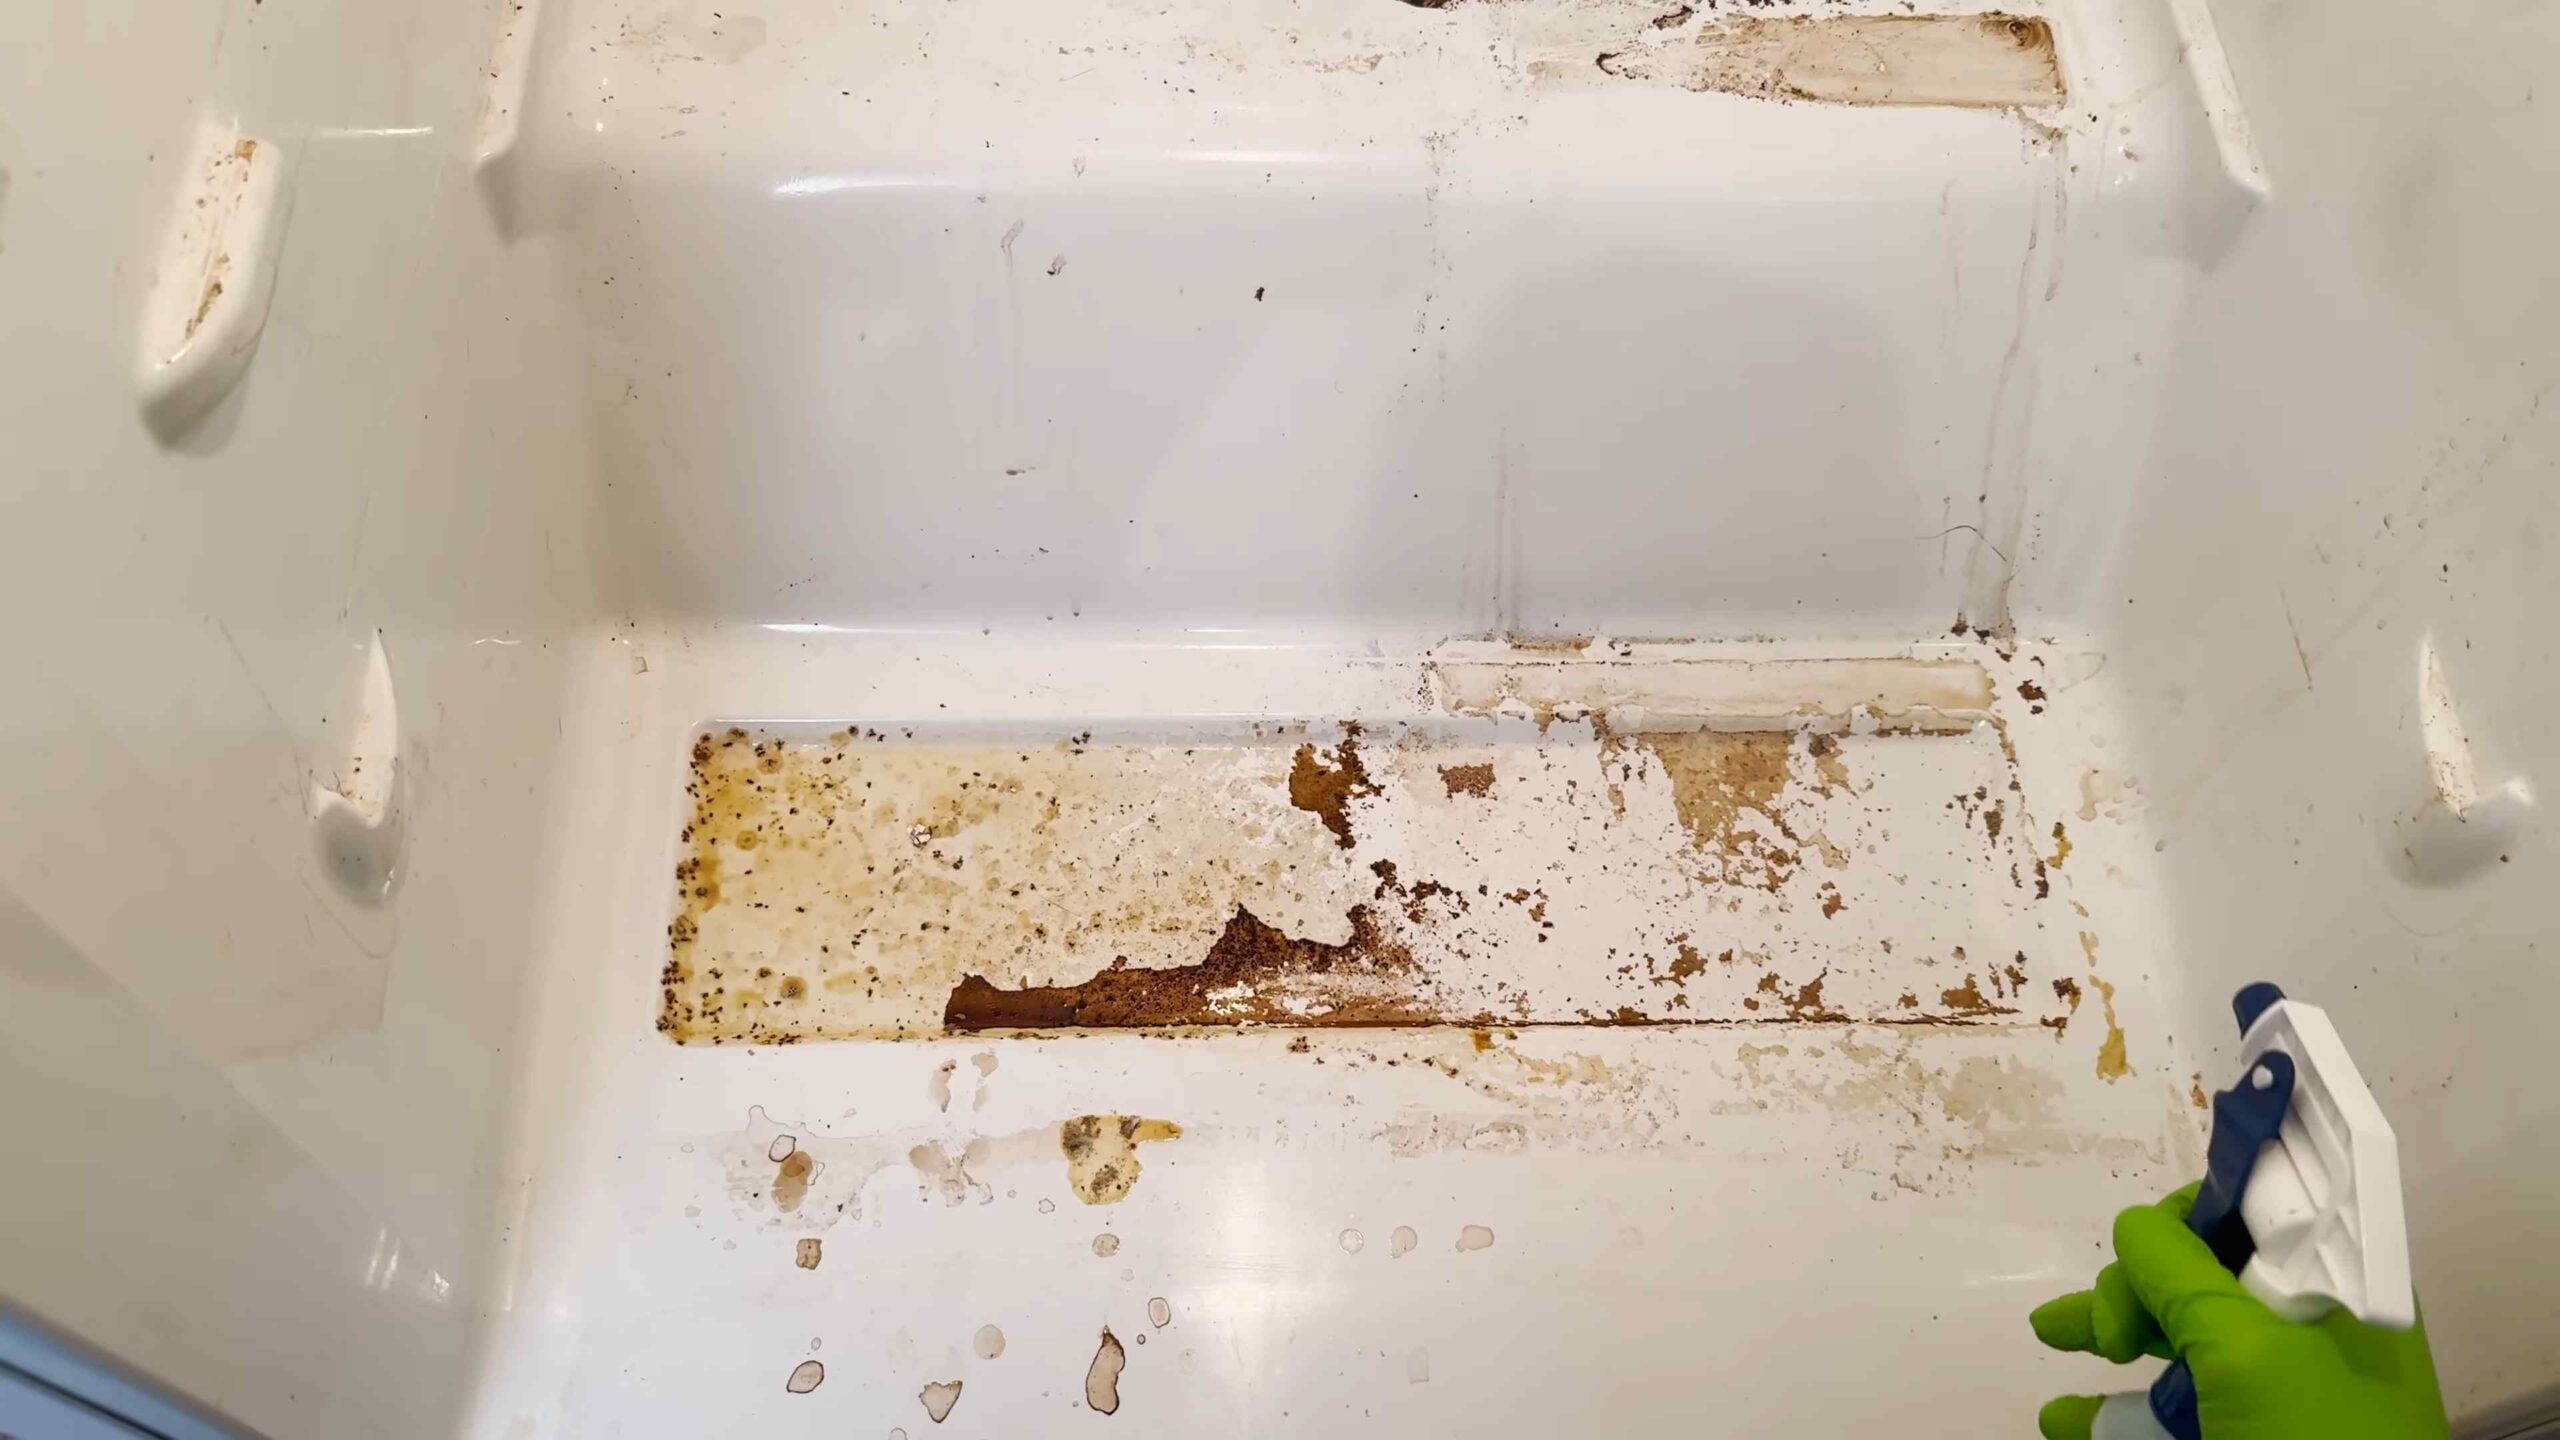
6. Assess the Damage: Take a good look at the inside of your fridge. Identify any spills, stains, mold, or areas that need extra attention. This will help you plan your cleaning strategy.
Phase 2: Cleaning the Removable Parts
Now, let’s tackle those shelves, drawers, and bins.
1. Wash with Warm, Soapy Water: Fill your sink or a large tub with warm water and a squirt of dish soap. Wash all the removable parts thoroughly, using a sponge or cloth to scrub away any dirt, grime, or food residue.
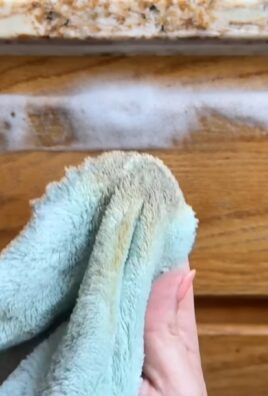
2. Tackle Stubborn Stains: For stubborn stains, create a paste of baking soda and water. Apply the paste to the stain, let it sit for a few minutes, and then scrub gently with a sponge or old toothbrush.
3. Rinse Thoroughly: Rinse all the parts thoroughly with clean water to remove any soap residue.
4. Disinfect with Vinegar Solution: In a spray bottle, mix equal parts white vinegar and water. Spray the solution onto the shelves, drawers, and bins, and let it sit for a few minutes. Vinegar is a natural disinfectant that will kill bacteria and help eliminate odors.
5. Wipe Dry: Wipe all the parts dry with a clean microfiber cloth. Make sure they are completely dry before placing them back into the fridge.
Phase 3: Cleaning the Fridge Interior
Time to get inside the fridge!
1. Prepare Your Cleaning Solution: In a bowl, mix 1 tablespoon of baking soda with 2 cups of warm water. This will be your main cleaning solution for the fridge interior.
2. Wipe Down the Walls and Ceiling: Dip a clean microfiber cloth into the baking soda solution and wring out the excess. Wipe down all the interior walls, ceiling, and door of the fridge, paying special attention to any areas with spills or stains.
3. Clean the Door Seals: The door seals are often overlooked, but they can accumulate dirt and grime. Use a damp cloth or sponge to clean the seals thoroughly. An old toothbrush can be helpful for getting into the crevices.
4. Tackle Stubborn Stains and Mold: For stubborn stains or mold, create a paste of baking soda and water. Apply the paste to the affected area, let it sit for a few minutes, and then scrub gently with a sponge or old toothbrush. You can also use a vinegar solution for mold, but be sure to ventilate the area well.
5. Clean the Drip Tray: Most refrigerators have a drip tray located at the bottom. Remove the tray and empty any accumulated water. Wash the tray with warm, soapy water and dry it thoroughly before replacing it.
6. Rinse with Clean Water: After cleaning with the baking soda solution, wipe down all the surfaces with a clean, damp cloth to remove any residue.
7. Dry Thoroughly: Use a clean, dry microfiber cloth to dry all the interior surfaces of the fridge. This will prevent water spots and help prevent mold growth.
Phase 4: Reassembling and Organizing
The finish line is in sight!
1. Replace Shelves, Drawers, and Bins: Once the fridge interior and all the removable parts are completely dry, carefully replace the shelves, drawers, and bins.
2. Organize Food Items: As you put the food items back into the fridge, take a moment to organize them properly.
* Top Shelf: Ready-to-eat foods, leftovers, and drinks.
* Middle Shelves: Dairy products, eggs, and yogurt.
* Bottom Shelf: Raw meat, poultry, and fish (to prevent cross-contamination).
* Drawers: Fruits and vegetables (in separate drawers if possible).
* Door: Condiments, sauces, and drinks (the door is the warmest part of the fridge, so avoid storing highly perishable items here).
3. Use Clear Containers: Store leftovers and cut fruits and vegetables in clear containers so you can easily see what’s inside. This will help you avoid food waste.
4. Place an Open Box of Baking Soda: Place an open box of baking soda in the back of the fridge to absorb odors. Replace the baking soda every month or two.
5. Optional: Add Essential Oils: For a fresh, natural scent, you can add a few drops of lemon or tea tree essential oil to a cotton ball and place it in the fridge.
6. Plug the Fridge Back In: Plug the fridge back in and allow it to cool down to the proper temperature before storing large quantities of food.
Extra Tips for a Sparkling Fridge
* Clean Up Spills Immediately: Don’t let spills sit and harden. Clean them up as soon as they happen to prevent stains and odors.
* Check Expiration Dates Regularly: Make it a habit to check expiration dates on food items at least once a week.
* Don’t Overcrowd the Fridge: Overcrowding can restrict airflow and make it harder for the fridge to maintain a consistent temperature.
* Consider Fridge Liners: Fridge liners can help protect shelves from spills and make cleaning easier.
* Clean Your Fridge Regularly: Aim to deep clean your fridge every 3-6 months, or more often if needed. A quick wipe-down of spills and surfaces once a week will also help keep it clean and fresh.
And there you have it! A sparkling clean fridge that’s ready to keep your food fresh and your kitchen smelling great. Now, go enjoy the fruits (and vegetables!) of your labor! You deserve it.
Conclusion
So, there you have it! Deep cleaning your fridge might seem like a daunting task, but with these simple, effective DIY tricks, it becomes a manageable and even satisfying experience. We’ve shown you how to banish lingering odors, tackle stubborn stains, and organize your refrigerator for optimal freshness and accessibility.
Why is this a must-try? Because a clean fridge isn’t just about aesthetics; it’s about food safety, extending the life of your groceries, and ultimately, saving you money. A fridge free from bacteria and mold ensures that your food stays fresher for longer, reducing waste and preventing potential health hazards. Plus, an organized fridge makes meal planning and grocery shopping a breeze. You’ll know exactly what you have on hand, preventing impulse buys and ensuring you use everything before it expires.
But don’t stop there! Feel free to experiment with variations on these techniques. For instance, if you’re not a fan of vinegar, try using a diluted lemon juice solution for its natural cleaning and deodorizing properties. You can also add a few drops of your favorite essential oil (like lemon or grapefruit) to your cleaning solution for a subtle, refreshing scent. For extra stubborn stains, create a paste of baking soda and water and let it sit on the affected area for a few minutes before scrubbing.
Consider investing in some clear, stackable storage containers to further organize your fridge. These containers not only maximize space but also allow you to easily see what’s inside, preventing forgotten leftovers from languishing in the back. Labeling these containers with expiration dates can also be a game-changer in preventing food waste.
Deep cleaning your fridge is an investment in your health, your wallet, and your peace of mind. It’s a small effort that yields significant rewards. We’re confident that once you try these DIY tricks, you’ll be amazed at the difference they make.
We encourage you to give these methods a try and share your experience with us! Let us know in the comments below which tips worked best for you, if you discovered any new variations, or if you have any other helpful suggestions to add to the mix. We’re always eager to learn from our readers and create a community of fridge-cleaning enthusiasts! Your feedback is invaluable and helps us refine our tips and tricks for everyone. So, grab your cleaning supplies, roll up your sleeves, and get ready to transform your fridge into a sparkling, organized haven for your food. Happy cleaning!
Frequently Asked Questions (FAQ)
How often should I deep clean my fridge?
Ideally, you should aim to deep clean your fridge every 3-6 months. However, the frequency depends on your usage and how prone it is to spills and messes. If you notice frequent spills, strong odors, or a build-up of grime, you might want to clean it more often. A quick wipe-down of shelves and drawers should be done weekly to prevent build-up.
What’s the best way to get rid of stubborn odors in my fridge?
Baking soda is your best friend for odor absorption. Place an open box of baking soda in the back of your fridge to neutralize odors. You can also try placing a bowl of activated charcoal or coffee grounds in the fridge. For particularly strong odors, try wiping down the interior with a solution of vinegar and water. Make sure to remove any spoiled food promptly, as this is often the source of the odor.
Can I use bleach to clean my fridge?
While bleach is a powerful disinfectant, it’s generally not recommended for cleaning your fridge. Bleach can leave a strong odor that can be absorbed by your food. It can also be corrosive to certain materials. If you choose to use bleach, dilute it heavily with water (no more than 1 tablespoon of bleach per gallon of water) and rinse thoroughly with clean water afterward. Ensure the fridge is completely dry before putting food back in. Natural alternatives like vinegar and baking soda are generally safer and more effective.
What’s the best way to prevent food from spoiling in my fridge?
Proper storage is key to preventing food spoilage. Store perishable items like meat, poultry, and seafood on the bottom shelf, where it’s coldest. Keep fruits and vegetables in the crisper drawers, and store dairy products on the middle shelves. Avoid overcrowding your fridge, as this can restrict airflow and lead to uneven cooling. Check expiration dates regularly and discard any food that is past its prime. Using airtight containers can also help to extend the shelf life of your food.
How do I clean the rubber seals around my fridge door?
The rubber seals around your fridge door can accumulate mold and mildew over time. To clean them, use a solution of warm water and dish soap. Apply the solution with a soft cloth or sponge and scrub gently. For stubborn mold, you can use a toothbrush to get into the crevices. Rinse the seals with clean water and dry them thoroughly. You can also use a diluted vinegar solution to help prevent mold growth.
What if I don’t have vinegar or baking soda? What are some alternatives?
If you don’t have vinegar or baking soda, you can use lemon juice as a natural cleaning agent. Lemon juice has antibacterial and deodorizing properties. You can also use a mild dish soap solution to clean the interior of your fridge. Make sure to rinse thoroughly with clean water to remove any soap residue.
How can I organize my fridge to maximize space?
Use clear, stackable storage containers to organize your fridge. These containers allow you to easily see what’s inside and prevent food from getting lost in the back. Use shelf dividers to separate different types of food. Store condiments and sauces in the door compartments. Use a lazy Susan to organize smaller items like jars and bottles. Label your containers with expiration dates to prevent food waste.
Is it necessary to unplug my fridge before cleaning it?
While it’s not strictly necessary to unplug your fridge before cleaning, it’s generally a good idea for safety reasons. Unplugging the fridge prevents the risk of electric shock and also allows you to clean the interior more thoroughly without the compressor running. If you choose not to unplug your fridge, be extra careful when cleaning around electrical components.
How do I clean the ice maker and water dispenser in my fridge?
Refer to your fridge’s user manual for specific instructions on cleaning the ice maker and water dispenser. Generally, you’ll need to empty the ice bin and clean it with warm water and dish soap. You may also need to flush the water dispenser with a solution of vinegar and water to remove mineral deposits. Replace the water filter regularly according to the manufacturer’s recommendations.
What are some common mistakes to avoid when deep cleaning my fridge?
Avoid using abrasive cleaners or scouring pads, as these can scratch the surfaces of your fridge. Don’t use too much water when cleaning, as this can lead to mold growth. Don’t forget to clean the drip tray underneath the fridge. Don’t put food back into the fridge until it’s completely dry. And most importantly, don’t procrastinate! Regular cleaning will prevent build-up and make the task much easier in the long run.

Leave a Comment