

Clean keyboard without damage? Absolutely! Let’s face it, our keyboards are like little petri dishes of crumbs, dust, and who-knows-what-else. We use them every day, often while snacking (guilty!), and rarely give them the deep clean they deserve. But the thought of tackling that grime can be daunting, right? Visions of broken keys and short-circuited circuits probably dance in your head.
Don’t worry, I’m here to tell you that cleaning your keyboard doesn’t have to be a high-stakes operation! In fact, throughout history, keeping our tools clean has been essential for both functionality and hygiene. From ancient scribes meticulously caring for their writing implements to modern-day tech enthusiasts obsessing over their gaming rigs, the principle remains the same: a clean tool is a happy and efficient tool.
This DIY guide is your roadmap to a sparkling clean keyboard, without the fear of causing any damage. I’ll share my favorite tricks and techniques, using simple household items, to banish the gunk and restore your keyboard to its former glory. Why is this important? Because a clean keyboard isn’t just about aesthetics; it’s about hygiene, performance, and even extending the lifespan of your device. So, let’s dive in and learn how to clean keyboard without damage, ensuring a healthier and more productive workspace!
DIY Keyboard Cleaning: A Deep Dive for a Sparkling Clean Keyboard
Hey there, fellow keyboard enthusiasts! Are you tired of crumbs, dust bunnies, and mysterious sticky substances lurking between your keys? I know I am! A clean keyboard isn’t just about aesthetics; it’s about hygiene and prolonging the life of your trusty typing companion. So, let’s dive into a comprehensive guide on how to clean your keyboard without causing any damage. I’ll walk you through each step, sharing my tried-and-true methods for a truly sparkling clean keyboard.
What You’ll Need: Your Cleaning Arsenal
Before we get started, let’s gather our cleaning supplies. Having everything ready will make the process smooth and efficient. Here’s what I recommend:
* Compressed Air: This is your best friend for blasting away loose debris.
* Small Vacuum Cleaner with Brush Attachment (Optional): A handheld vacuum can be helpful for sucking up larger particles.
* Microfiber Cloths: These are gentle and effective for wiping surfaces.
* Isopropyl Alcohol (70% or Higher): This is a fantastic disinfectant and evaporates quickly.
* Cotton Swabs: Perfect for cleaning those hard-to-reach areas.
* Keycap Puller (Optional but Recommended): Makes removing keycaps much easier and safer.
* Small Bowl or Container: For soaking keycaps.
* Mild Dish Soap: For washing keycaps.
* Soft-Bristled Brush (e.g., Toothbrush): For scrubbing stubborn grime.
* Screwdriver (If needed to disassemble the keyboard): Only if you’re comfortable disassembling your keyboard.
* Camera or Phone: To take a picture of your keyboard layout before removing keycaps (trust me, you’ll thank me later!).
Phase 1: Pre-Cleaning – Getting Rid of the Big Stuff
This phase is all about removing the loose debris before we get into the deeper cleaning.
1. Unplug Your Keyboard: This is crucial for safety! Make sure your keyboard is completely disconnected from your computer.
2. Turn It Upside Down and Shake: Give your keyboard a good shake over a trash can or a sink. This will dislodge a surprising amount of crumbs and dust.
3. Compressed Air Attack: Now, grab your compressed air and use short bursts to blow out debris from between the keys. Hold the can at an angle and move it across the keyboard, paying attention to crevices and hard-to-reach areas. Don’t hold the can upside down, as this can release liquid propellant.
4. Vacuuming (Optional): If you have a small vacuum cleaner with a brush attachment, use it to gently vacuum up any remaining loose particles. Be careful not to press too hard, as you don’t want to damage the keys.
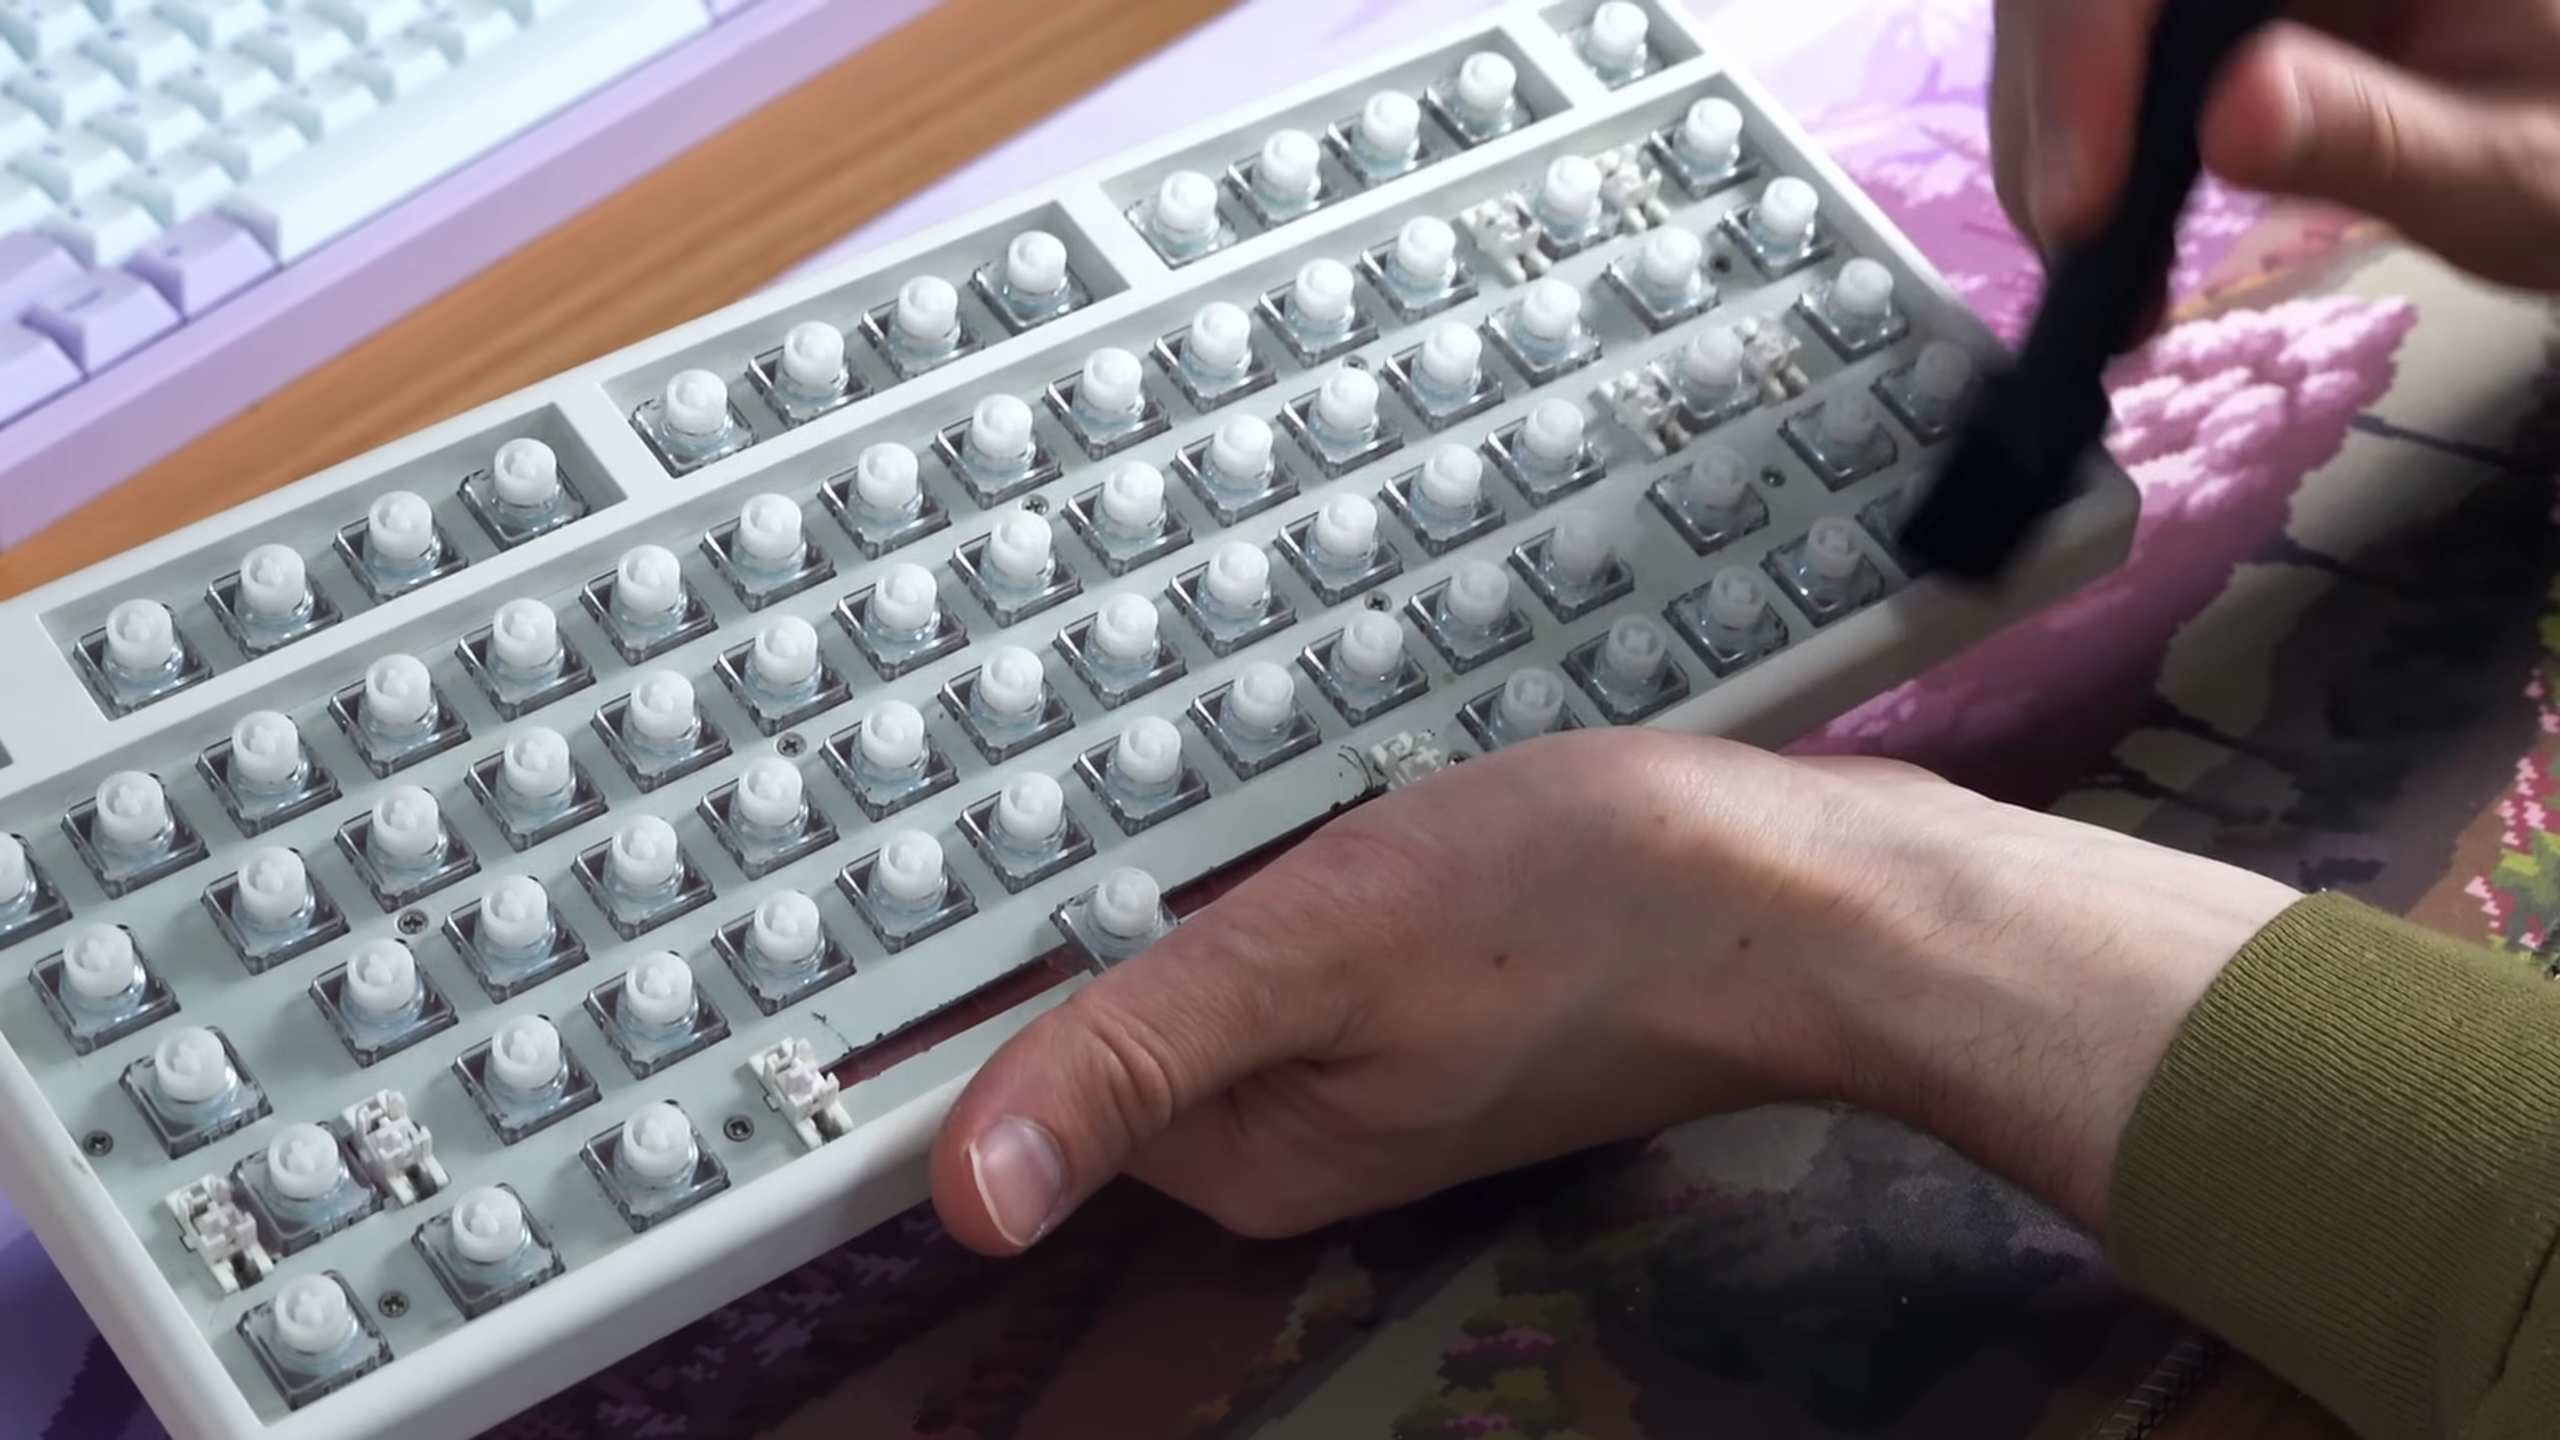
Phase 2: Keycap Removal – The Deep Clean Begins
This is where we get serious about cleaning. Removing the keycaps allows us to clean both the keycaps themselves and the keyboard base underneath.
1. Take a Picture: Before you start removing any keycaps, take a clear picture of your keyboard layout. This will be a lifesaver when you’re putting everything back together. I’ve learned this the hard way!
2. Using a Keycap Puller: If you have a keycap puller, gently slide it over the keycap you want to remove. Make sure the wires are securely gripping the keycap. Then, pull straight up with even pressure. Avoid twisting or wiggling the keycap puller, as this can damage the keycap or the switch underneath.
3. Without a Keycap Puller (Carefully!): If you don’t have a keycap puller, you can try using a small, flathead screwdriver or a thin, plastic pry tool. Wrap the tip of the screwdriver with a microfiber cloth to prevent scratches. Gently pry up one side of the keycap, then the other, until it comes loose. Be extremely careful not to apply too much force, as you could break the keycap or the switch.
4. Remove All Keycaps: Continue removing all the keycaps, placing them in a bowl or container as you go.
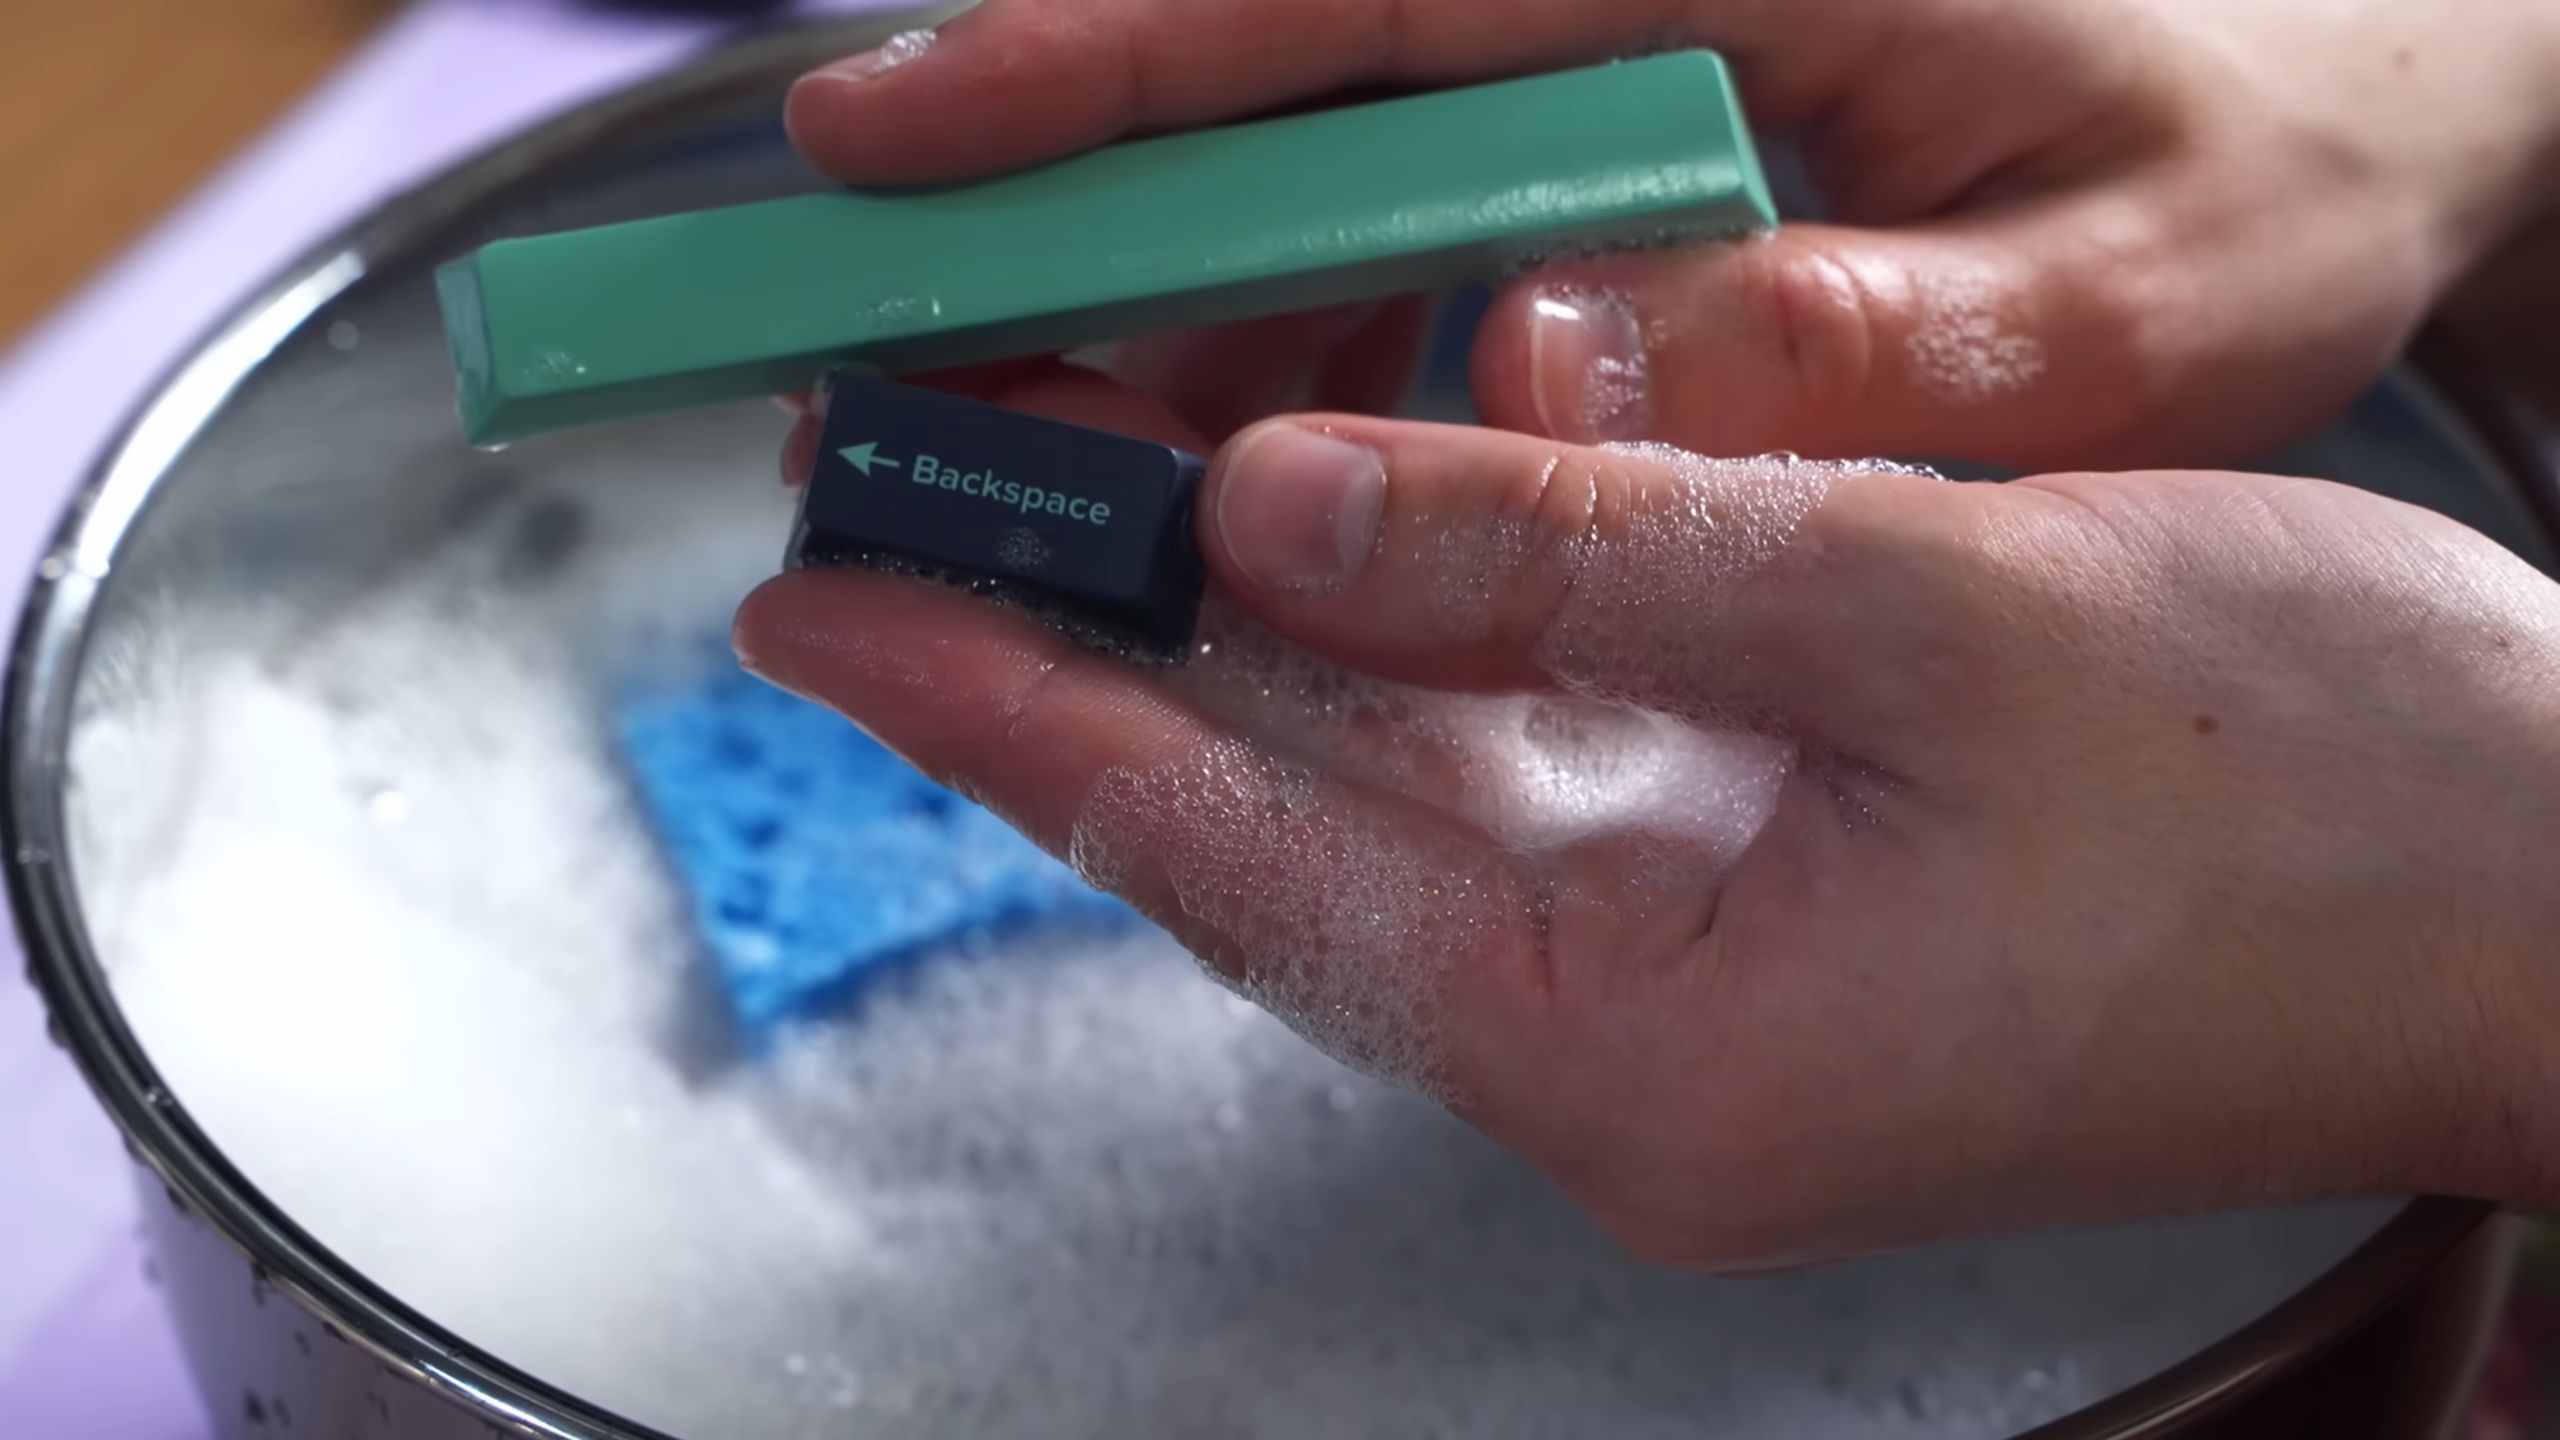
Phase 3: Keycap Cleaning – A Refreshing Bath
Now that we’ve removed the keycaps, it’s time to give them a good cleaning.
1. Prepare the Soapy Water: Fill your bowl or container with warm water and add a few drops of mild dish soap.
2. Soak the Keycaps: Place the keycaps in the soapy water and let them soak for about 15-30 minutes. This will help loosen any dirt and grime.
3. Scrubbing Time: After soaking, use a soft-bristled brush (like an old toothbrush) to gently scrub each keycap. Pay attention to any stubborn stains or grime.
4. Rinse Thoroughly: Rinse the keycaps thoroughly with clean water to remove all traces of soap.
5. Drying is Key: Spread the keycaps out on a clean microfiber cloth and let them air dry completely. Make sure the keycaps are completely dry before reattaching them to the keyboard. You can also gently pat them dry with another microfiber cloth.
Phase 4: Keyboard Base Cleaning – The Nitty-Gritty
With the keycaps removed, we can now focus on cleaning the keyboard base itself.
1. Compressed Air Again: Use compressed air to blow out any remaining dust and debris from the keyboard base. Pay close attention to the areas around the switches.
2. Isopropyl Alcohol Wipe Down: Dampen a microfiber cloth with isopropyl alcohol (70% or higher). Gently wipe down the entire keyboard base, paying attention to any sticky or dirty areas. Avoid getting alcohol directly into the switches, as this could damage them.
3. Cotton Swab Detail Work: Use cotton swabs dipped in isopropyl alcohol to clean those hard-to-reach areas around the switches and in the corners of the keyboard base.
4. Stubborn Stain Removal: For stubborn stains, you can try using a slightly damp (not soaking wet!) microfiber cloth with a tiny amount of dish soap. Gently rub the stain until it disappears, then wipe the area with a clean, damp cloth to remove any soap residue.
5. Let it Dry: Allow the keyboard base to air dry completely before reattaching the keycaps.
Phase 5: Reassembly – Putting It All Back Together
Now for the satisfying part – putting your keyboard back together!
1. Ensure Everything is Dry: Double-check that both the keycaps and the keyboard base are completely dry before proceeding.
2. Refer to Your Picture: Use the picture you took earlier as a guide to reattach the keycaps in the correct positions.
3. Press Firmly: Gently press each keycap onto the switch until it clicks into place.
4. Double-Check: Once you’ve reattached all the keycaps, double-check that they are all properly seated and that none are loose.
5. Plug It In and Test: Plug your keyboard back into your computer and test all the keys to make sure they are working correctly.
Optional: Disassembling the Keyboard for a Super Deep Clean
If you’re feeling adventurous and your keyboard allows it, you can disassemble it for an even deeper clean. However, this is only recommended if you’re comfortable with electronics and have some experience disassembling and reassembling devices.
1. Consult Your Keyboard’s Manual: Before you start, consult your keyboard’s manual or search online for instructions on how to disassemble your specific model.
2. Remove Screws: Carefully remove any screws that are holding the keyboard together.
3. Separate the Components: Gently separate the keyboard’s components, such as the top case, the bottom case, and the circuit board.
4. Clean Each Component: Clean each component separately using the methods described above. Be especially careful when cleaning the circuit board, as it is sensitive to moisture.
5. Reassemble the Keyboard: Once all the components are clean and dry, carefully reassemble the keyboard, following the instructions in your keyboard’s manual or online.
Tips and Tricks for a Long-Lasting Clean
* Regular Cleaning: Clean your keyboard regularly (at least once a month) to prevent dirt and grime from building up.
* Eat Away From Your Keyboard: Avoid eating or drinking near your keyboard to prevent spills and crumbs.
* Wash Your Hands: Wash your hands before using your keyboard to prevent transferring dirt and oils.
* Keyboard Cover: Consider using a keyboard cover to protect your keyboard from dust and spills.
* Don’t Use Harsh Chemicals: Avoid using harsh chemicals or abrasive cleaners, as these can damage the keyboard’s surface.
* Be Gentle: Always be gentle when cleaning your
Conclusion
So, there you have it! A simple, effective, and surprisingly satisfying way to achieve a pristine keyboard without resorting to harsh chemicals or risking damage to your precious tech. This DIY keyboard cleaning trick is more than just a cleaning method; it’s an investment in the longevity and performance of your computer. Think about it: a clean keyboard isn’t just aesthetically pleasing; it’s also more responsive, preventing sticky keys and frustrating typing errors.
Why is this a must-try? Because it’s gentle yet powerful. Unlike canned air, which can sometimes just blow debris around, or harsh solvents that can damage delicate components, our method uses readily available household items and a careful approach to lift dirt and grime away. It’s also incredibly cost-effective. You’re likely to have everything you need already in your home, saving you money and a trip to the store.
But the real beauty of this DIY keyboard cleaning method lies in its adaptability. Feel free to experiment with variations to suit your specific needs and preferences. For example, if you have particularly stubborn grime, you can slightly dampen the cotton swabs with isopropyl alcohol (make sure it’s at least 70% and never directly spray it on the keyboard). For keyboards with deep crevices, a soft-bristled brush can be invaluable in loosening debris before you wipe it away.
Consider these variations:
* For sticky keys: A slightly damp (not wet!) cotton swab dipped in isopropyl alcohol can work wonders on individual sticky keys. Gently rub around the key and then press it repeatedly to work the alcohol in and loosen the grime.
* For dust bunnies: A small vacuum cleaner attachment designed for electronics can be used to suck up loose dust and debris before you start the cleaning process.
* For a deeper clean: If you’re comfortable removing the keycaps (check your keyboard’s manual first!), you can soak them in warm, soapy water for a more thorough cleaning. Just make sure they’re completely dry before reattaching them.
Ultimately, the goal is to find a cleaning routine that works for you and keeps your keyboard in top condition. A clean keyboard is a happy keyboard, and a happy keyboard leads to a more productive and enjoyable computing experience.
We wholeheartedly encourage you to give this DIY keyboard cleaning trick a try. It’s a simple, effective, and rewarding way to maintain your tech and keep it looking its best. And most importantly, we want to hear about your experience! Share your tips, tricks, and before-and-after photos in the comments below. Let’s build a community of clean keyboard enthusiasts and help each other keep our tech sparkling! Your feedback will help others discover the best ways to keep their keyboards clean and functioning optimally. So, grab your supplies, follow the steps, and get ready to experience the satisfaction of a truly clean keyboard. You’ll be amazed at the difference it makes!
FAQ
Frequently Asked Questions About Cleaning Your Keyboard
Q: How often should I clean my keyboard?
A: The frequency of cleaning depends on your usage habits and environment. If you use your keyboard frequently or work in a dusty environment, you should aim to clean it at least once a month. For lighter users, cleaning every two to three months may suffice. However, if you notice visible dirt, grime, or sticky keys, it’s time for a cleaning regardless of your regular schedule. Regular cleaning prevents the buildup of debris that can damage your keyboard over time.
Q: What kind of cleaning supplies do I need?
A: For this DIY keyboard cleaning method, you’ll need a few basic supplies:
* Microfiber cloths: These are essential for wiping down the keyboard surface without scratching it.
* Cotton swabs: These are perfect for cleaning hard-to-reach areas and individual keys.
* Isopropyl alcohol (70% or higher): This is optional but recommended for stubborn grime or sticky keys.
* A small bowl of warm water: For dampening the microfiber cloths and cotton swabs.
* A soft-bristled brush (optional): For loosening debris in deep crevices.
* A can of compressed air (optional): To blow away loose particles before cleaning.
Q: Is it safe to use water on my keyboard?
A: Yes, but with extreme caution. Never directly spray water onto your keyboard. Instead, dampen a microfiber cloth or cotton swab with water and wring out any excess moisture. The cloth or swab should be damp, not wet. Excess water can seep into the keyboard and cause damage. Always ensure the keyboard is completely dry before using it again.
Q: Can I use other cleaning solutions besides isopropyl alcohol?
A: While isopropyl alcohol is generally safe and effective, you can also use a mild dish soap diluted in water. However, be extra careful to avoid getting any liquid inside the keyboard. Avoid using harsh chemicals, such as bleach or ammonia, as they can damage the keyboard’s plastic and electronic components. Always test any cleaning solution on a small, inconspicuous area of the keyboard first to ensure it doesn’t cause discoloration or damage.
Q: How do I clean a mechanical keyboard?
A: Cleaning a mechanical keyboard is similar to cleaning a regular keyboard, but with a few extra considerations. Mechanical keyboards often have removable keycaps, which can be soaked in warm, soapy water for a more thorough cleaning. Use a keycap puller to remove the keycaps carefully. After soaking, rinse the keycaps thoroughly and allow them to dry completely before reattaching them. For the keyboard base, use the same method described above: a damp microfiber cloth and cotton swabs. Be extra careful to avoid getting any liquid inside the switches.
Q: What if I spill liquid on my keyboard?
A: If you spill liquid on your keyboard, act quickly. Immediately unplug the keyboard from your computer. Turn the keyboard upside down to allow the liquid to drain out. Use a dry cloth to absorb as much of the liquid as possible. If the liquid was sugary or sticky, you may need to disassemble the keyboard to clean the individual components. Allow the keyboard to dry completely for at least 24 hours before plugging it back in. If the keyboard still doesn’t work properly, you may need to take it to a professional repair shop.
Q: How do I prevent my keyboard from getting dirty in the first place?
A: Prevention is key to keeping your keyboard clean. Avoid eating or drinking near your keyboard. Wash your hands regularly before using your computer. Consider using a keyboard cover to protect it from dust and spills. Regularly dust your keyboard with a soft cloth or a can of compressed air. By taking these simple steps, you can significantly reduce the amount of dirt and grime that accumulates on your keyboard.
Q: My keys are still sticky after cleaning. What should I do?
A: If your keys are still sticky after cleaning, it’s likely that there’s still some residue trapped underneath them. Try removing the keycaps (if possible) and cleaning the area underneath with a cotton swab dipped in isopropyl alcohol. Gently rub around the switch and then press the key repeatedly to work the alcohol in and loosen the grime. Allow the alcohol to evaporate completely before reattaching the keycap. If the problem persists, you may need to disassemble the keyboard further to clean the switches more thoroughly.
Q: Can I put my keyboard in the dishwasher?
A: Absolutely not! Putting your keyboard in the dishwasher will almost certainly damage it beyond repair. The high heat and harsh detergents can damage the plastic and electronic components. Always clean your keyboard manually using the methods described above.
Q: Where can I find more information about keyboard cleaning?
A: There are many online resources available that provide more information about keyboard cleaning. You can search for tutorials on YouTube, read articles on tech websites, or consult your keyboard’s manual. Remember to always follow the manufacturer’s instructions and take precautions to avoid damaging your keyboard.


Leave a Comment