

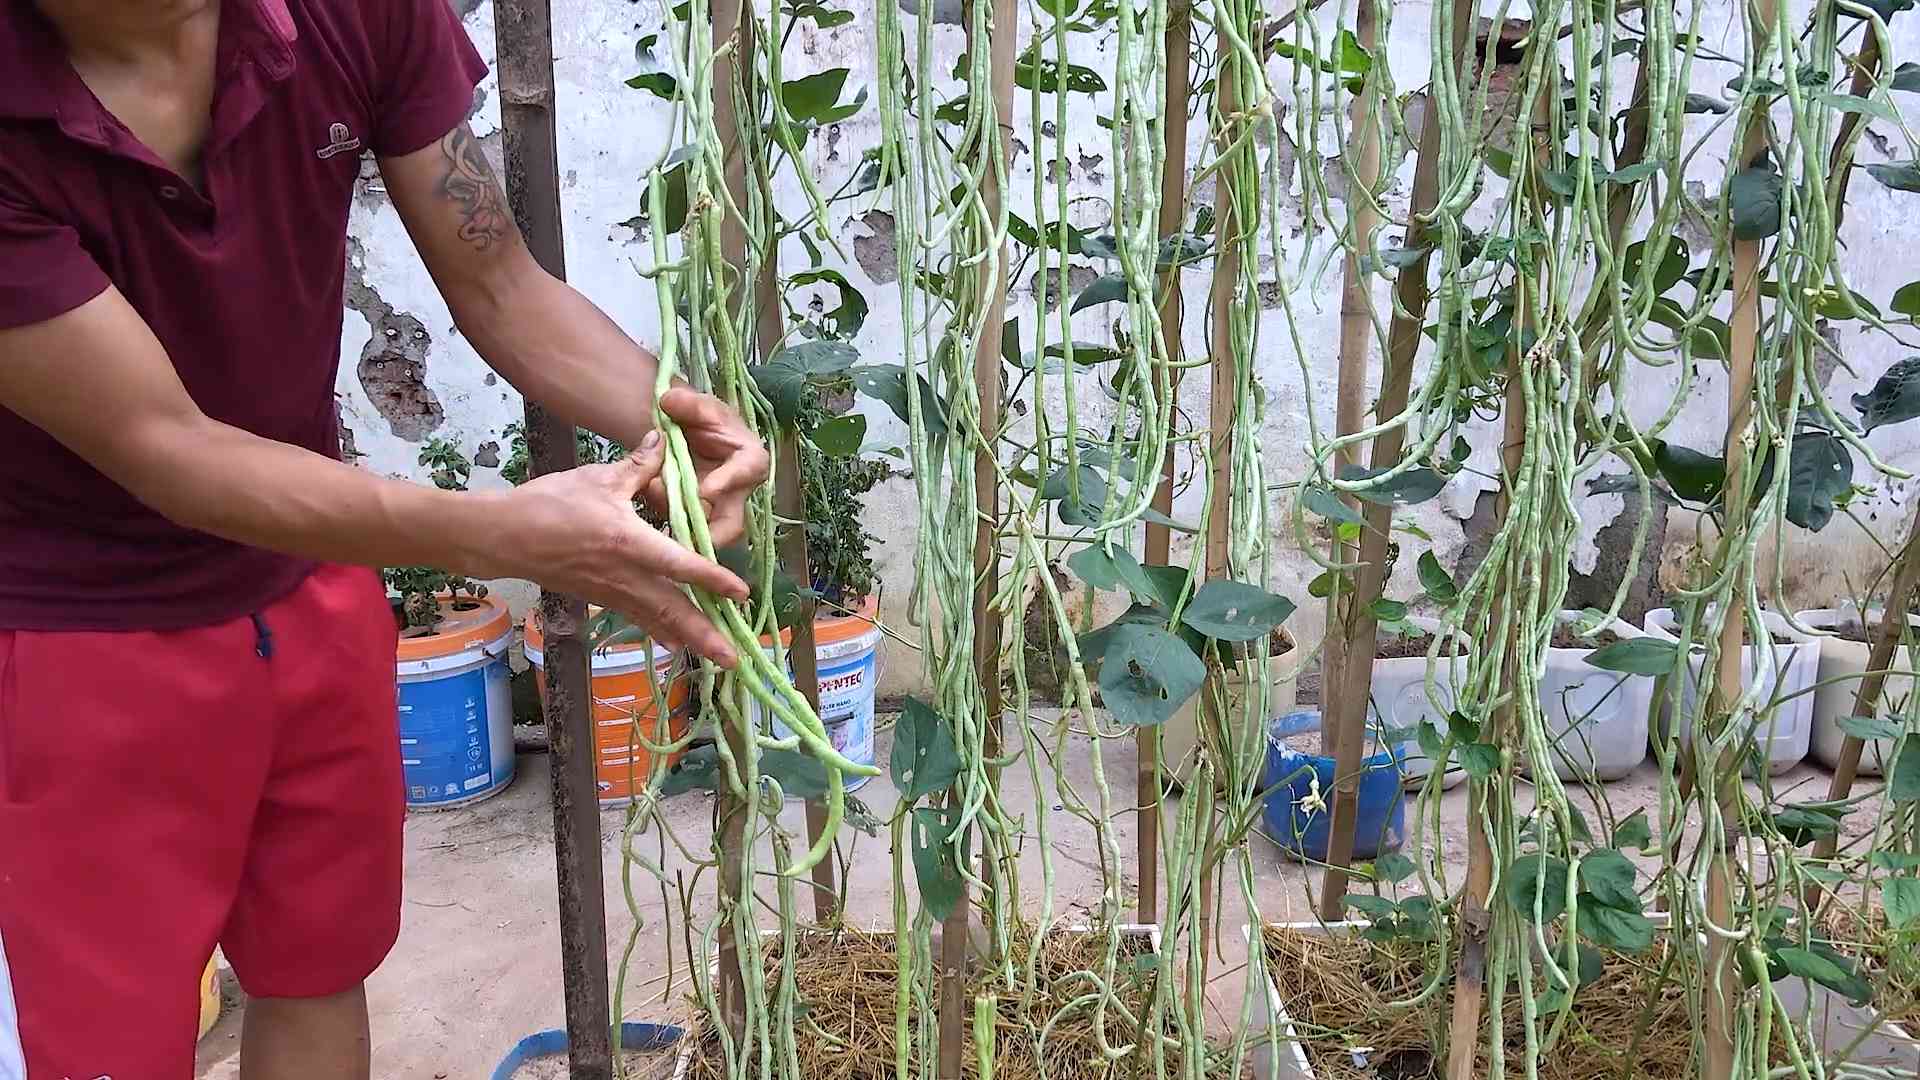
Yardlong bean growing guide: Ever dreamt of harvesting beans so long they practically touch the ground? I know I have! There’s something incredibly satisfying about growing your own food, and yardlong beans, with their impressive length and delicious flavor, are a fantastic choice for any home gardener looking for a unique and rewarding experience.
While the exact origins are debated, yardlong beans, also known as asparagus beans or Chinese long beans, have been cultivated in Southeast Asia for centuries. They’re a staple in many Asian cuisines, adding a delightful crunch and subtle sweetness to stir-fries, salads, and curries. Imagine bringing that vibrant flavor straight from your backyard to your table!
But why should *you* embark on this yardlong bean growing adventure? Well, beyond the sheer novelty of their length, these beans are surprisingly easy to grow, even for beginners. Plus, they’re incredibly productive, offering a bountiful harvest from just a few plants. In this DIY guide, I’ll share all my secrets and tips for successfully cultivating these fascinating legumes. From choosing the right variety to providing the perfect support system, I’ll walk you through every step of the process, ensuring you’ll be enjoying your own homegrown yardlong beans in no time. Get ready to impress your friends and family with your gardening prowess and a truly unique culinary treat!
DIY Vertical Yardlong Bean Trellis: Grow Up, Not Out!
Okay, let’s talk yardlong beans! These amazing, ridiculously long beans are not only delicious but also a ton of fun to grow. The only catch? They need support. That’s where this DIY vertical trellis comes in. Forget sprawling vines taking over your garden; we’re going vertical, baby! This project is perfect for small spaces, maximizing your yield, and adding a touch of whimsical charm to your garden. I’m going to walk you through building a sturdy and attractive trellis that your yardlong beans will absolutely love.
Materials You’ll Need
Before we dive in, let’s gather our supplies. Don’t worry, you probably have some of these lying around already!
* Wooden Posts: Four 4×4 wooden posts, at least 8 feet long. Cedar or pressure-treated lumber is best for longevity, especially if you live in a damp climate. I’m using cedar because I love the natural look and its resistance to rot.
* Wooden Boards: Two 2×4 wooden boards, 8 feet long. These will be used for the top and bottom supports.
* Heavy-Duty Wire Mesh or Netting: This is what the beans will actually climb on. Chicken wire works, but I prefer a sturdier wire mesh with larger openings for easier harvesting. You’ll need enough to cover the area between your posts. Think about 4 feet wide and 6 feet tall.
* Staple Gun and Staples: For attaching the wire mesh to the wooden frame. A heavy-duty staple gun is a must!
* Drill and Screws: For attaching the wooden boards to the posts. I recommend using exterior-grade screws to prevent rust. 3-inch screws should do the trick.
* Measuring Tape: Accuracy is key!
* Level: To ensure your trellis is straight and sturdy.
* Shovel or Post Hole Digger: For digging the holes for the posts. A post hole digger makes the job much easier.
* Concrete Mix (Optional): For setting the posts in concrete for extra stability. This is especially recommended if you live in an area with strong winds.
* Gloves: To protect your hands.
* Safety Glasses: Always a good idea when working with power tools.
* Wire Cutters: For trimming the wire mesh.
* Wood Stain or Paint (Optional): To protect and beautify your trellis. I’m going with a natural stain to let the cedar shine.
Planning and Preparation
Before you start swinging that shovel, let’s do a little planning.
* Choose Your Location: Yardlong beans need at least 6-8 hours of sunlight per day. Pick a spot in your garden that gets plenty of sun. Also, consider the mature size of the trellis and make sure it won’t block sunlight from other plants.
* Measure and Mark: Decide on the dimensions of your trellis. I’m going with a 4-foot wide by 6-foot tall structure. Mark the locations for your posts using stakes or spray paint. Remember to account for the width of your posts when measuring.
* Prepare the Posts: If you’re using untreated lumber, now’s the time to stain or paint it. This will protect it from the elements and prolong its life. Let the stain or paint dry completely before proceeding.
Building the Trellis Frame
Alright, let’s get our hands dirty!
1. Dig the Post Holes: Using your shovel or post hole digger, dig holes for your posts. The holes should be at least 2 feet deep. The deeper the holes, the more stable your trellis will be.
2. Set the Posts: Place the posts in the holes. Use a level to ensure they are perfectly vertical. If you’re using concrete, mix it according to the manufacturer’s instructions and pour it into the holes around the posts. Let the concrete cure completely before proceeding (usually 24-48 hours). If you’re not using concrete, pack the soil tightly around the posts to secure them.
3. Attach the Top and Bottom Supports: Using your drill and screws, attach the 2×4 wooden boards to the top and bottom of the posts. Make sure the boards are level and flush with the posts. These boards will provide additional stability to the trellis. I like to pre-drill pilot holes to prevent the wood from splitting.
4. Reinforce the Corners (Optional): For extra stability, you can add corner braces made from scrap wood. Cut the wood at a 45-degree angle and attach it to the posts and top/bottom supports using screws.
Attaching the Wire Mesh
This is where the magic happens!
1. Measure and Cut the Wire Mesh: Measure the area between the posts and cut the wire mesh to size using wire cutters. Be sure to wear gloves to protect your hands from the sharp edges of the wire. I always add a couple of extra inches to each side for easier stapling.
2. Attach the Wire Mesh: Using your staple gun, attach the wire mesh to the wooden frame. Start at one corner and work your way around, stapling every few inches. Make sure the mesh is taut and secure. Overlap the mesh slightly at the seams for added strength. I find it helpful to have someone hold the mesh in place while I staple.
3. Trim Excess Wire: Use wire cutters to trim any excess wire mesh. Be careful not to leave any sharp edges that could injure you or your plants.
Planting Your Yardlong Beans
Now for the fun part!
1. Prepare the Soil: Amend the soil around the base of the trellis with compost or other organic matter. Yardlong beans prefer well-drained soil that is rich in nutrients.
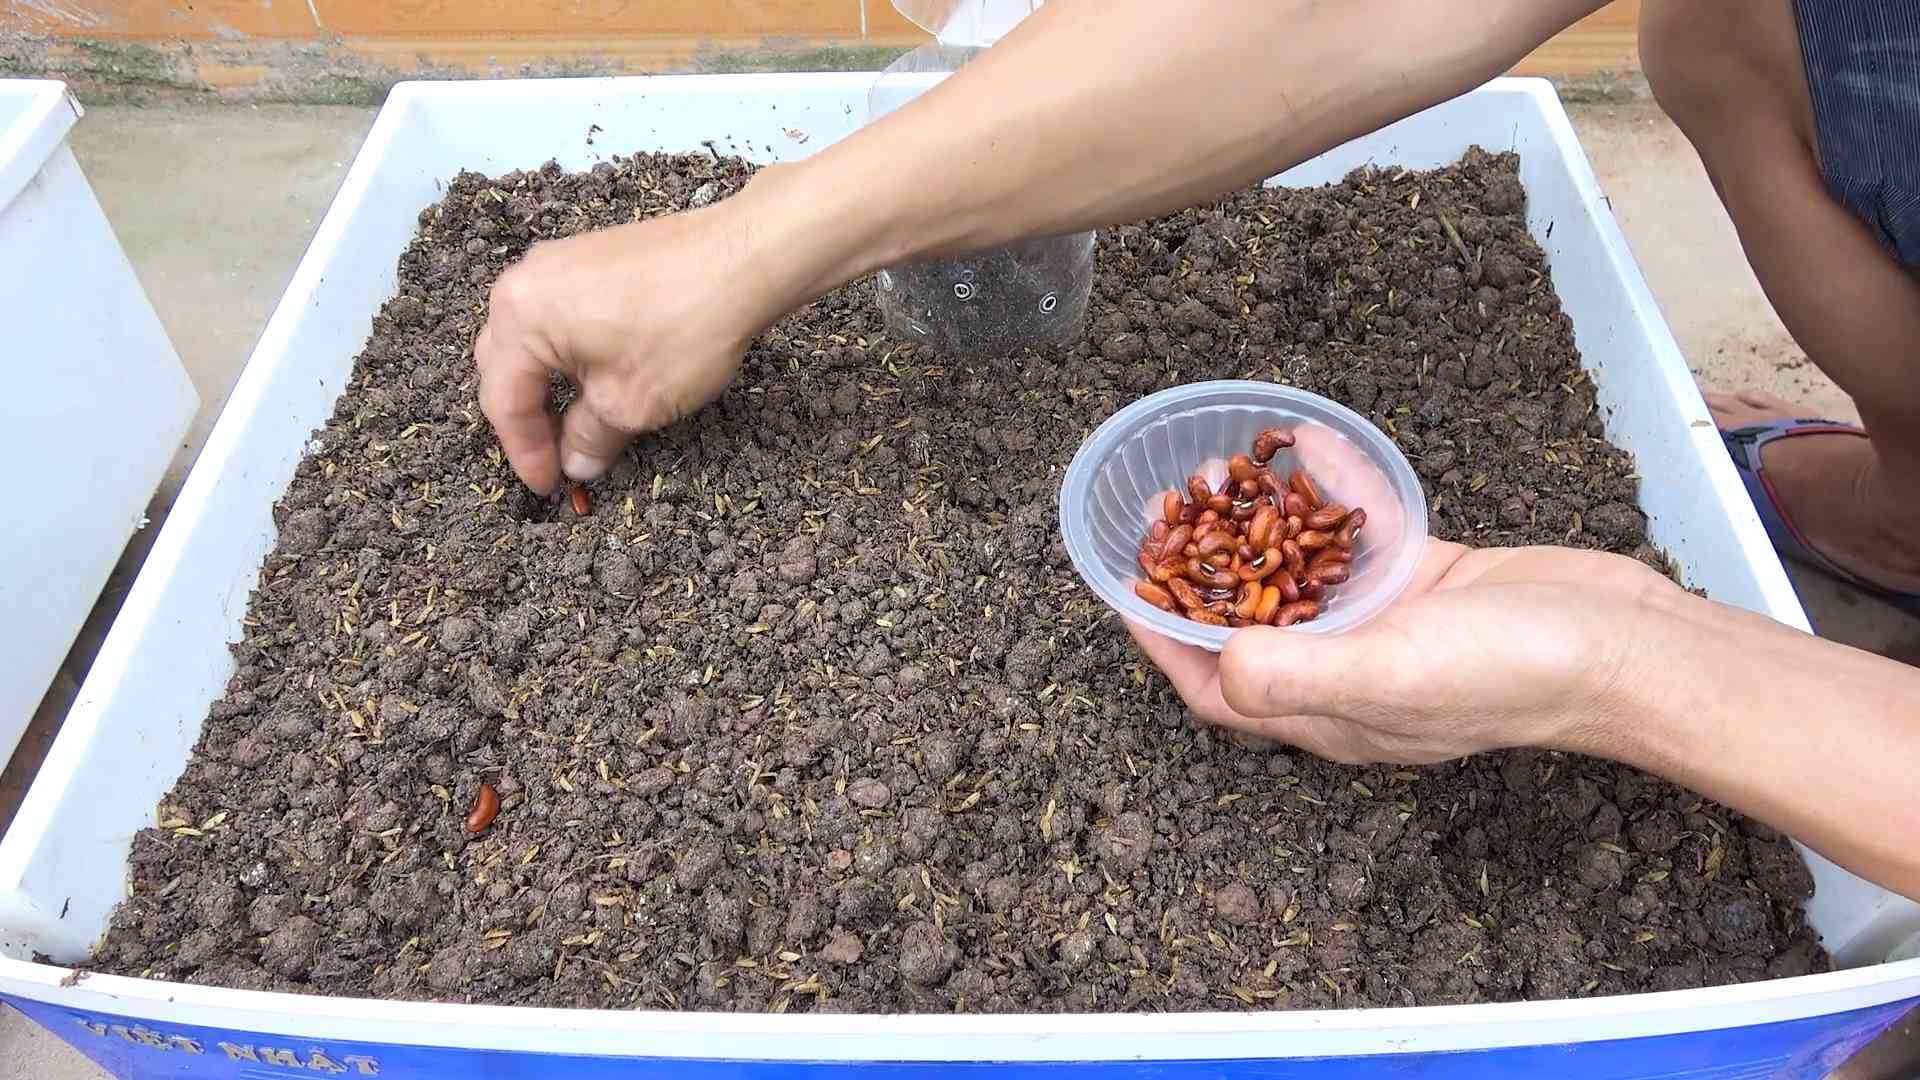
2. Plant the Seeds: Plant the yardlong bean seeds according to the package instructions. Typically, you’ll want to plant them about 1 inch deep and 2-3 inches apart.
3. Water Thoroughly: Water the seeds thoroughly after planting. Keep the soil moist but not soggy until the seeds germinate.
4. Provide Support: As the bean plants grow, gently guide them onto the wire mesh. They will naturally start to climb on their own, but you may need to help them get started.
Maintenance and Care
A little TLC goes a long way!
* Water Regularly: Yardlong beans need consistent moisture, especially during hot weather. Water deeply whenever the soil feels dry to the touch.
* Fertilize: Fertilize your yardlong beans every few weeks with a balanced fertilizer. Follow the instructions on the fertilizer package.
* Pest Control: Keep an eye out for pests such as aphids and bean beetles. Treat infestations promptly with insecticidal soap or other organic pest control methods.
* Harvest Regularly: Harvest the yardlong beans when they are about 12-18 inches long. Regular harvesting will encourage the plants to produce more beans. Don’t let them get too thick, or they’ll become tough.
Tips and Tricks
Here are a few extra tips to help you succeed:
* Soak the Seeds: Soaking the yardlong bean seeds in water for 24 hours before planting can improve germination rates.
* Succession Planting: Plant new seeds every few weeks to extend your harvest season.
* Companion Planting: Plant yardlong beans with companion plants such as corn, sunflowers, or marigolds. These plants can help attract pollinators and deter pests.
* Mulch: Apply a layer of mulch around the base of the plants to help retain moisture and suppress weeds.
* Pruning: Prune the vines as needed to keep them from becoming too dense. This will improve air circulation and reduce the risk of disease.
Enjoy Your Harvest!
With a little effort, you’ll be rewarded with a bountiful harvest of delicious yardlong beans. Enjoy them fresh, stir-fried, or pickled. They’re a versatile and nutritious addition to any meal. I love adding them to my summer salads! Happy gardening!
Conclusion
So, there you have it! Mastering the art of growing yardlong beans doesn’t require a green thumb blessed by the gardening gods. It’s about understanding their needs, providing the right support, and being patient. This comprehensive guide has armed you with the knowledge to cultivate your own thriving yardlong bean patch, bursting with these unique and delicious legumes.
Why is this DIY approach a must-try? Because it empowers you to control the quality of your food, reduces your reliance on store-bought produce (often shipped from afar), and connects you with the natural world in a deeply satisfying way. Imagine the pride of serving a dish featuring yardlong beans you nurtured from seed to table! Plus, growing your own allows you to choose organic practices, ensuring your beans are free from harmful pesticides and herbicides.
But the journey doesn’t end here! Feel free to experiment with different varieties of yardlong beans. Some are known for their exceptional flavor, while others boast impressive length. Consider companion planting to enhance growth and deter pests. Marigolds, for example, are excellent companions for yardlong beans, repelling nematodes and other unwanted visitors. You can also try different trellis designs to find what works best for your space and aesthetic preferences. Perhaps a simple bamboo structure, a repurposed metal gate, or even a living trellis of sunflowers!
Don’t be afraid to get creative with your harvest, too! While stir-fries are a classic way to enjoy yardlong beans, they’re also fantastic in salads, curries, and even pickled. Explore different cuisines and discover new and exciting ways to showcase their unique flavor and texture.
Ultimately, growing yardlong beans is a rewarding experience that combines the joy of gardening with the satisfaction of producing your own food. We encourage you to embrace this DIY project, get your hands dirty, and witness the magic of these extraordinary beans firsthand.
And most importantly, share your experiences! We want to hear about your successes, your challenges, and your innovative approaches to growing yardlong beans. Post photos of your thriving plants, share your favorite recipes, and connect with fellow gardeners in the comments below. Let’s build a community of yardlong bean enthusiasts and learn from each other’s journeys. Your insights could inspire others to embark on their own gardening adventures and discover the joys of growing these fascinating vegetables. Remember, every garden is a learning experience, and every gardener has something valuable to contribute. So, get planting, get sharing, and get ready to enjoy the delicious rewards of your labor! This **yardlong bean growing guide** is just the beginning of your journey.
Frequently Asked Questions (FAQ)
What are the ideal growing conditions for yardlong beans?
Yardlong beans thrive in warm climates with plenty of sunshine. They need at least 6-8 hours of direct sunlight per day. The ideal soil temperature for germination is between 70-85°F (21-29°C). They prefer well-drained soil that is rich in organic matter. Amend your soil with compost or well-rotted manure before planting to improve its fertility and drainage. Consistent moisture is crucial, especially during flowering and pod development.
How often should I water my yardlong beans?
Water your yardlong beans deeply and regularly, especially during hot and dry periods. Aim for about 1 inch of water per week. Check the soil moisture regularly by sticking your finger about an inch deep into the soil. If it feels dry, it’s time to water. Avoid overhead watering, as this can promote fungal diseases. Instead, water at the base of the plants. Mulching around the plants can help retain moisture and suppress weeds.
What kind of support system do yardlong beans need?
Yardlong beans are vigorous climbers and require a sturdy support system to grow properly. A trellis, fence, or teepee structure works well. The support should be at least 6-8 feet tall to accommodate the long vines. Ensure the support is strong enough to handle the weight of the mature plants and the developing beans. You can use bamboo poles, wooden stakes, metal fencing, or even repurposed materials to create your support system. Train the vines to climb the support by gently guiding them and tying them loosely if necessary.
When is the best time to plant yardlong beans?
Yardlong beans are warm-season crops and should be planted after the last frost when the soil has warmed up to at least 65°F (18°C). In most regions, this is typically in late spring or early summer. You can start seeds indoors 3-4 weeks before the last frost to get a head start, but be sure to harden off the seedlings before transplanting them outdoors. If you live in a warmer climate with a long growing season, you can plant yardlong beans multiple times throughout the summer for a continuous harvest.
How long does it take for yardlong beans to mature?
Yardlong beans typically take 60-80 days to mature after planting. You can start harvesting the beans when they are about 12-18 inches long and still tender. Regular harvesting encourages continued production. Check your plants frequently for mature beans, as they can become tough and less flavorful if left on the vine for too long.
What are some common pests and diseases that affect yardlong beans?
Yardlong beans can be susceptible to various pests and diseases, including aphids, bean beetles, spider mites, and fungal diseases like powdery mildew and bean rust. Regularly inspect your plants for signs of infestation or disease. Use organic pest control methods, such as insecticidal soap or neem oil, to control pests. Ensure good air circulation around the plants to prevent fungal diseases. Remove any infected leaves or plants promptly to prevent the spread of disease. Companion planting with beneficial herbs and flowers can also help deter pests and attract beneficial insects.
Can I grow yardlong beans in containers?
Yes, you can grow yardlong beans in containers, but you’ll need to choose a large container that is at least 12 inches in diameter and depth. Use a well-draining potting mix and provide a sturdy trellis or support system for the vines to climb. Container-grown yardlong beans may require more frequent watering and fertilization than those grown in the ground. Place the container in a sunny location that receives at least 6-8 hours of direct sunlight per day.
How do I harvest and store yardlong beans?
Harvest yardlong beans when they are about 12-18 inches long and still tender. Use scissors or pruning shears to cut the beans from the vine, leaving a short stem attached. Harvest regularly to encourage continued production. Freshly harvested yardlong beans can be stored in the refrigerator for up to a week. For longer storage, you can blanch and freeze them. To blanch, boil the beans for 2-3 minutes, then immediately transfer them to an ice bath to stop the cooking process. Drain the beans and store them in freezer bags or containers.
What are some creative ways to use yardlong beans in cooking?
Yardlong beans are incredibly versatile and can be used in a variety of dishes. They are commonly used in stir-fries, curries, and salads. You can also grill, roast, or steam them. Try adding them to soups, stews, or casseroles. They pair well with Asian flavors like soy sauce, ginger, and garlic. You can also use them in Mediterranean dishes with olive oil, lemon juice, and herbs. Experiment with different recipes and flavor combinations to discover your favorite ways to enjoy yardlong beans.
How can I save seeds from my yardlong beans?
Saving seeds from your yardlong beans is a great way to ensure a continuous supply for future plantings. Allow some of the beans to mature fully on the vine until they are dry and brown. Remove the seeds from the pods and spread them out on a tray to dry completely. Store the dried seeds in an airtight container in a cool, dark, and dry place. Label the container with the variety and date of collection. The seeds should remain viable for several years if stored properly.


Leave a Comment