

Grow Birds Eye Chili, and unlock a world of fiery flavor right in your own backyard! Have you ever dreamt of adding a zesty kick to your meals with chilies you’ve nurtured from tiny seedlings? This isn’t just about gardening; it’s about embracing a culinary adventure and connecting with a tradition that spans continents.
Chili peppers, including the Birds Eye variety, boast a rich history, dating back thousands of years to South America. They’ve since become integral to cuisines worldwide, adding depth and heat to dishes from Thailand to Mexico. But why rely on store-bought chilies when you can cultivate your own, bursting with freshness and flavor?
I know what you’re thinking: “Gardening seems complicated!” But trust me, growing Birds Eye Chili is surprisingly easy, even for beginners. This DIY guide is packed with simple tricks and hacks to help you succeed, regardless of your experience level. Imagine the satisfaction of harvesting your own chilies, knowing exactly where they came from and how they were grown. Plus, you’ll save money and reduce your environmental impact by avoiding commercially produced peppers. Let’s dive in and discover how to grow Birds Eye Chili like a pro!

Growing Birds Eye Chili: A Spicy DIY Adventure!
Okay, chili lovers, get ready to turn up the heat! I’m going to walk you through everything you need to know to grow your own Birds Eye Chili peppers right at home. These little firecrackers pack a serious punch, and there’s nothing quite like the satisfaction of harvesting your own homegrown spice. Let’s get started!
Choosing Your Seeds and Starting Indoors
First things first, you need seeds! You can find Birds Eye Chili seeds online, at your local garden center, or even sometimes inside dried chilies (though germination rates might be lower with those). I always prefer to start my chili seeds indoors, especially if you live in a region with shorter growing seasons. This gives them a head start and ensures you’ll have a bountiful harvest.
Here’s how I do it:
* Gather your supplies: You’ll need Birds Eye Chili seeds, seed starting trays or small pots, seed starting mix (this is important – regular potting soil can be too heavy), a spray bottle, and a heat mat (optional, but highly recommended).
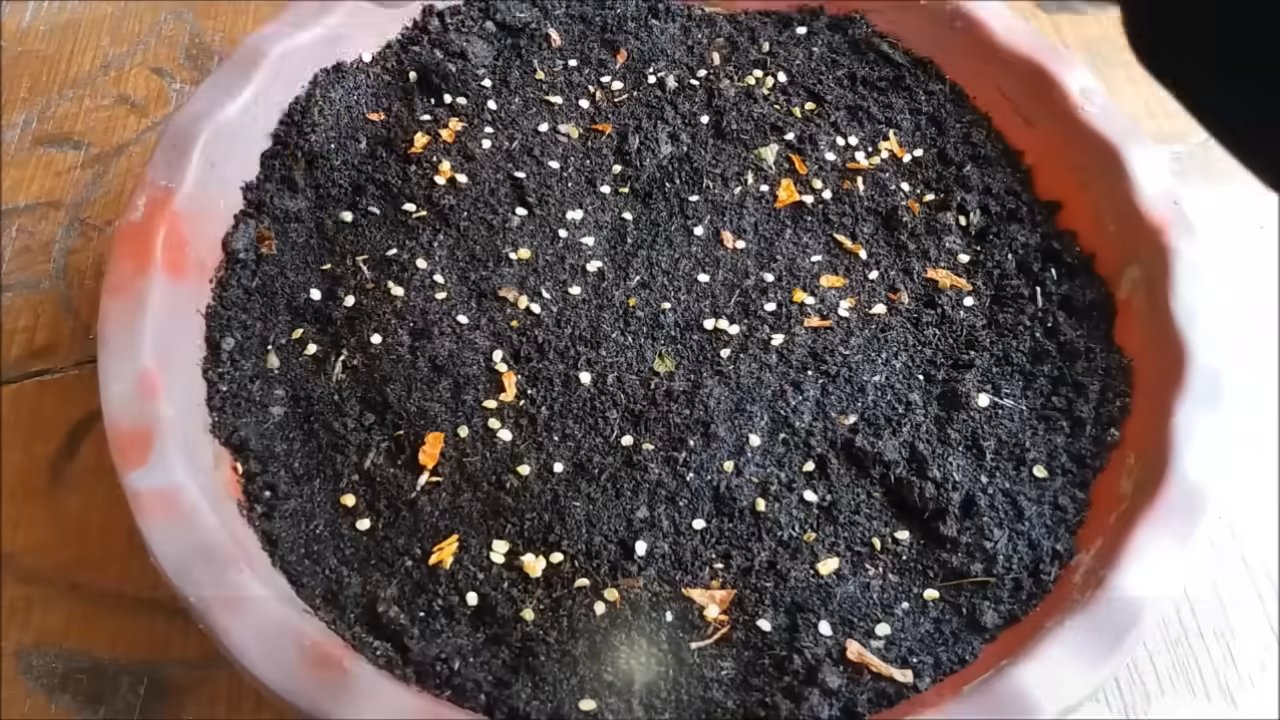
* Prepare your seed starting trays: Fill each cell of your seed starting tray or each small pot with the seed starting mix. Gently tap the tray to settle the soil.
* Sow the seeds: Make a small indentation (about ¼ inch deep) in the center of each cell or pot. Place 2-3 seeds in each indentation. This increases your chances of at least one seed germinating.
* Cover the seeds: Gently cover the seeds with a thin layer of seed starting mix.
* Water gently: Use a spray bottle to mist the soil thoroughly. You want the soil to be moist, but not soggy.
* Provide warmth: Place the seed starting tray on a heat mat. Chili seeds germinate best in warm temperatures (around 80-85°F). If you don’t have a heat mat, find a warm spot in your house, like on top of your refrigerator.
* Maintain moisture: Keep the soil consistently moist by misting it regularly with the spray bottle. Don’t let it dry out!
* Wait patiently: Germination can take anywhere from 7-21 days, so be patient. Once the seedlings emerge, remove the heat mat and provide them with plenty of light.
Providing Light and Care for Seedlings
Once your little chili sprouts pop up, they’ll need plenty of light to grow strong and healthy.
* Provide adequate light: Place the seedlings under grow lights or in a very sunny windowsill. If using a windowsill, rotate the tray regularly to prevent the seedlings from leaning towards the light. I personally use grow lights because they provide consistent and reliable light, regardless of the weather.
* Water carefully: Water the seedlings when the top inch of soil feels dry to the touch. Avoid overwatering, as this can lead to root rot.
* Fertilize lightly: Once the seedlings have their first set of true leaves (the leaves that look like miniature chili pepper leaves, not the initial seed leaves), you can start fertilizing them with a diluted liquid fertilizer. I use a balanced fertilizer (like 20-20-20) diluted to half strength.
* Harden off the seedlings: Before transplanting the seedlings outdoors, you’ll need to “harden them off.” This process gradually acclimates them to the outdoor environment. Start by placing the seedlings outdoors in a sheltered location for an hour or two each day, gradually increasing the amount of time they spend outside over the course of a week or two. This will help them adjust to the sun, wind, and temperature changes.
Transplanting Your Chili Plants
Once the danger of frost has passed and the soil has warmed up, it’s time to transplant your chili plants outdoors.
* Choose a sunny location: Birds Eye Chili peppers need at least 6-8 hours of sunlight per day. Choose a location in your garden that receives plenty of sun.
* Prepare the soil: Chili peppers prefer well-drained soil that is rich in organic matter. Amend the soil with compost or well-rotted manure before planting.
* Dig the holes: Dig holes that are slightly larger than the root balls of your seedlings. Space the holes about 12-18 inches apart.
* Transplant the seedlings: Gently remove the seedlings from their pots or trays. Loosen the roots slightly and place the seedlings in the holes.
* Fill the holes: Fill the holes with soil and gently firm the soil around the base of the plants.
* Water thoroughly: Water the plants thoroughly after transplanting.
* Mulch: Apply a layer of mulch around the base of the plants to help retain moisture, suppress weeds, and regulate soil temperature. I like to use straw or wood chips.
Caring for Your Chili Plants
Now that your chili plants are in the ground, it’s time to provide them with the care they need to thrive.
* Water regularly: Water the plants regularly, especially during hot, dry weather. Chili peppers need consistent moisture to produce a good crop.
* Fertilize regularly: Fertilize the plants every 2-3 weeks with a balanced fertilizer. You can also use a fertilizer specifically formulated for peppers.
* Pinch off flowers (optional): If you want to encourage bushier growth and a larger harvest, you can pinch off the first few flowers that appear on the plants. This will encourage the plants to focus their energy on vegetative growth.
* Provide support (optional): As the plants grow taller and produce more peppers, they may need support to prevent them from falling over. You can use stakes or cages to support the plants.
* Watch out for pests and diseases: Chili peppers can be susceptible to a variety of pests and diseases, such as aphids, spider mites, and blossom end rot. Inspect your plants regularly for signs of pests or diseases and take action promptly if you notice any problems. I like to use organic pest control methods whenever possible.
Harvesting Your Birds Eye Chilies
The moment you’ve been waiting for! Harvesting your fiery bounty.
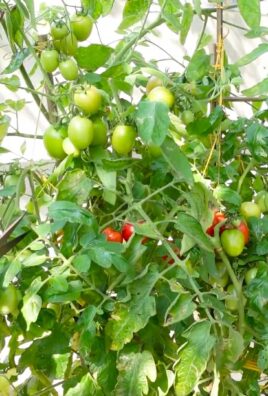
* When to harvest: Birds Eye Chili peppers are typically ready to harvest about 80-90 days after transplanting. The peppers will turn from green to red when they are ripe.
* How to harvest: Use scissors or pruning shears to cut the peppers from the plant. Be careful not to damage the plant.
* Handle with care: Birds Eye Chili peppers are very hot, so be careful when handling them. Wear gloves to protect your hands.
* Enjoy your harvest: Use your fresh Birds Eye Chili peppers in your favorite recipes. You can also dry them for later use.
Drying Your Chilies for Long-Term Storage
If you have more chilies than you can use fresh, drying them is a great way to preserve them.
* Air Drying: This is the simplest method. String the chilies together using a needle and thread, making sure they don’t touch each other. Hang the string of chilies in a warm, dry, well-ventilated place. It can take several weeks for them to dry completely.
* Oven Drying: Preheat your oven to the lowest setting (usually around 170-200°F). Spread the chilies out on a baking sheet lined with parchment paper. Leave the oven door slightly ajar to allow moisture to escape. Dry the chilies for several hours, or until they are brittle. Check them frequently to prevent burning.
* Dehydrator: If you have a food dehydrator, this is the easiest and most efficient way to dry your chilies. Follow the manufacturer’s instructions for drying peppers.
Storing Your Dried Chilies
Once your chilies are completely dry, store them in an airtight container in a cool, dark, and dry place. They should last for several months, or even years, if stored properly.
Troubleshooting Common Problems
Even with the best care, you might encounter some problems along the way. Here are a few common issues and how to address them:
* Blossom End Rot: This is caused by a calcium deficiency. The bottom of the chili will turn black and rot. To prevent this, make sure your soil is rich in calcium and water your plants consistently. You can also add calcium to the soil by using bone meal or eggshells.
* Aphids: These tiny pests can suck the sap from your plants, causing them to weaken and become distorted. You can control aphids by spraying them with a strong stream of water, using insecticidal soap, or introducing beneficial insects like ladybugs.
* Spider Mites: These tiny pests can also suck the sap from your plants, causing them to develop yellow spots and webbing. You can control spider mites by spraying them with a strong stream of water, using insecticidal soap, or introducing predatory mites.
* Lack of Fruit: If your chili plants are not producing fruit, it could be due to a number of factors, such as lack of pollination, insufficient sunlight, or nutrient deficiencies
Conclusion
So, there you have it! Growing your own Birds Eye Chili plants is not just a rewarding experience; it’s a gateway to unlocking a world of culinary possibilities and adding a fiery kick to your dishes that store-bought chilies simply can’t match. This DIY project is a must-try for anyone who loves fresh, flavorful ingredients and enjoys a little bit of spice in their life. Forget the bland, mass-produced chilies – with a little patience and care, you can cultivate your own supply of vibrant, potent Birds Eye Chilies right in your backyard or even on your windowsill.
Why is this a must-try? Because the flavor difference is undeniable. Homegrown chilies burst with freshness and a complex heat that you just won’t find in commercially grown varieties. Plus, you have complete control over the growing process, ensuring that your chilies are free from harmful pesticides and chemicals. Imagine the satisfaction of harvesting your own chilies and using them to create authentic Thai curries, spicy salsas, or fiery chili oils.
But the benefits don’t stop there. Growing your own Birds Eye Chili plants is also a sustainable and cost-effective way to enjoy this popular spice. You’ll reduce your reliance on store-bought chilies, save money in the long run, and contribute to a more environmentally friendly lifestyle.
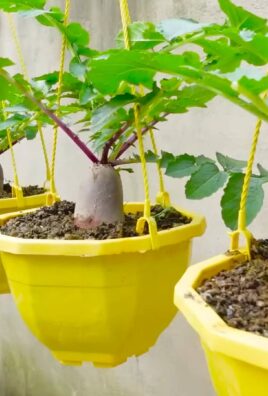
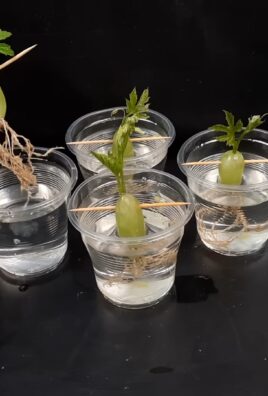
Looking for variations? Consider experimenting with different growing methods. Try growing your chilies in raised beds for improved drainage, or use hydroponics for faster growth and higher yields. You can also explore different varieties of Birds Eye Chili, such as the Thai Dragon or the Prik Chi Fa, each with its own unique flavor profile and heat level. Another fun variation is to ferment your harvested chilies to create a delicious and complex chili paste or hot sauce. Fermentation adds depth of flavor and a pleasant tanginess that complements the fiery heat of the chilies.
Don’t be intimidated if you’re a beginner gardener. Growing Birds Eye Chili plants is relatively easy, even for those with limited experience. With the right conditions and a little bit of attention, you’ll be harvesting your own chilies in no time.
We encourage you to give this DIY trick a try and experience the joy of growing your own Birds Eye Chili plants. Share your experiences with us in the comments below! We’d love to hear about your successes, challenges, and creative ways you’re using your homegrown chilies. Let’s build a community of chili-loving gardeners and inspire others to embrace the rewarding experience of growing their own food. So, grab your seeds, get your hands dirty, and prepare to add some serious heat to your life!
Frequently Asked Questions (FAQ)
What is the best time of year to start growing Birds Eye Chili?
The best time to start growing Birds Eye Chili depends on your climate. In warmer climates with mild winters, you can start seeds indoors in late winter or early spring, about 6-8 weeks before the last expected frost. In colder climates, it’s best to start seeds indoors in early spring to give the plants enough time to mature before the growing season ends. You can also purchase seedlings from a nursery if you prefer to skip the seed-starting process.
How much sunlight do Birds Eye Chili plants need?
Birds Eye Chili plants thrive in full sunlight, requiring at least 6-8 hours of direct sunlight per day. If you’re growing your plants indoors, place them near a sunny window or use grow lights to supplement natural light. Insufficient sunlight can lead to leggy growth, reduced flowering, and smaller chili yields.
What type of soil is best for growing Birds Eye Chili?
Birds Eye Chili plants prefer well-draining, fertile soil with a slightly acidic to neutral pH (6.0-7.0). A good potting mix for chilies should contain a blend of peat moss, perlite, and vermiculite. You can also amend your garden soil with compost or well-rotted manure to improve drainage and fertility. Avoid heavy clay soils, as they can retain too much moisture and lead to root rot.
How often should I water my Birds Eye Chili plants?
Water your Birds Eye Chili plants regularly, keeping the soil consistently moist but not waterlogged. Water deeply when the top inch of soil feels dry to the touch. Avoid overwatering, as this can lead to root rot and other fungal diseases. During hot, dry weather, you may need to water your plants more frequently.
What are some common pests and diseases that affect Birds Eye Chili plants?
Common pests that can affect Birds Eye Chili plants include aphids, spider mites, whiteflies, and chili thrips. These pests can suck the sap from the leaves, causing them to yellow, curl, and eventually die. You can control these pests with insecticidal soap, neem oil, or by introducing beneficial insects like ladybugs. Common diseases that can affect Birds Eye Chili plants include fungal diseases like powdery mildew, anthracnose, and fusarium wilt. These diseases can cause leaf spots, wilting, and fruit rot. You can prevent these diseases by providing good air circulation, avoiding overwatering, and using disease-resistant varieties.
How do I fertilize my Birds Eye Chili plants?
Fertilize your Birds Eye Chili plants regularly with a balanced fertilizer that is high in phosphorus and potassium. Phosphorus promotes root growth and flowering, while potassium enhances fruit development and disease resistance. You can use a liquid fertilizer diluted according to the package instructions or a slow-release granular fertilizer. Avoid over-fertilizing, as this can lead to excessive vegetative growth and reduced fruit production.
When can I harvest my Birds Eye Chili?
You can harvest your Birds Eye Chili when they have reached their mature size and color, typically about 70-80 days after transplanting. The chilies will turn from green to red as they ripen. You can harvest them at any stage of ripeness, depending on your preference. Green chilies will have a milder flavor, while red chilies will be hotter and more flavorful. Use scissors or pruning shears to cut the chilies from the plant, leaving a small stem attached.
How do I store my harvested Birds Eye Chili?
You can store your harvested Birds Eye Chili in several ways. Fresh chilies can be stored in the refrigerator for up to a week. You can also dry them by stringing them together and hanging them in a well-ventilated area. Dried chilies can be stored in an airtight container for up to a year. Another option is to freeze your chilies. Simply wash and dry them, then place them in a freezer bag or container. Frozen chilies can be stored for up to six months. You can also pickle or ferment your chilies to preserve them for longer periods.
Can I grow Birds Eye Chili indoors?
Yes, you can grow Birds Eye Chili indoors, provided you give them enough sunlight and warmth. Place your plants near a sunny window or use grow lights to supplement natural light. Maintain a consistent temperature of 70-80°F (21-27°C) and provide good air circulation. Water your plants regularly and fertilize them as needed. You may need to hand-pollinate the flowers to ensure fruit set.
How hot are Birds Eye Chili?
Birds Eye Chili are known for their intense heat, ranging from 50,000 to 100,000 Scoville Heat Units (SHU). This makes them significantly hotter than jalapeños, which typically range from 2,500 to 8,000 SHU. Use caution when handling Birds Eye Chili and avoid touching your eyes or face after handling them. It’s always a good idea to wear gloves when working with hot chilies.
Leave a Comment